Overland Tech and Travel
Advice from the world's
most experienced overlanders
tests, reviews, opinion, and more
The world's best recovery shovel . . .
If you want to start one of those 47-page debates on an overland forum, just type, “What’s the best recovery shovel?” in the topic line.
On one end you’ll be assured that a $20 folding entrenching tool is all you need. On the other you’ll learn that you absolutely must carry a full-length garden shovel so you can reach under to the middle of the vehicle with it. And you’ll hear everything in between.
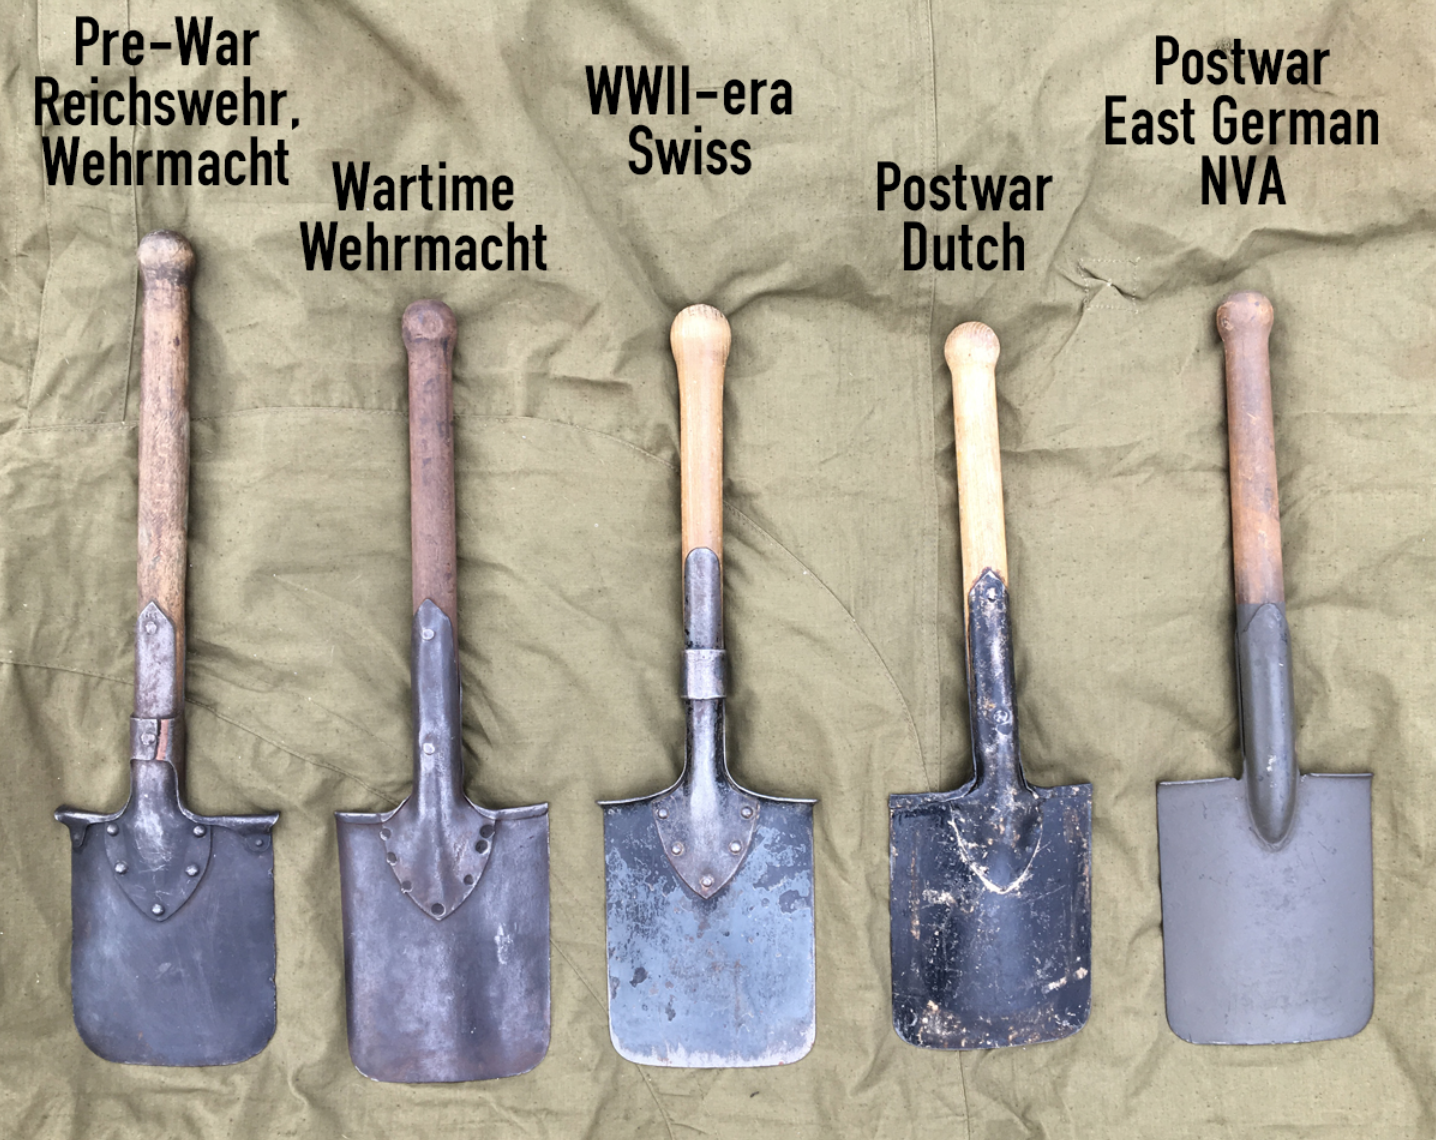
I’ve tried and owned a lot of them, including oddities such as the WWII Wehrmacht entrenching tool, which is awesome for its size, indestructible, and has one sharpened side edge to use as a semi-effective hatchet. Much superior to the folding U.S. entrenching tool in my opinion. There’s an interesting history of them here.
I also have a factory Land Rover T-handled shovel (half of their “Pioneer Kit,” the other being a pick), which is excellent:
Also an all-steel Wolverine (review here), which is also excellent, if heavy and decidedly crude in construction (I know, it’s not a fly rod, but still . . .). Being all-metal, the Wolverine also gets blisteringly hot if left in the sun.
I sampled one of the Krazy Beaver shovels . . .
. . . and managed to bend one of the teeth my first time out, in addition to which I didn’t like the pinned plastic handle. Not many people realize that you should occasionally sharpen your shovel, and doing so on the Krazy Beaver would be a real pain.
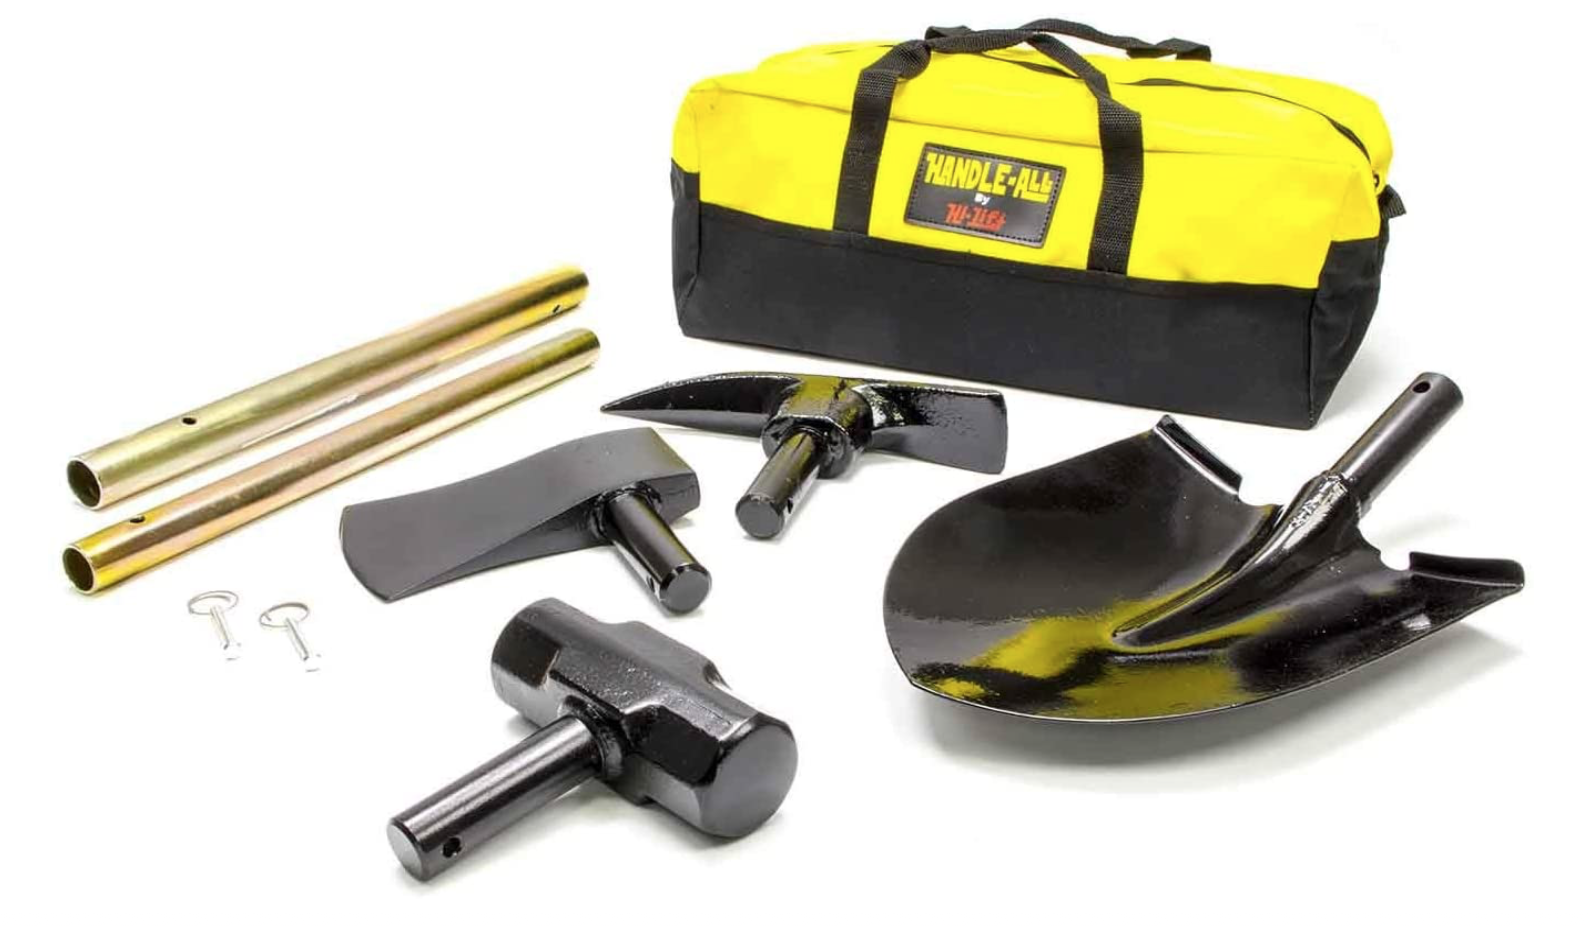
I also tried a Hi-Lift Handle All, which comprises a shovel, sledge hammer, axe, and mattock all in one, and, as typical with such things, performs poorly as any of them. It was indubitably versatile, but utterly awkward and uncomfortable to use.
And before you ask: No, I’ve not tried one of these because I do not live in fear of a Zombie Apocalypse:
I briefly tried an early example of the DMOS Collective folding/collapsing shovel, which felt a bit rickety to me, and full of moving bits begging to be jammed with mud. However, I’ve not tried one of the later models, which I understand are sturdier. They are available with a very nice mounting bracket, and will store easily inside the vehicle, a boon unless you’re into ostentatious exterior displays of all the recovery gear you rarely use. However, I still I can’t imagine that a folding shovel with a collapsible handle held by numerous spring pins could possibly be as strong or last as long as a single-piece model. Also: $239 for the Pro model? Even my broad latitude for equipment elitism blanched at that. The bracket, incidentally, adds another $239 . . .
Through all this experimentationI learned that I strongly prefer a mid-length wood shaft with either a T or D-shaped handle, as on the Land Rover Pioneer unit. Why wood? I live in southern Arizona and most of my foreign travels have been in warm countries. And even when wearing gloves, the steel shaft and handle of the Wolverine were uncomfortably hot if I set down the shovel for a few minutes when the air temperature was above 90ºF and the ground temperature 40º higher. And it was just as uncomfortable in freezing weather. Fiberglass is better, but then the question of aesthetics arises, and what can beat a wood shaft? Its only disadvantage is weathering if left exposed to the elements, but I’m willing to keep the shovel stored in the garage except when I’m on a trip. Judicious re-varnishing would reduce the issue as well. Technically a steel or fiberglass shaft might be stronger, but I can count the broken wood shafts of mid-length shovels I’ve seen on a closed fist.
I like a T or D handle because it’s often necessary to punch the shovel into the substrate (not just when doing a recovery but for many camp tasks), and a T or D handle is way more comfortable for this, and produces more power as well.
Finally, the mid-length shovel is just the best compromise for length. It allows you to reach far under the vehicle yet retain sufficient power, and is of course a lot easier to store than a full-length garden shovel. (Also, I have seen long wood shovel shafts break if abused.)
All this, the world’s longest lede (the correct spelling for the introduction to an article), is leading (leding?) up to my nomination for the world’s best recovery shovel—and I’ll bet it’s one you’ve never encountered in those 47-page threads. Plus it has the coolest name ever for a tool.
It’s called a poacher’s spade. Told you.
Originally—according to tradition—cut down from an old full-size spade, the poacher’s spade was used by poor rural tennants in Britain to dig out rabbits to supplement their meager diets (also to dig out the ferrets and terriers sent after the rabbits). This hunting was illegal since all game was the property of the estate owner—thus, poacher’s spade (or rabbiting spade). It was ideal for the task because the blade was no wider than necessary to unearth a rabbit burrow, and lighter than a full-size shovel if you wound up needing to flee from a shotgun-wielding gamekeeper. The relatively small blade area enhanced rigidity and cut more easily into tough substrate (does England even have tough substrate?).
So, you’re asking, how does this translate to efficacy as a recovery shovel? Why would you want a small blade when you might have a half a cubic yard of sand to get out from under a bogged vehicle in order to be able to insert MaxTrax or other recovery aids?
The answer dawned on me over the course of many, many scenarios digging out vehicles deeply bogged in sand or mud, whether genuinely stuck or put there for training purposes: I realized that a good portion of my digging time and effort was wasted just making room for the shovel itself. When the vehicle was buried to within a few inches of the bodywork, I spent my first couple of minutes at each wheel just scooping out a ramp so I could get the shovel in to where it actually needed to be to dig out the tire without risking gouging the bodywork with the edge of the blade. I theorized that a smaller blade—perhaps no larger than that on an entrenching tool but with a longer, solid handle—might actually be faster than a larger shovel that frequently got in its own way.
I tested the theory with an old trenching (as opposed to entrenching) spade I had, with a D-handled wood shaft and a narrow but square-cornered blade made for cutting nice neat trenches. The blade shape wasn’t ideal but the narrow width immediately showed its superiority in extracting deeply sunk vehicles. There was noticeably less prep work to begin actually uncovering the tires. To my surprise, I found that it wasn’t even at a disadvantage in removing sand, since I typically hold the shovel sideways like a canoe paddle and sweep out sand from the tires. The long, narrow blade scooped out just as much sand as a fat blade.
Experiment complete and successful, I had no doubt what kind of shovel I wanted to get.
I knew about poacher’s spades thanks to a long fascination with the 18th, 19th, and 20th century practitioners of the time-honored pursuit, who elevated the skill of winkling out food from under the noses of estate owners and gamekeepers to a high art. In addition to spades, poachers employed guns, traps, snares, nets, ferrets, terriers—they even developed a particular breed of dog called a lurcher, a cross between a coursing dog and a herding breed such as a border collie. The result was both intelligent and fast—the perfect companion for a poacher (the name comes from the Romany word lur, meaning thief or bandit). I have several books written by legendary poachers such as Brian Plummer, Ian Niall, and Jim Connell, and the tales they tell of close calls are wild indeed.
I also knew where to go to get a proper poacher’s spade: Bulldog Tools in Wigan, Greater Manchester, founded in 1780 and still forging tools at the same location. Bulldog made entrenching tools for the British military in WWI and does so today. Bulldog tools are available from several outlets in the U.S., and are sometimes sold under the name Clarington Forge here. I ordered their Premier 28” Rabbiting Spade, which is equipped with an ash shaft ending in a beautiful split and steam-bent D (or Y) handle. The blade and handle socket are forged in one piece, and the socket extends nearly halfway up the shaft. (Strangely the steel part doesn’t seem to get as hot as the Wolverine’s hollow steel; I suspect the wood core might bleed off some heat but I don’t know.)
And . . . it’s perfect. The blade is thick and rigid but not heavy thanks to its size. The length is just right. And despite being forged in England in a 240-year-old factory, it was only $66.
Let me be clear: A $20 folding Chinese entrenching tool will dig you out if the alternative is staying put. For that matter, your bare hands will dig you out if the alternative is staying put. But for me, having the most suitable tools for a particular job enhances my enjoyment while traveling. And if something has gone wrong—even something as inconsequential as a bogging—those suitable tools take all the stress and a lot of the work out of the situation.
There’s another reason to carry a recovery shovel made in Britain: It will lend you a proper British attitude toward getting bogged, which usually involves saying, cheerfully, “Bugger,” then relaxing and having a brew-up before tackling the problem. And while you’re doing that you usually figure out the easiest and safest way to solve the issue, in contrast to the normal American Oh-shit-we’re-stuck-we-need-to-get-out-now! panic attack.
Cheers.
Long-wheelbase Jimny announced
What a shame we can’t get these in the U.S.! More on the Indian Autos Blog, here.
Buyer beware: Fake NATO fuel cans
A properly constructed NATO fuel can. Note the full welds on the handle, the fully recessed perimeter weld, and the reinforced spout.
I can smugly claim to have been a very early adopter of the NATO jerry can—at least in terms of U.S. overland travelers—after becoming disgusted with the poor design of the U.S. Blitz cans with which I originally equipped my FJ40’s rear rack. The Blitz cans leaked at the screw-in lid, they seeped at the crimped seams, and they took forever to decant into the main tank via the poorly ventilated flexible spout. I loathed the things but it was all we had. Or so I thought.
Some time in the mid-1980s, after noticing NATO-style cans in photos in various articles (including, IIRC, one by Tom Sheppard), I did some research, and began to realize how superior the original Wehrmacht design was. The Brits and, later, NATO were smart enough to copy exactly the design of the German cans they liberated during the North Africa campaign. The perimeter seam was welded, not crimped; the lid was a small-diameter hinged assembly that cammed tightly closed; a generous breather and properly designed spout made decanting a fast and leak-free procedure. The interior was lined with a rust-proof coating.
For misguided reasons of economy the American military, with their own Wehrmacht can to copy, decided to cut corners, and the result was the hugely inferior Blitz can. In fact the only effective feature we adopted was the three-handle design, made so one soldier could easily carry four empty cans, or two full ones, and so a line of men could easily pass full cans along without fumbling.
I ordered two surplus NATO cans from overseas at absurd cost—and never looked back. They didn’t leak, even when stored on their backs or sides, even in 110º Arizona sun. Decanting was easy and fast. The improvement over Blitz cans was night and day.
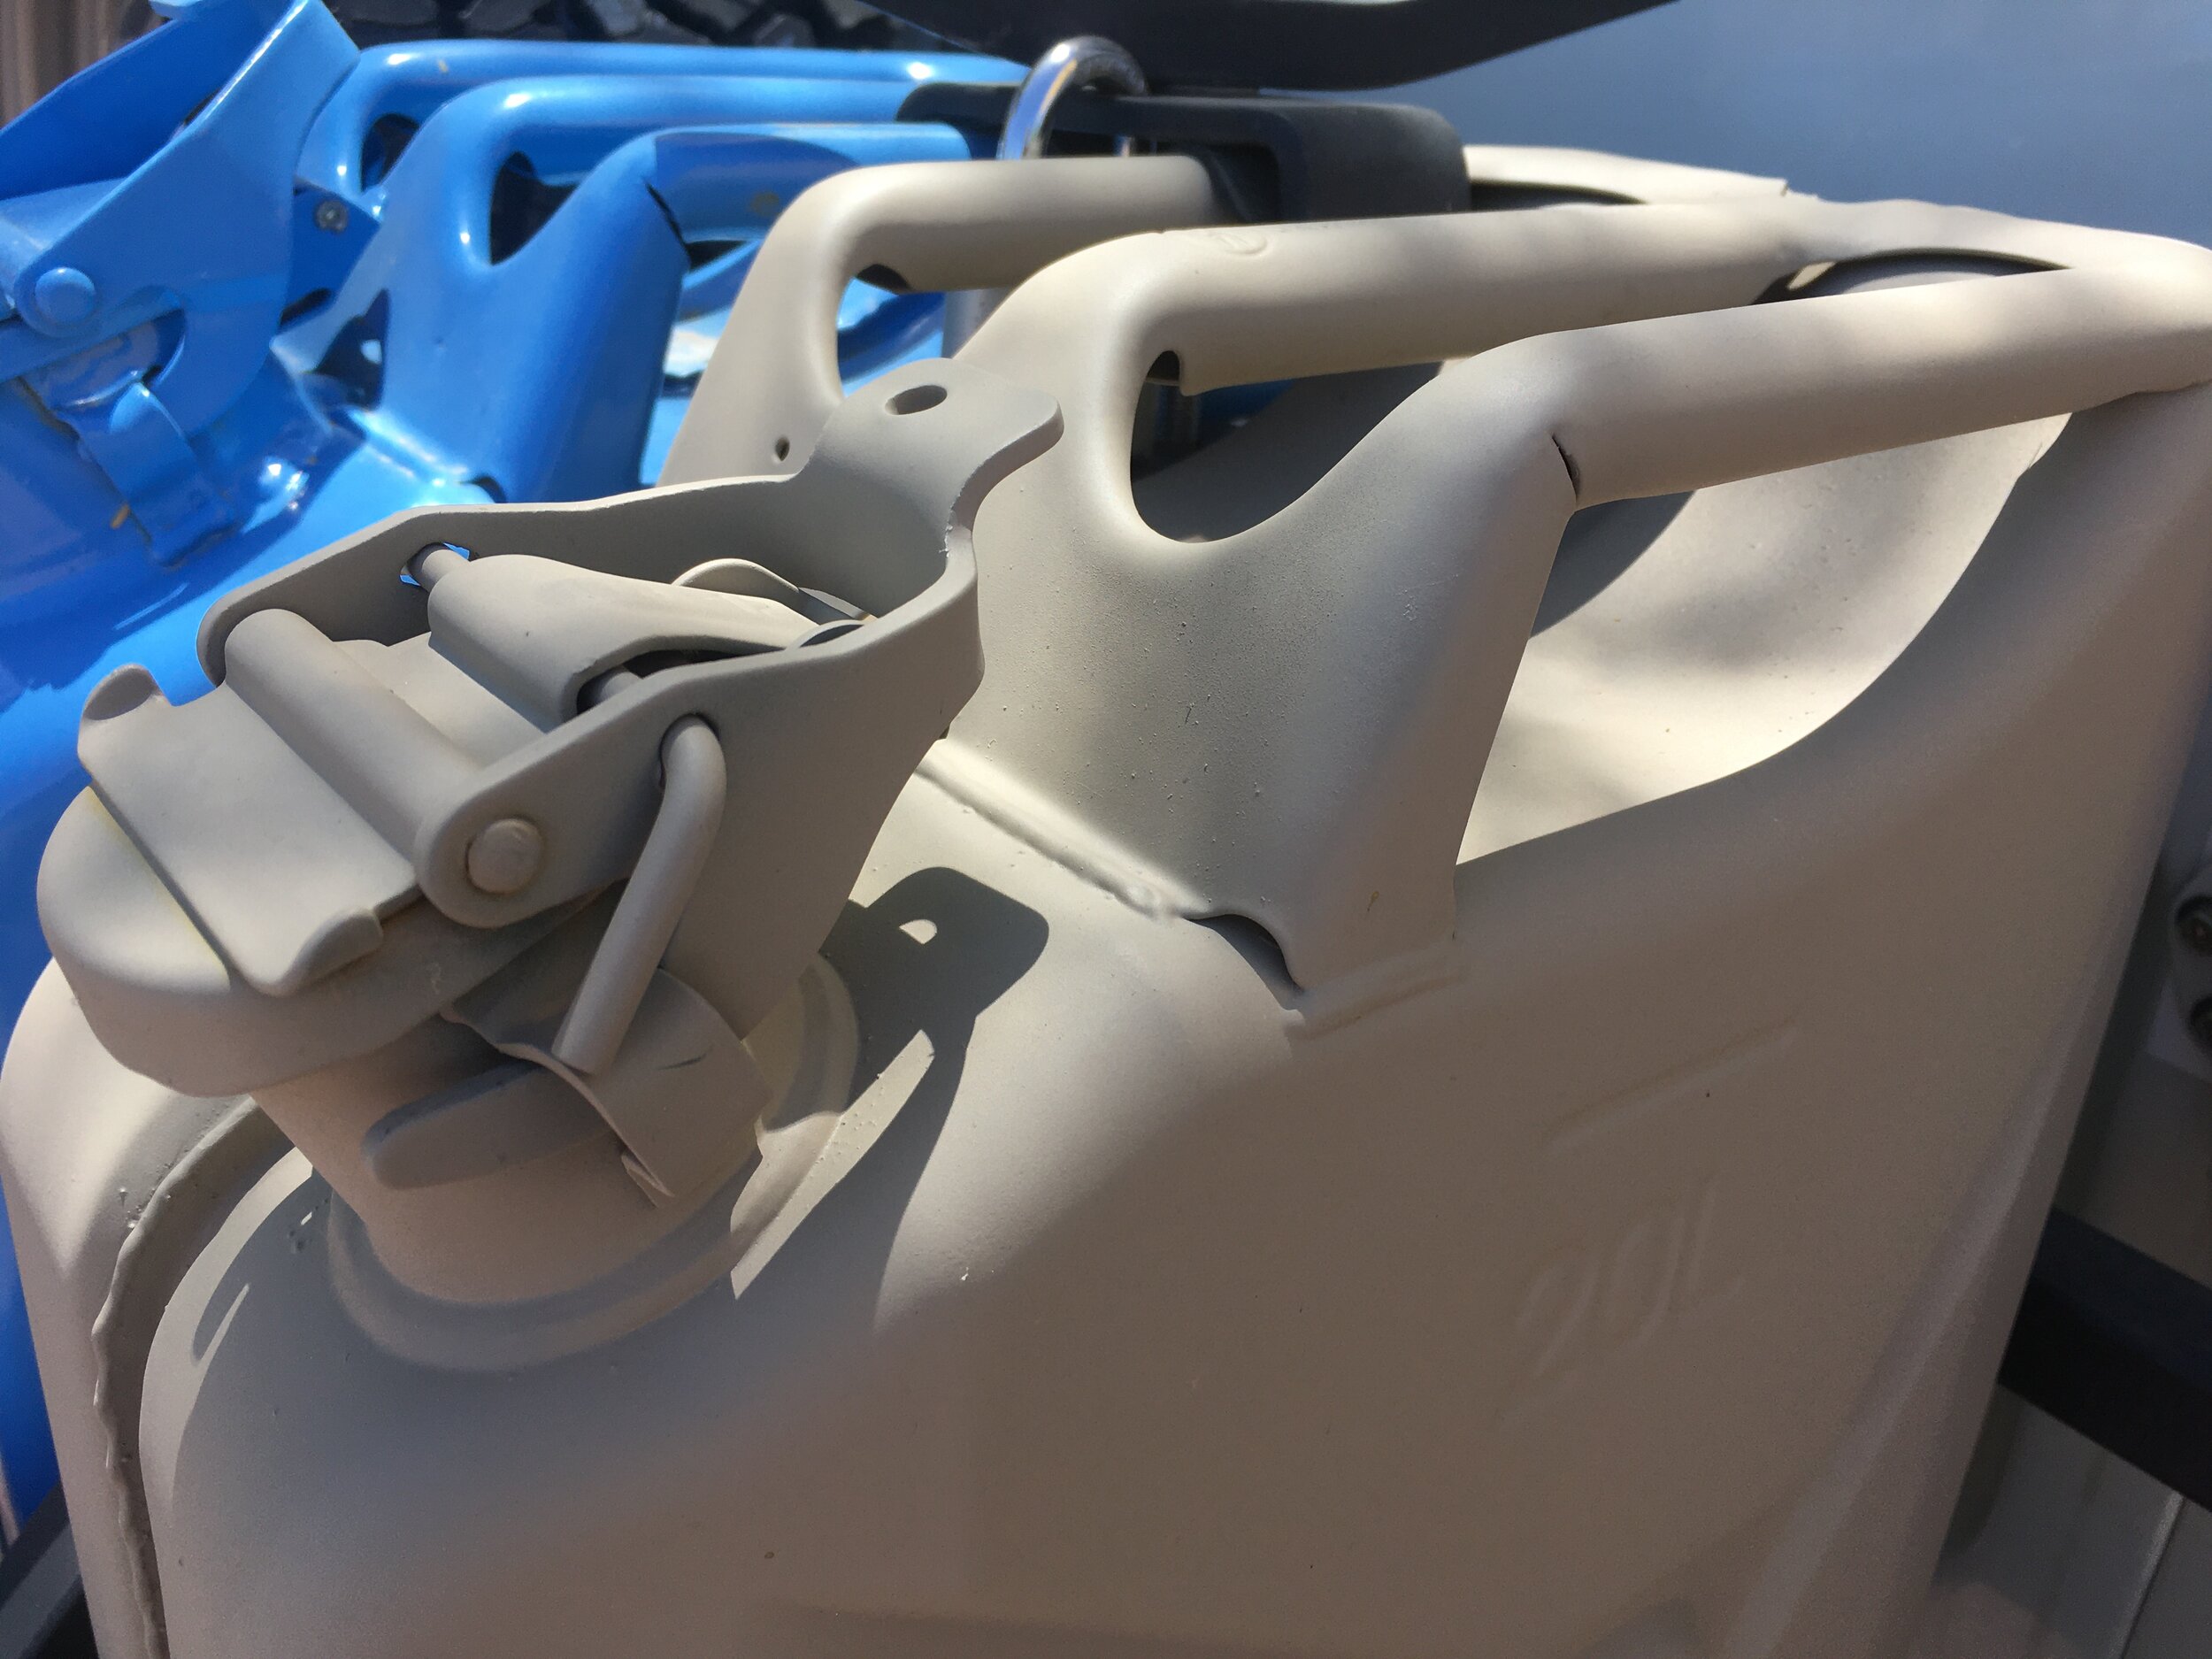
Wide breather orifice aids fast decanting.
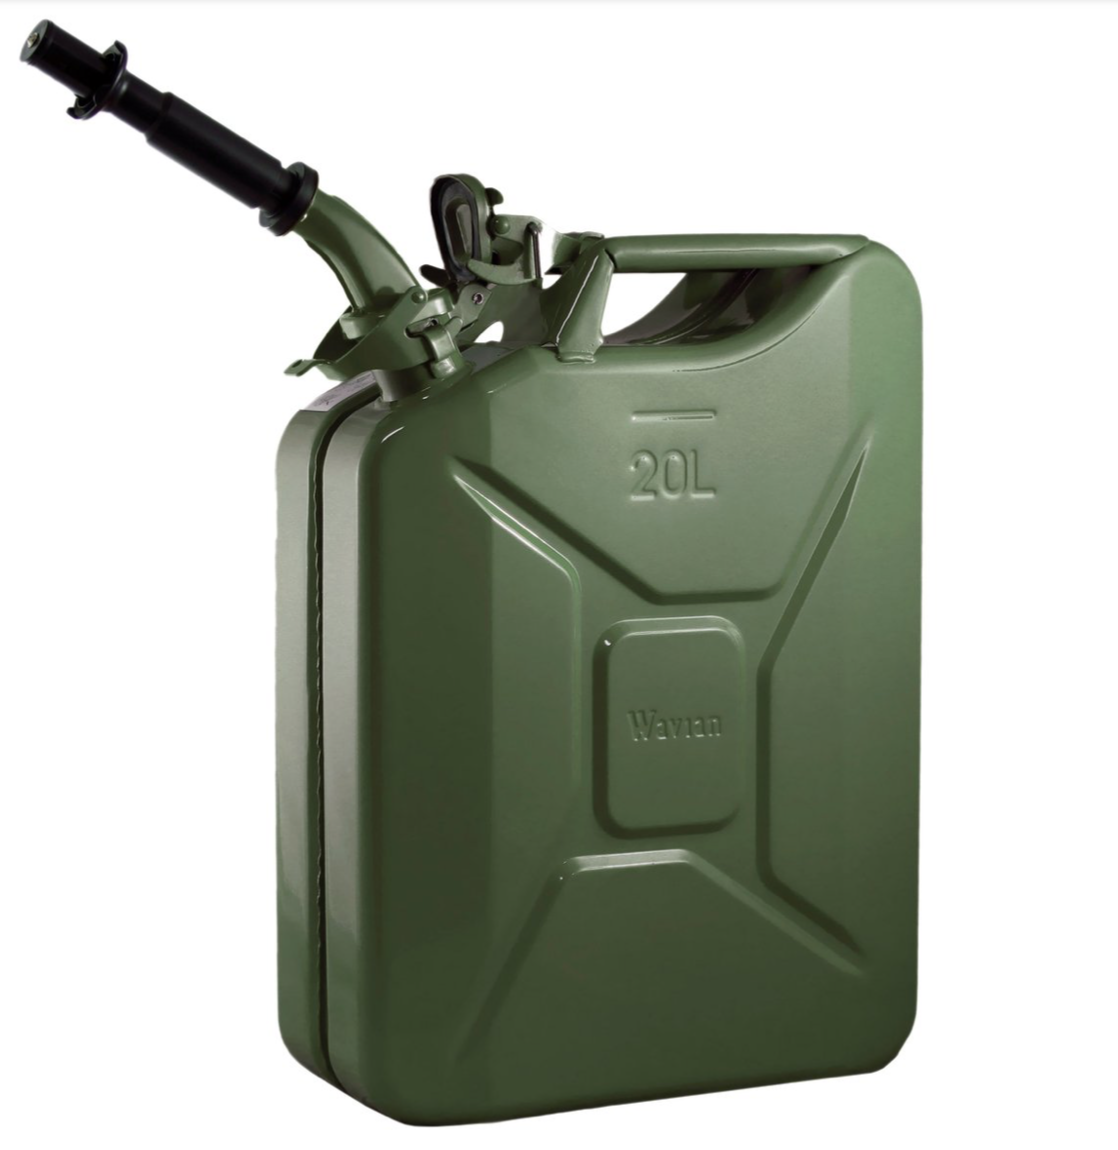
Surplus NATO cans, and current production models from NATO suppliers, became easily available after the turn of the millenium. Wavian now imports new NATO cans directly from the Latvian factory where they have been made since WWII. (Valpro cans are identical.) Other high-quality NATO cans are available from Gelg (Polish manufacture), although they are made of slightly thinner steel—.8mm versus the .9mm of Wavian/Valpro.
My later testing against the newer U.S. military (plastic) Scepter cans only reinforced the NATO can’s supremacy. Every other Scepter can I tried seeped at the wide lid. You could buy any of a number of special spanners designed to crank the lid as tight as possible, and get it open again—a bandaid “solution” to a poor design. The plastic sides bulged in heat and jammed in their holders. Besides which, being plastic, all Scepter cans are doomed to become plastic trash at some point. Thus, the NATO jerry can remains my fuel can of choice.
However, recently I’ve been noticing Chinese copies of the NATO can that are shockingly inferior to the European-made versions. You can find them on Amazon under the brand name Teekland, for one, and at Walmart (and, I presume, other discount stores). At a glance they look to be identical to their more expensive counterparts, but even a cursory inspection shows this to be a sham. The steel is thinner than the Gelg cans—.7mm. The interior is uncoated and rusts instantly. The handle is attached with spot welds rather than strip welds. The breather is a tiny tube rather than the generous orifice of the Wavian/Valpro and Gelg cans. Also, critically, the welded perimeter seam is not recessed as it is on authentic NATO cans; thus you cannot effectively store these cans on their backs. Absolutely nothing about these ripoffs except the styling is the same as the European-made containers.
Chinese copy. Note the tack welds on the handle, the raised perimeter weld, the flimsy and poorly welded spout, and the undersized breather tube inside.
But there’s worse. The online Walmart ad claims a list prince of $169.99, selling for “only” $64.99. Yet even the premium Wavian can lists for $80; the Gelg for $50. Thus Walmart will sell you an inferior fuel can for more money. (The Amazon can is $50; identical in price to the distinctly superior Gelg.)
So, caveat emptor—look for either genuine NATO surplus jerry cans, or newly manufactured ones from either Wavian or Gelg.
Comprehensive jack review for Tread magazine
I just finished a comparison of the major types of recovery jacks available now. From left to right they are the Pro Eagle Off Road jack, the Hi-Lift, the Safe Jack bottle jack kit, the ARB Jack, and the surplus HMMWV scissors jack with the Agile Off Road axle and chassis adapter. It should be published in a couple of months, but in the meantime if you have any specific questions feel free to email me.
Hint: When using “Search,” if nothing comes up, reload the page, this usually works. Also, our “Comment” button is on strike thanks to Squarespace, which is proving to be difficult to use! Please email me with comments!
Overland Tech & Travel brings you in-depth overland equipment tests, reviews, news, travel tips, & stories from the best overlanding experts on the planet. Follow or subscribe (below) to keep up to date.
Have a question for Jonathan? Send him an email [click here].
SUBSCRIBE
CLICK HERE to subscribe to Jonathan’s email list; we send once or twice a month, usually Sunday morning for your weekend reading pleasure.
Overland Tech and Travel is curated by Jonathan Hanson, co-founder and former co-owner of the Overland Expo. Jonathan segued from a misspent youth almost directly into a misspent adulthood, cleverly sidestepping any chance of a normal career track or a secure retirement by becoming a freelance writer, working for Outside, National Geographic Adventure, and nearly two dozen other publications. He co-founded Overland Journal in 2007 and was its executive editor until 2011, when he left and sold his shares in the company. His travels encompass explorations on land and sea on six continents, by foot, bicycle, sea kayak, motorcycle, and four-wheel-drive vehicle. He has published a dozen books, several with his wife, Roseann Hanson, gaining several obscure non-cash awards along the way, and is the co-author of the fourth edition of Tom Sheppard's overlanding bible, the Vehicle-dependent Expedition Guide.


