
Overland Tech and Travel
Advice from the world's
most experienced overlanders
tests, reviews, opinion, and more
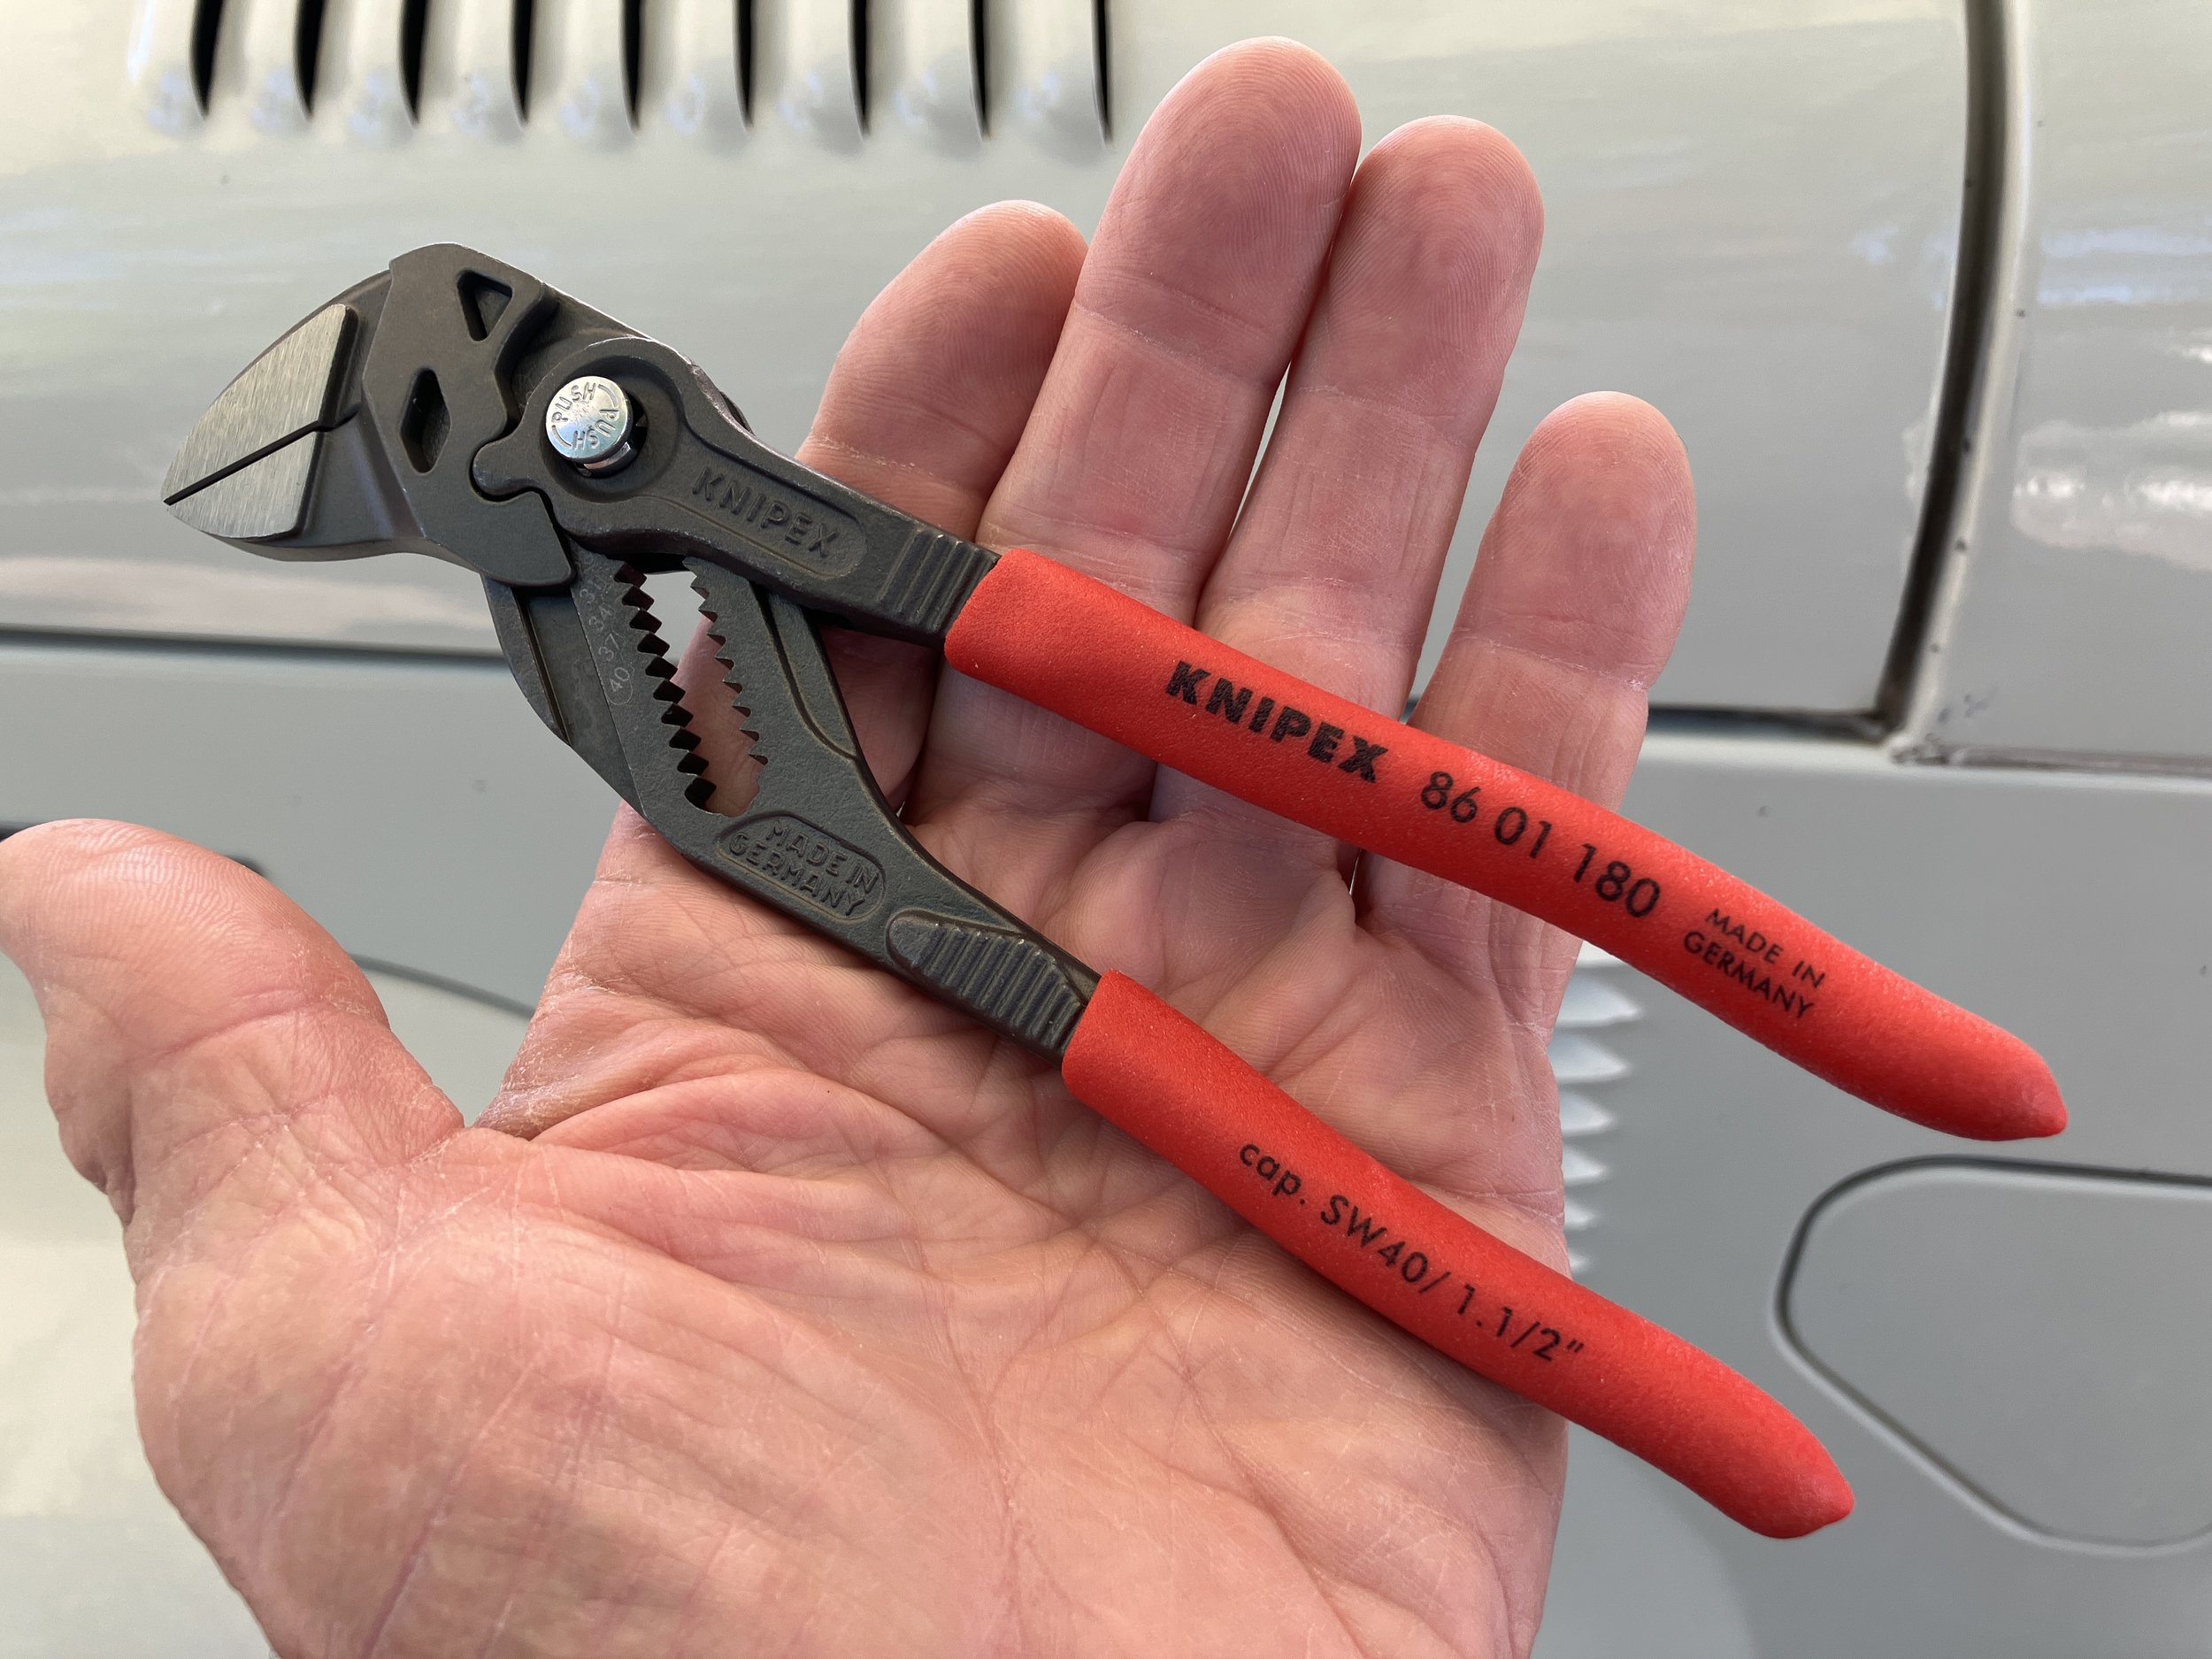
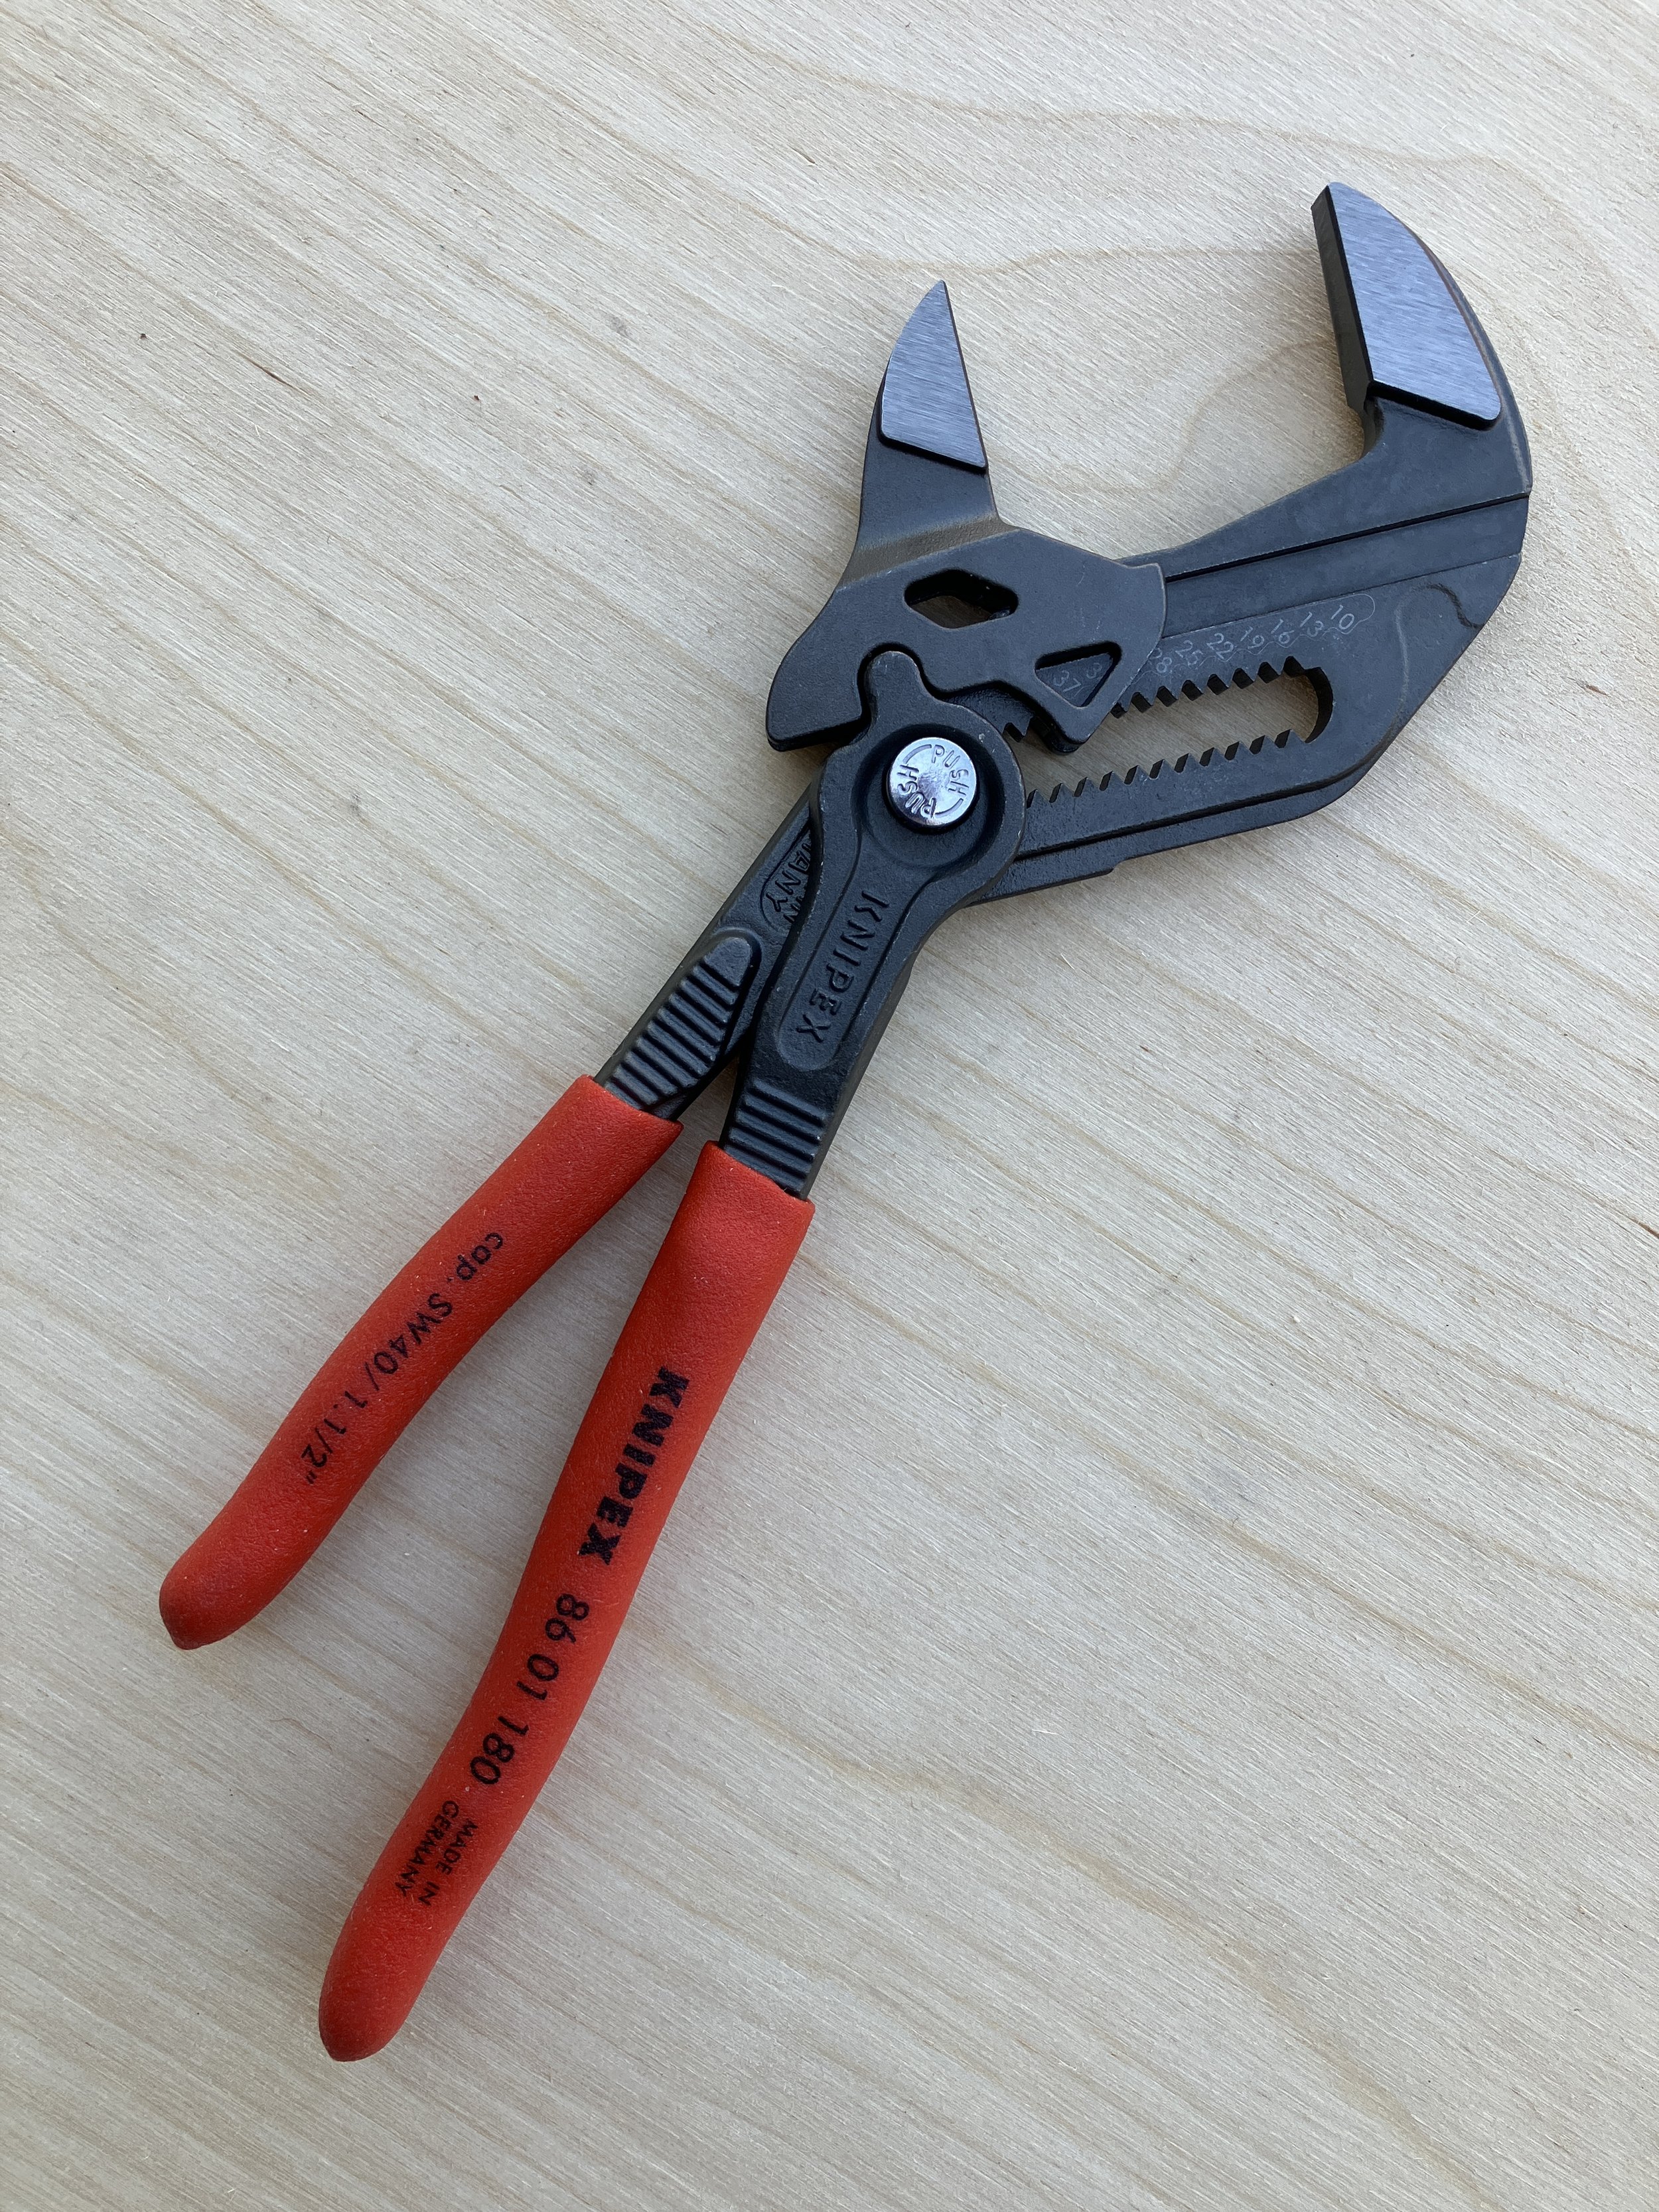
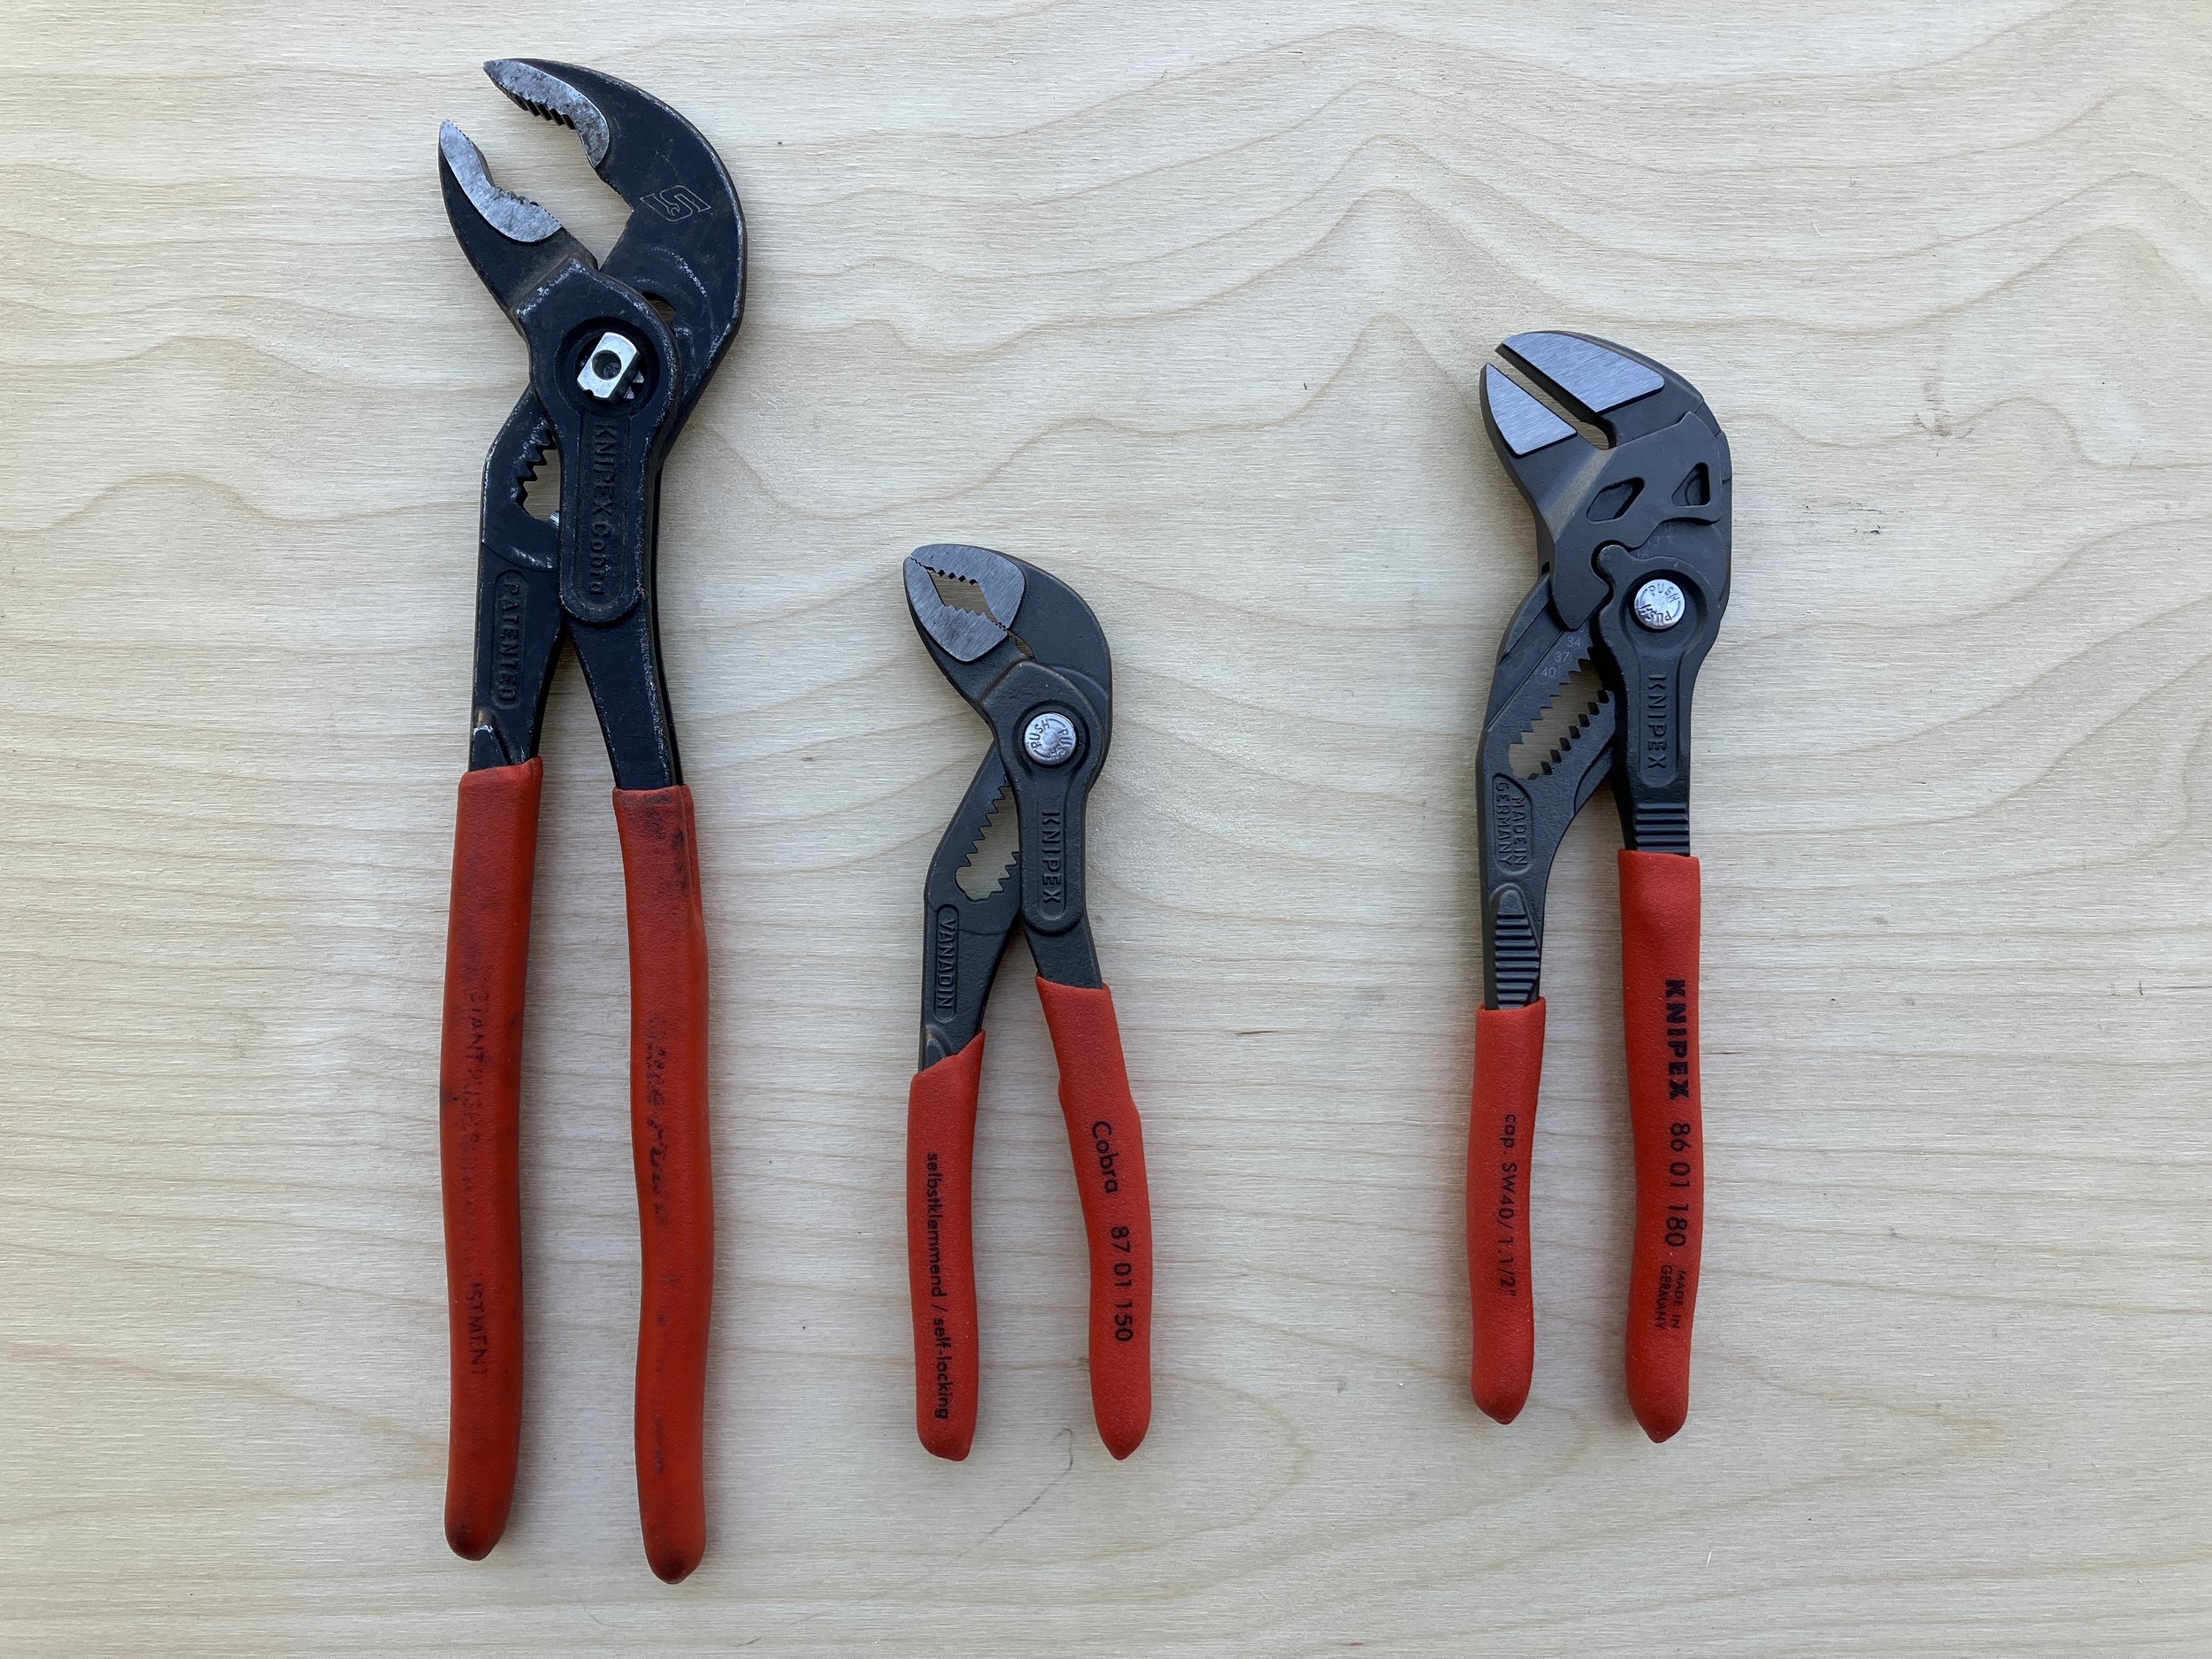
Knipex parallel-jaw pliers
Despite their occasional usefulness—in some cases serving a purpose no other tool can fill—pliers get little respect in the automotive tool world. Possibly the only tool more scorned is the adjustable (or “monkey”) wrench with its sloppy fit on almost any fastener.
Pliers can at least grip properly; their main drawback is the tendency of the teeth to scar the flats of nuts and bolts, and to slip and subsequently round off fasteners if not gripped tightly enough to risk that scarring.
Enter the Knipex parallel-jaw pliers, or as the company refers to them, pliers wrench.
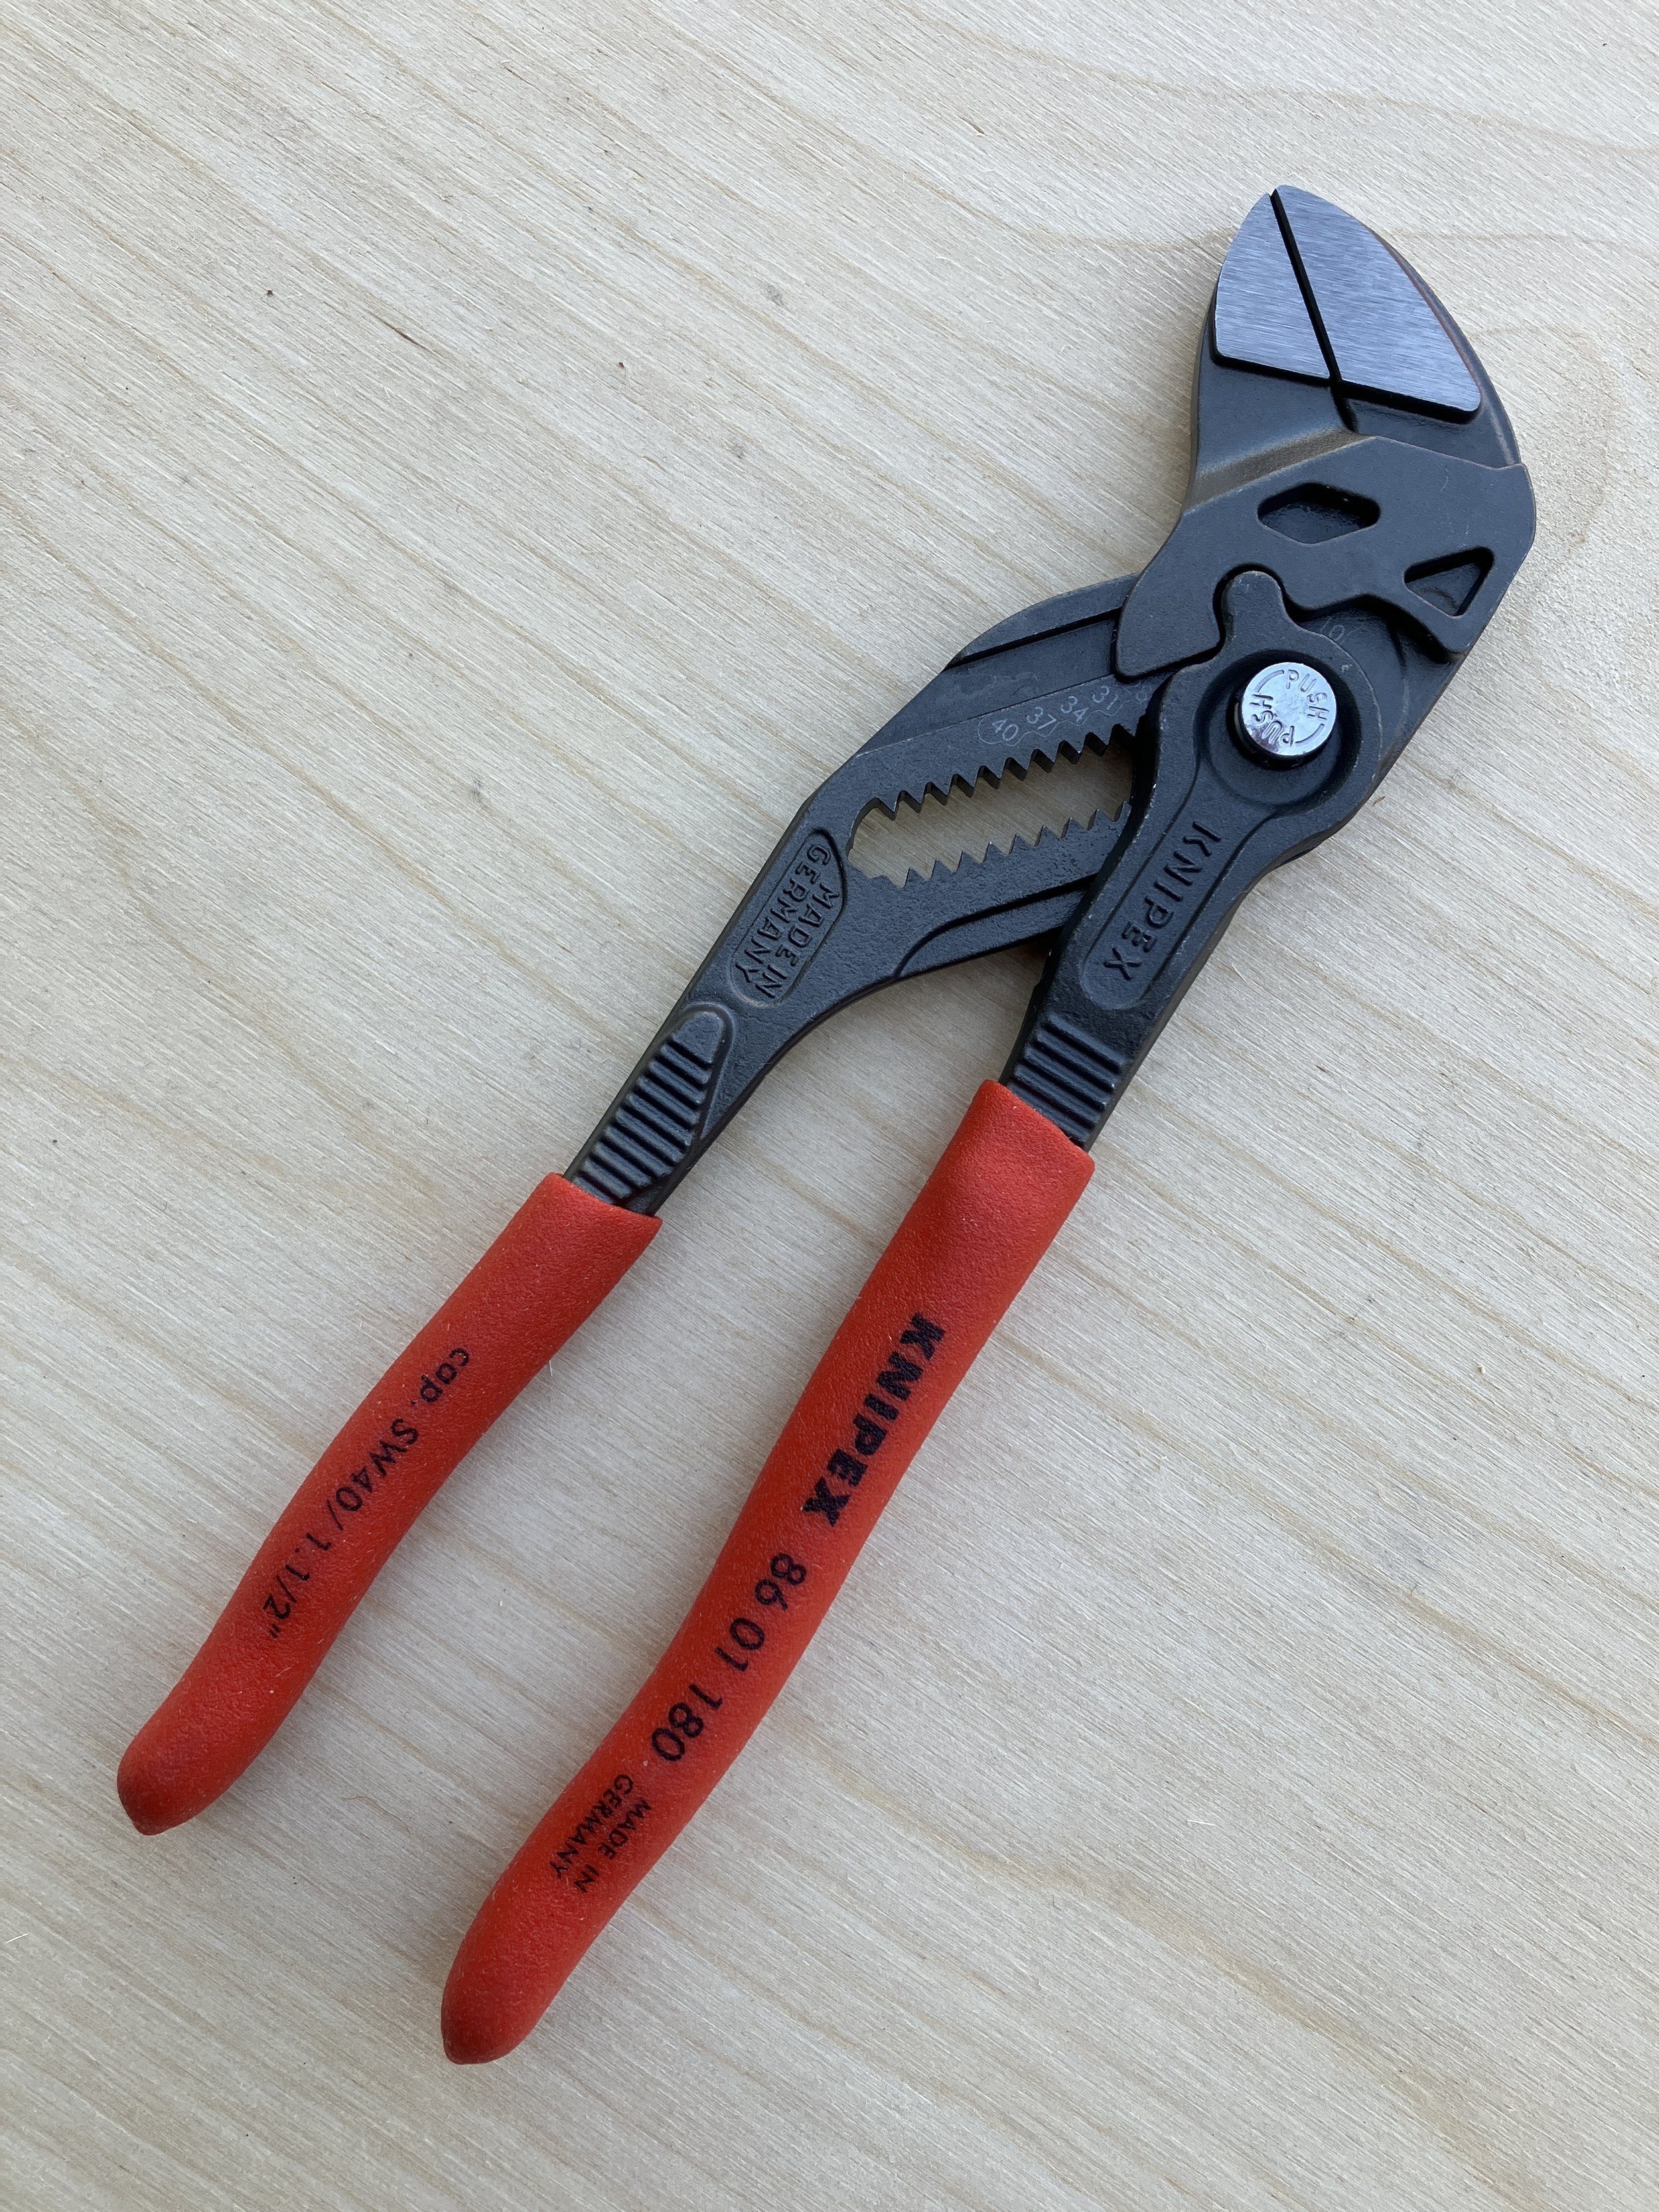
The lower jaw of the Knipex PJ pliers (my nickname) does not pivot about a central axle; instead it moves straight up and down in a track, and is adjusted with a separate handle on a pivot. The coarse adjustment is accomplished by sliding the handle up or down a toothed track, and the overall range is impressive: The compact 180mm model shown here can adjust its grasp from zero—i.e. gripping a piece of paper or sheet metal—up to a full 1 1/2 inches or 40mm. That means a pair of these could, in a pinch, substitute for a full ratchet/socket and wrench set from 3 or 4mm all the way up to 24mm or so (beyond that their leverage might be insufficient). Add the 250mm model for even more versatility.
One advantage of using the PJ pliers to, say, hold a nut while one unscrews a bolt from it, is that you actually grip the nut, which you cannot do with a standard wrench. This would be extremely useful in tight spaces were dropping the nut might mean a five-minute search in the bowels of the engine compartment—or the mud underneath. Likewise, when trying to thread a nut onto a bolt in a tight space you can retain a firm grip on it. Like all Knipex (pronounced “kineepex,” incidentally) pliers, due to the superior steel used the jaws are quite narrow, further enhancing their usefulness.
Disadvantages? The lack of teeth renders the PJ pliers useless at gripping round things—axles, the shaft of a bolt, etc.—which is why I also carry the company’s excellent standard sliding-jaw pliers. A very useful addition to a home or field tool kit.
Knipex is here.
The Pro Eagle Off Road jack

A floor jack with off-road tires—why didn’t someone think of this before?
A floor jack is the easiest way ever to lift a vehicle on a concrete driveway. But most will be stopped in their tracks by a quarter-inch-diameter pebble. Pro Eagle took a two-ton floor jack, beefed up the chassis and added fat tires, and invented the all-terrain floor jack. The Pro Eagle rolled over my gravel driveway effortlessly, and lifted the entire front end of my FJ40 in a sandy wash without digging in more than a couple inches. Given the fat tires plus a full-length underbody “skid plate,” it shouldn’t sink in any substrate that doesn’t have a current.

The Pro Eagle barely sank lifting the front of the FJ40 in sand.
An adjustable extension post (stored near the base of the handle) pops on for a full 26 inches of lift height. I certainly wouldn’t carry this bulky, 52-pound jack for field duty in the FJ40 (although a convenient carrying handle helps moving it around), but if you’ve got a full-size truck or Sprinter (there’s also a 3-ton version) or are traveling with a group, it will make any recovery a breeze.
And, of course, at home it’s an excellent shop jack. I’ve abandoned my standard floor jack because the Pro Eagle is so much easier to move around—even in urban settings—and because of its greater lifting capability.
One operational note—like all such jacks, the lifting pad moves through an arc as it rises. A floor jack on concrete will roll slightly to compensate for this. If you employ the extension on the Pro Eagle, and the jack is immobilized in sand or rock, the extension can wind up tilted significantly at full extension. Plan ahead.
Pro Eagle is here. The two-ton model retails for $430.
Touching up 48-year-old paint

Most people find it hard to believe my 1973 FJ40 still wears most of its original paint (aside from the newer doors I installed and had matched, and a couple of repaired areas). Despite having sat uncovered in the Arizona sun for at least 26 years of its life, the paint still glows with a hand application of Classic Car Wax (until the brand disappeared) or Mother’s California Gold—no ceramic coatings, no polymers, just good old-fashioned “wax on; wax off” cleaner and carnauba. I’ve lost track of those who ask me where I had my Land Cruiser restored.
That is, until they walked around front.
Thanks to the thousands of miles of dirt roads the 40 has covered, it has over the decades collected what seems like thousands of tiny stone chips, which stand out like a bad case of acne once one gets closer than ten feet. I imagine as the paint has aged it has probably become more brittle and thus more prone to chipping, as well. When I had the new doors painted a few years ago I got an extra pint of the match and painstakingly dabbed dozens of chips on the edge of the hood, the front clip and fenders, and the windshield surround. In the intervening years, however, another couple hundred have appeared. The can of paint had long since petrified, so I went online to one of the paint companies specializing in touch-up matching, and looked up the chart for a 1973 Land Cruiser in white. The first company led me to a color coded 040, so I ordered a tiny $20 bottle of the stuff.
Not even close. It was way, way too white.
Back to the research. Several people online swore my color should be T12, Cygnus White, and linked me to a color chart of 40-series colors in the early 70s. And there it was, overlapping from 1970 to 1975. Perfect. Except . . . in looking for the paint I found this offering at Cruiser Corps:

Well, my fiberglass top is and always has been a distinctly whiter shade of white than the body, which is distinctly off-white. Still, several forum members swore Cygnus White was the body color on their early 70s FJs. So, I ordered another $20 mini bottle.
And it, too, was too white. Not, perhaps as too-white as the first one, but not a match. Now I was down 40 bucks with nothing to show for it. Back to the forums, and this time someone suggested Arctic White, 022, which on another chart was listed as a 1973 color for Toyotas—but not specifically Land Cruisers. Ugh. Do I risk another 20 bucks for a few CCs of maybe?

No. I decided on a different route. I pulled off the locking fuel filler lid and took it up to Finish Master, a professional auto paint supply store in Tucson. When I explained to the counter guy—whose name I should have recorded—he at first demurred. “We’re mostly a professional supply source; we don’t usually do small batches. And what we make is designed for spraying; it’s pretty thin. What kind of vehicle is it?”
When I said, “It’s a 48-year-old Land Cruiser,” he perked up. “Really?” He thought for a moment. “Well, look, I can match the paint with our camera, and you could just build up layers if it’s too thin. But the smallest amount I can sell you is a quart, and it will be $40.”
“Done,” I said. He thought for another moment, then said, “You know, since you don’t need that much for stone chips, I could take some of it out and make up two cans of aerosol. It would be an extra $24.”
“Seriously?” I said. “That would be great!”
He took the filler flap and scanned it. “When can I come back?” I asked.
“Do you have ten minutes? We’ll make it up right now.”
This just kept getting better. I waited; ten minutes later I had my paint, which proved to be an excellent match.

I used the can to dab chips on the edge of the hood and fenders. I tried to fill in each one to slightly above the level of the surrounding paint, and then sanded it all flush with 1500-grit sandpaper, brought back the finish with rubbing compound, and finally applied the Mother’s California Gold.

Looking at the front apron, which was particularly loaded with acne, I decided to try the aerosol. So I pulled off the apron, cleaned it and sanded it with 800-grit wet-and-dry paper, and started spraying on layers. The paint went on well but, as I’d been warned, in thin layers, and the stone chips still showed up behind it, so I bought some lightweight polyester filler and faired in most of the tiny nicks, then resanded and repainted. After three or four more coats I smoothed out the paint with rubbing compound, then went at it with the Mother’s California Gold.

And, well, it looked pretty darn good when I was finished—certainly not the mirror finish a professional painter would have achieved, but it shines well and looks ten thousand percent better than it did. Since it is such a discrete part of the front of the vehicle, any slight contrast with adjoining panels is difficult to see.
Overall the improvement is astonishing. From a couple of feet away you can see the repairs, but from ten the work is nearly invisible.

Knipex: The right tool for the job

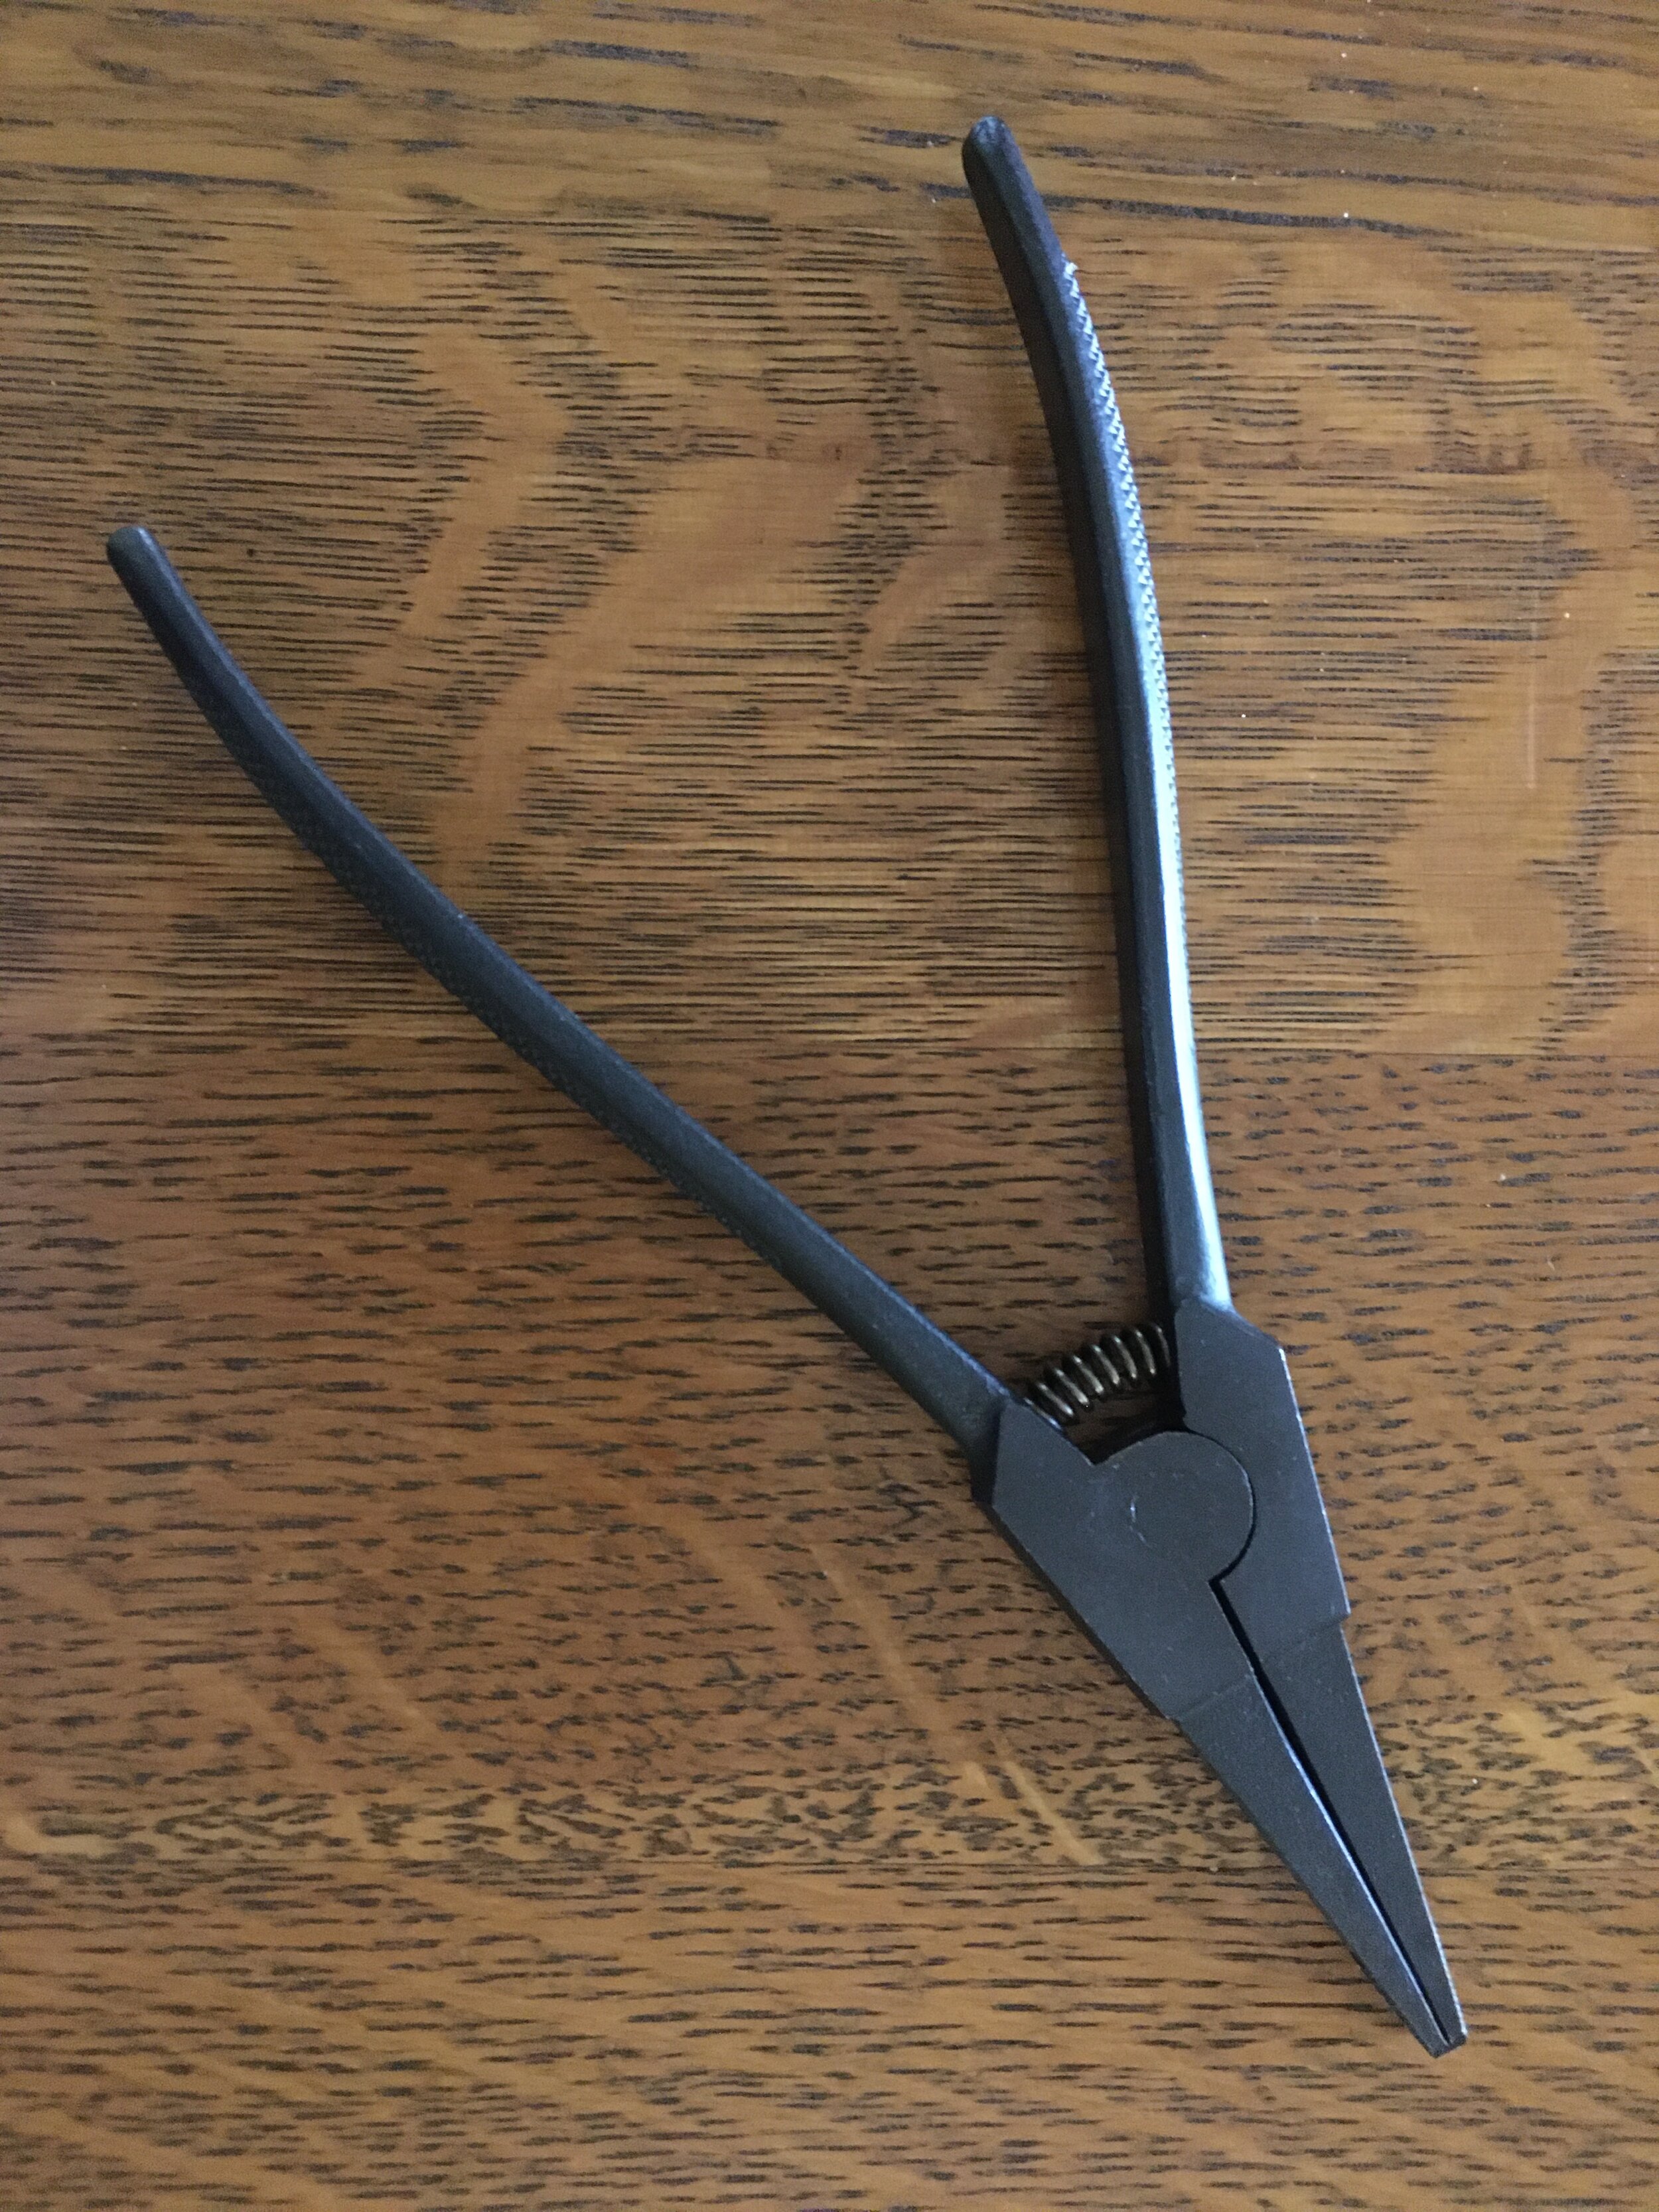
If you’ve ever needed to disassemble a Land Cruiser hub (or quite a few others), you’ve run into the retaining ring that secures the end of the stub axle. It’s not a circlip with holes that accept a standard snap-ring plier; the free ends come to bevelled points that are expletive-inducing to remove with any makeshift tool. Graham Jackson and I got them off our Troopy in the middle of the Australian bush by filing flat shoulders in the tips of a pair of his needle-nosed pliers. But it was still a dicey job to avoid having the things sproing off 20 feet into the dirt.
Rather unbelievably, I’d been through this same procedure at least a dozen times on our other Land Cruisers, from my 40 to our FJ55 to our FJ60. Every expletive-filled time I thought, I need a proper tool for this (expletive) job!
Finally I got one, and oh brother what a difference. It’s from the German tool maker Knipex, and it turns the task of removing and replacing this ring into an effortless and expletive-less five-second procedure.

If you drive a Land Cruiser and carry a tool kit for field repairs, get one, part # 4510170.
You’ll thank me some day.
Shackles: Are yours doing their job?

Proper shackle angle on an Old Man Emu suspension
I wonder if Obadiah Elliot had any clue, when in 1804 he patented a system of stacked steel plates designed to smooth the ride of a carriage, that his invention would still be in use two centuries later.
To be sure, the leaf spring has been eclipsed in sophistication by coil, torsion, and air springs, yet its simplicity, ruggedness, and low cost keep it standard equipment on the rear axles of millions of pickups and four-wheel-drive vehicles, as well as on the axles of larger freight-hauling trucks.
It’s not so much the cost of the spring itself that makes leaf-spring suspension systems cheaper to manufacture—it has to do more with the fact that a leaf spring also comprises its own locating mechanism. A coil or air-sprung beam axle requires a leading or trailing arm (or multiples) to secure it fore and aft, and a transverse arm such as a Panhard rod to locate it side to side. The leaf spring does both all on its own. Additionally, the stress a leaf spring applies to the chassis is divided between its front and rear mounting points, while the perch of a coil spring has to take all the load, requiring sufficient reinforcement.
Perhaps the biggest disadvantage of the leaf spring—that is, in the common configuration with multiple leaves—is inter-leaf friction, which not only hinders springing action but can vary or increase as, for example, the leaves become rusty. Some manufacturers such as Old Man Emu address this with a nylon pad at the end of each leaf, which can be lubricated.
There’s one situation, incidentally, when that interleaf friction can be an advantage—if you blow a shock absorber (as we recently did on our Land Cruiser Troopy), inter-leaf friction attenuates the endless cycling (bouncing) that would otherwise occur. If you’ve ever driven a coil-sprung vehicle with bad (or no) shocks, you’ll know what I mean.
Those of you with leaf springs at one or both ends of your vehicle likely have never given much thought to the shackles—those brackets that connect the free end of the spring to the chassis. But they perform a critical function, and their orientation can affect several aspects of suspension performance.
A leaf spring in its static position has a specified eye-to-eye length. When it flexes as the vehicle travels over a bump or through a hole, the spring “lengthens” or “shortens”—obviously it actually does neither; as it flexes the arch in the spring simply decreases or increases, changing the eye-to-eye distance. A leaf spring attached rigidly to the chassis at both ends could not flex at all, so the shackle travels through an arc to allow this. Clearly, then, you want the shackle oriented so it does this job as effectively as possible.
Take a look at this diagram.

Ignore for a moment everything but the angle at which the shackle meets the spring at the eye. This shows that angle as 90 degrees to the datum line—a line drawn straight between the eyes of the spring. For most practical purposes we can think of this as essentially right angles to the spring itself—an easy orientation to ascertain visually.
The most obvious and important result of this angle is that it lets the spring flex to its maximum extent both when compressed and extended. You can see that if the shackle were angled as in “A,” the spring could flex a lot downward (as the shackle pivots forward), but when compressed, the shackle would quickly bind against the chassis. Exactly the opposite is the case with the shackle at “B.” The spring has plenty of travel when compressed, but very little when extended. Another danger of a shackle angled as at “B” is that if the spring flexes too much the shackle can invert and lock itself against the chassis, completely immobilizing the spring.
You might also read or hear that the angle of the shackle can affect the ride quality of the spring—and this is where things get vague.
Note that this diagram claims that a shackle oriented at “A” will stiffen the ride while a shackle at “B” will soften it. I could find no explanation as to the physics of this supposed effect. On the other hand, I found a source claiming exactly the opposite. This one noted that with the shackle at “B,” when the spring compresses the shackle has to travel slightly downward in its arc before rising to the rear, and this jacks the chassis slightly upward, exacerbating the effect of a bump. Makes sense.
Not finished, however. Yet another fellow, with experience setting up racing vehicles, argues adamantly that the shackle has no effect either way on ride quality unless it actually binds. He points out that no matter what, the force from the spring is virtually straight up and down at the axle; the slight fore and aft movement imparted from the pivoting shackle is indiscernable. (He uses this fact also to argue against shackle-reversal kits as a waste of money.)
While the ride question remains unresolved, there’s no doubt that proper a 90-degree shackle angle allows the spring to do its job through the maximum possible travel in both compression and extension.
Look at the opening photo, which shows the rear of my FJ40 and its Old Man Emu suspension. The shackle angle is, as one would expect from the company, spot on (the front is as well).
In contrast, look at the shackle angle on the front springs of our Troopy:

Much closer to “B” in the diagram, no? These springs were installed at a shop in Perth, Australia, after we took it in to have them diagnose a worrying clicking noise I could both hear and feel through the steering wheel, and which neither Graham Jackson nor I were able to diagnose in the field except to be pretty sure it was in the steering. But the shop diagnosed worn springs, so we let them replace both sides.
We picked up the vehicle the day before we were scheduled to containerize both our and Graham and Connie’s Troopy for shipping to Africa—and as I drove away from the shop the clicking was there as loud as ever. Some testy and hasty negotiating resulted in a refund of all our labor charges, but the springs stayed on. (After getting the vehicle home I disassembled the steering and found indeed that was where the noise was coming from—just loose bolts in the tilt mechanism.)
Examining the springs in Durban I realized they had too much arch, resulting in this poor shackle angle. Whatever you believe regarding shackle angle and ride quality, these springs also definitely ride more harshly then the previous set, so I’m on a mission to fix both issues.
The first and most obvious approach is to remove a leaf in the springs. This isn’t necessarily as simple as it sounds, because removing the wrong leaf could create stress risers in the remaining leaves and lead to breakage. (So-called “add-a-leaf” kits can do this as well.) However, it looked to me that removing the bottom leaf on these springs wouldn’t compromise the rest of the pack, and the bottom leaf was the only one not captured with a clamp (or rebound clip to give it its proper name). So I jacked up the front end, loosened the U-bolts, and pulled the bottom leaves.

Notice the near-total lack of a wear pattern on the tips of the leaves.
After tightening everything again, I took the Troopy for a drive to settle everything then examined the results. Note the shackle angle in the first Troopy photo, and compare it to the “after” photo below.

If you’re thinking, “I don’t see the slightest difference,” congratulations. I don’t see one either. Clearly those bottom leaves are doing nothing at all—at least when the vehicle is static. They probably don’t provide any resistance until the spring is significantly compressed.
Since this is in no way an existential threat, I’m re-evaluating. I might still try removing another leaf, or I might just live with it for now—I certainly don’t intend to spring for new springs just yet . . .
Part Souq, an international resource for parts

Whenever possible I try to buy parts for our vehicles locally. For the newer ones this is generally no problem, but automobile dealers seem to be increasingly reluctant to stock parts for any model more than a few years old. And when you begin your conversation with the counter person with, “I have a 1973 . . .” he looks at you like you just stepped out of a time machine. (It would be fun to run with this some time, and as he’s looking futilely at his screen for spark plugs to fit a 46-year-old FJ40, say something like, “So, do you think Nixon will resign?”)
If parts for the 40 flummox the dealer, imagine the situation with a 1993 HZJ75 Troopy that was never even officially imported into the U.S. I don’t even try.
Fortunately there are several specialty Land Cruiser shops around the country that carry at least the commonly needed items for 70-Series Land Cruisers, and a few have surprisingly extensive inventories. In part this is due to the happy fact of a model that has changed very little over its 35-year history. Cruiser Outfitters and cruiserparts.net are good sources.
However, even these enthusiast outlets can’t carry everything. And supposing you’re looking for something really arcane—like say, a Toyota factory floor mat in “sable,” the brown that is our interior color?
Some time ago I was introduced to an online parts source called PartSouq.com—“souq” being the Arab term for a market. (Amazon, I understand, recently bought the English/Arabic-language E-commerce site souq.com; I have no idea if the two are related.) I called up the site, clicked on the Toyota section (the site lists 20 brands and claims 17 million parts in its database). A prompt asked me for the VIN of the Troopy, so I retrieved that, typed it in, hit enter—and was rewarded with a complete catalog of parts for a 1993 Toyota Land Cruiser HZJ75. Engine, transmission, chassis, electrical, body—it was all there, with diagrams. I went to the interior section, hovered over the floor mat part number, 58510B (when you do this, the list on the side scrolls automatically to the correct placement), and clicked on that. It showed four factory floor mats available, three in gray, one in sable. The sable mat was located in . . . Oman? Yep. “Ships in one day,” it said.

Needless to say, clicking “Buy now” on a $310 item located halfway around the world took a leap of faith. Only the rave reviews I’d read of the site gave me the courage to do so. Shipping was nearly a hundred dollars—hardly unexpected.
What was unexpected was finding the large box containing our new Toyota factory HZJ75 floor mat, in sable, at our commercial mail service four days later. The mat was perfect, and a welcome replacement for the sadly (and hazardously) chewed-up original.
So if you can buy your parts locally, please do so to support your nearby economy. But if you can’t find it close, and the factory made it, there’s a really good chance it will show up on a PartSouq.com search.

Curiously useful: the offset box wrench

I never owned a set of offset box wrenches until last year. The configuration always seemed like something that could be duplicated by other tools—a standard combination wrench, even a ratchet and socket. It seemed like a solution to a problem that didn’t exist—even though I had noticed them in the tool chests of several professional mechanic friends.
But then I chanced across a beautiful German-made set from Stahlwille (say “stallvilla”) on sale online—and few things can make me reconsider the need for a tool faster than a discount price on German-made version of that tool. Since I had some birthday funds available from my wife, I ordered the set, which comprised eight tools that covered the broad and useful span of 7 to 22 mm. They were as beautiful in person as in the photos. I set them up on a wrench rack in my rolling chest and more or less forgot about them.

But over the past few months, a funny thing has happened. I’ve found more and more situations for which an offset box wrench was the perfect tool, indeed just a bit more convenient or secure than whatever I would have used before. Sometimes it was just nice to have the extra knuckle clearance provided by the offset design.
And twice already I’ve used one in circumstances where no other tool I owned would fit. The latest involved snugging the nylock nuts on the rear engine mounts on the FJ40, which had loosened a bit as the new motor mounts installed when the engine was rebuilt have compressed a tiny bit. The driver’s side bolt head is easily accessed on top of the mount, but the bottom 19mm nut is inside the boxed chassis rail, accessible only through an opening about three inches in diameter. That by itself might not have been a problem, but I have a header on my engine, and the exhaust runs very close to that hole.
I tried a socket and ratchet. No go. Short extension on it? Nope. Just a breaker bar on the socket? Close, but not quite. Standard combination wrench? Uh uh.
Hmm . . . I grabbed the 17/19mm offset box wrench, angled it into the hole above the exhaust, and bink. It snapped right on.


So my who-needs-them? offset box wrenches have become some of my favorite tools. Of course you really don’t need the über German versions—unless you’ve got some birthday cash on hand.

Just in case, Stahlwille is available here.
Hack your tire plug kit for more versatility

There are two tire plug kits I recommend above all others I’ve tried: The Extreme Outback Ultimate Puncture Repair Kit, and ARB’s Speedy Seal kit.
Each has its advantages. The ARB kit comes in a snap-in, well-organized blow-molded case, so everything you need is easy to access and nothing you don’t need is in the way. The reamer and plug insertion tool are stoutly made with solid aluminum handles—critical for working on tough all-terrain tires. (Never, ever buy plastic-handled plug tools.) Included are pliers for pulling out whatever has holed your tire, a razor for trimming the inserted plug, lube to ease insertion (no wise cracks please!), a tire gauge, and a kit containing spare valves and valve cores, valve caps, and a valve tool. Finally, 40 plugs are included, which should suffice for a very long time—except see below.
The Extreme Outback Ultimate Puncture Repair Kit is the one you want if you are heading out to drive around the world, or you are a professional leading self-drive tours, or if you just want to guarantee that you can repair any tire issue short of a carcass-shredding blowout. In addition to everything in the ARB kit (except the pliers), the EO kit includes an exhaustive selection of patches and rubber cement to repair seriously large punctures or even sidewall tears from the inside out, once you have broken the bead and removed one side of the tire from the rim. There are even thread and needles to sew up sidewall tears before patching them, and such thoughtful additions as a piece of chalk to mark where your tire and rim meet, so when you remount the tire your balance will not be lost, and packets of hand wipes. The one downside not shared by the ARB kit is that all this stuff is crammed into a heavy-duty zippered nylon case. It’s amazingly compact, but you need to pull just about everything out to accomplish even the simplest plug job.
Also included are plenty of plugs—but, as with the ARB, there is a problem.

I’ve always maintained that the plugs in the ARB kit, which are about 8mm in diameter, are far too large for the average nail or screw hole. They are extremely difficult to insert in such a hole in any tire with a tough carcass, especially a stout E-rated AT, even after a vigorous reaming.
Up until recently, the Extreme Outback kit included two sizes of plugs, about 6mm and 4mm. The 4mm plugs were perfect for most small holes—in fact, when teaching tire repair and actually drilling 3/16th-inch holes in tires for students to practice on, the thin plugs were all I used. Only when demonstrating more challenging situations did I need the larger sizes.
Now, however, the EO kit only comes with 6mm plugs, which, while easier to insert than the ARB’s, are still problematic for many repairs. Case in point: At the last Expo I was having students plug tires after I drilled holes in them. The first volunteer was a woman, and she simply could not get a plug from the EO kit inserted, even with plenty of lube and while putting virtually all her body weight on it. Finally Mark Kellgren, who was teaching with me, took over—and had nearly as hard a time getting the thing in there. Finally I realized I had unwittingly run out of the 4mm plugs and had substituted one of the thicker ones, which was clearly too large for such a hole.
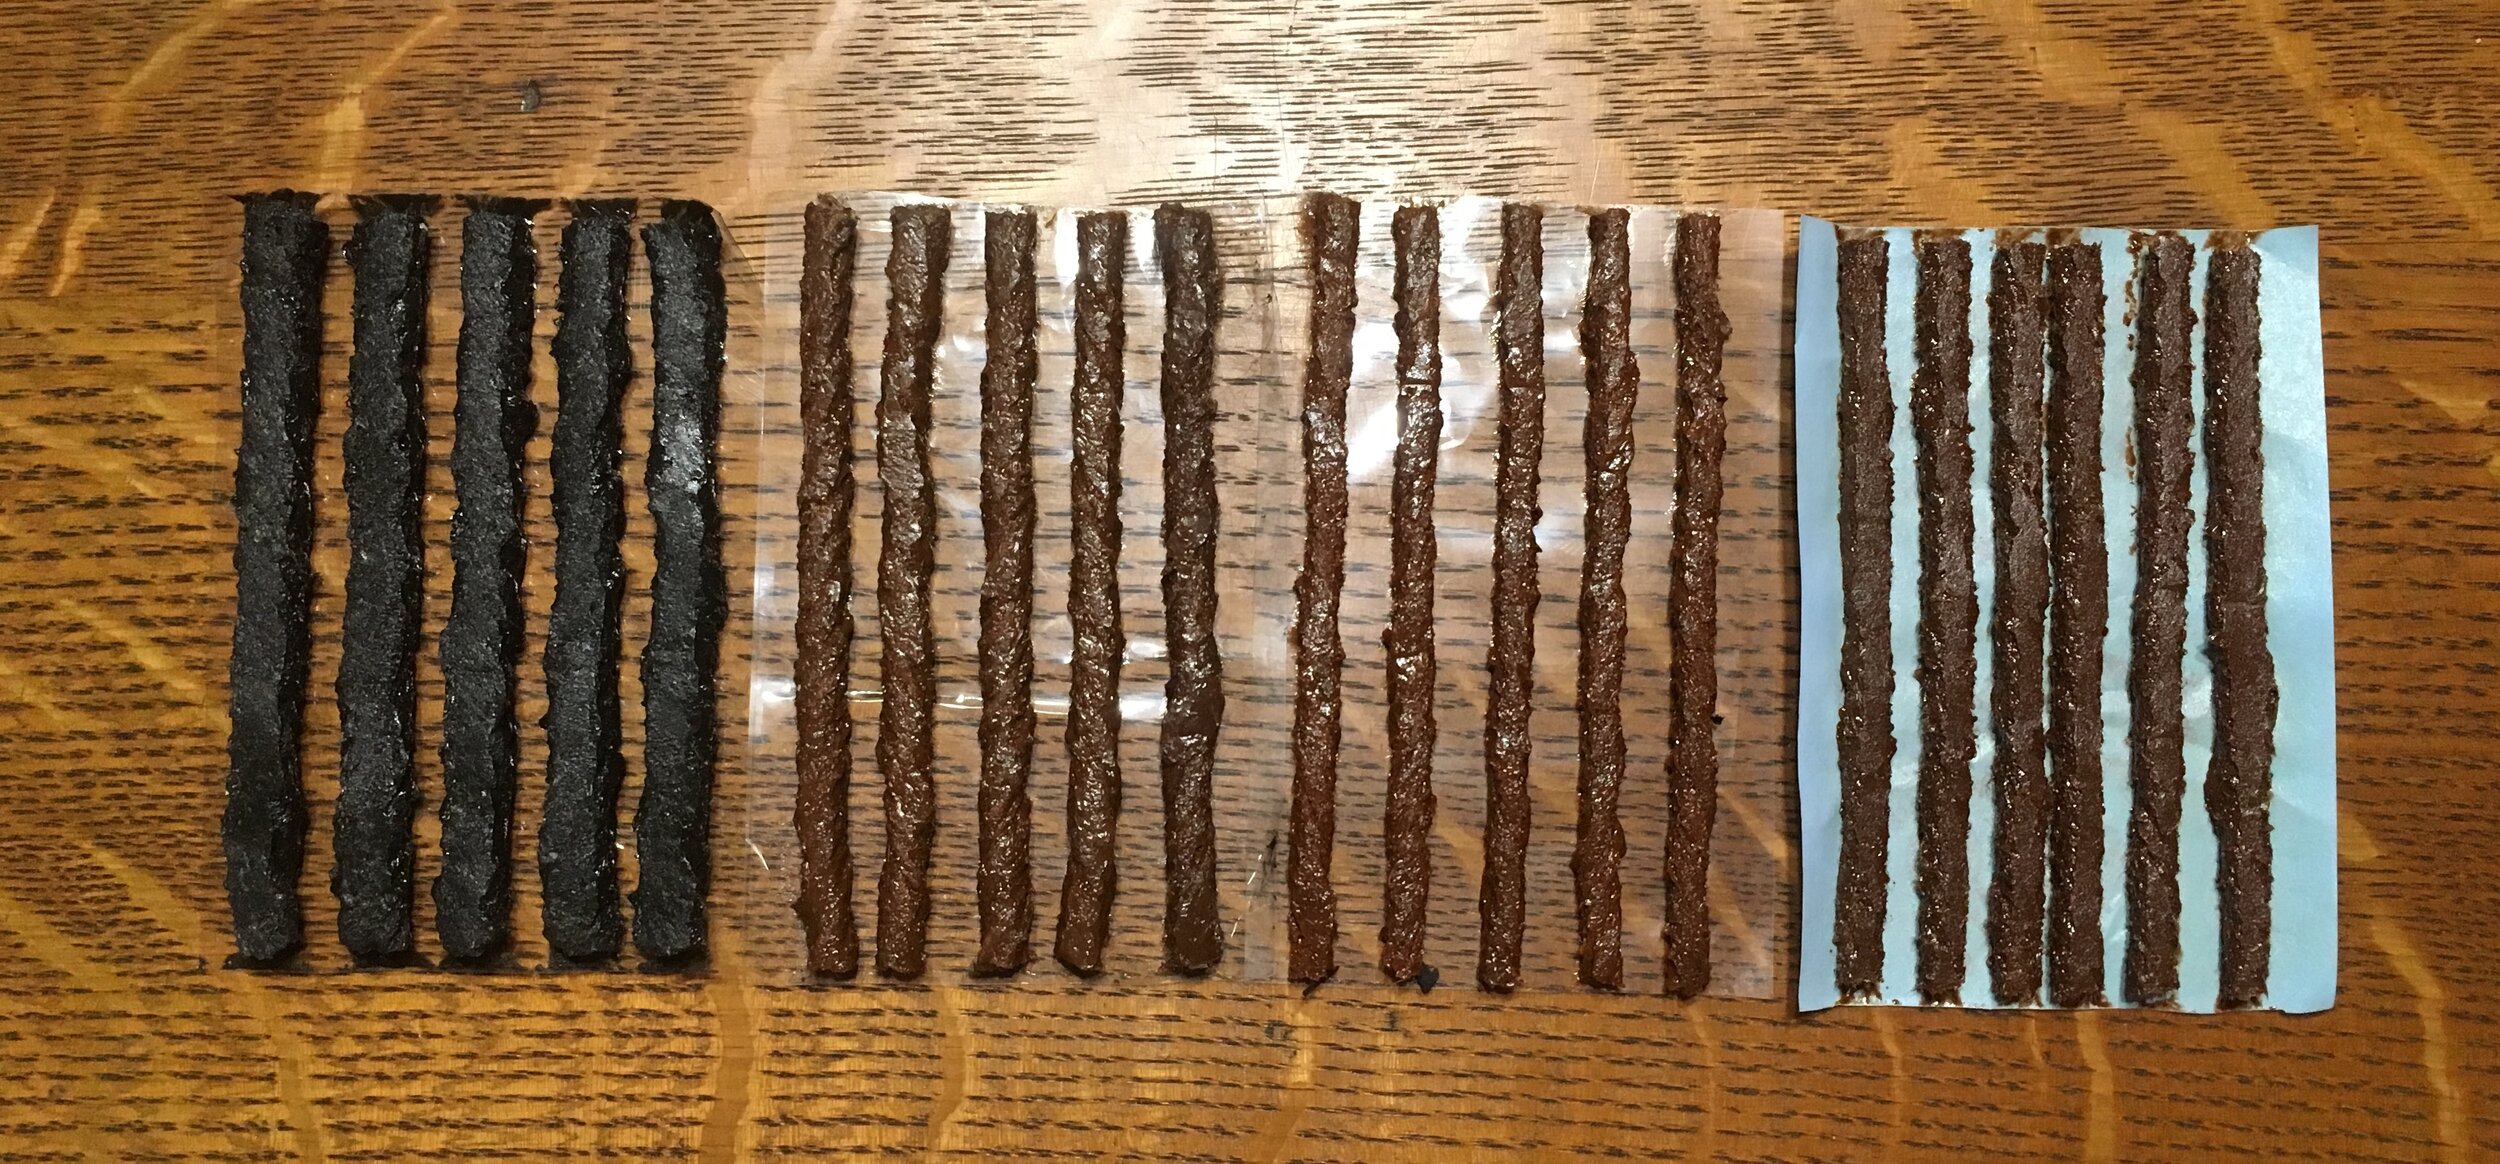
Left to right: ARB, Extreme Outback thick and thin, and Safety Seal Slim tire plugs. (The Safety Seal plugs are slightly flattened and look thicker than they are.)
I called George Carousos, who owns Extreme Outback, and he told me the kits were no longer available with the thinner plugs. So I decided it was time to hack all our ARB and EO kits. I looked up Safety Seal, a company that has been making tire repair products for half a century, and ordered a box of their slim plugs. At a listed 3.2mm these should be smaller than the old thin EO plugs, but if anything they look a tiny bit thicker. Nevertheless they should suffice for those smaller holes. So I’ve replaced half the thicker plugs in all our kits with thinner versions, which should make each kit far more versatile.

Hint: When using “Search,” if nothing comes up, reload the page, this usually works. Also, our “Comment” button is on strike thanks to Squarespace, which is proving to be difficult to use! Please email me with comments!
Overland Tech & Travel brings you in-depth overland equipment tests, reviews, news, travel tips, & stories from the best overlanding experts on the planet. Follow or subscribe (below) to keep up to date.
Have a question for Jonathan? Send him an email [click here].
SUBSCRIBE
CLICK HERE to subscribe to Jonathan’s email list; we send once or twice a month, usually Sunday morning for your weekend reading pleasure.


Overland Tech and Travel is curated by Jonathan Hanson, co-founder and former co-owner of the Overland Expo. Jonathan segued from a misspent youth almost directly into a misspent adulthood, cleverly sidestepping any chance of a normal career track or a secure retirement by becoming a freelance writer, working for Outside, National Geographic Adventure, and nearly two dozen other publications. He co-founded Overland Journal in 2007 and was its executive editor until 2011, when he left and sold his shares in the company. His travels encompass explorations on land and sea on six continents, by foot, bicycle, sea kayak, motorcycle, and four-wheel-drive vehicle. He has published a dozen books, several with his wife, Roseann Hanson, gaining several obscure non-cash awards along the way, and is the co-author of the fourth edition of Tom Sheppard's overlanding bible, the Vehicle-dependent Expedition Guide.