
Overland Tech and Travel
Advice from the world's
most experienced overlanders
tests, reviews, opinion, and more
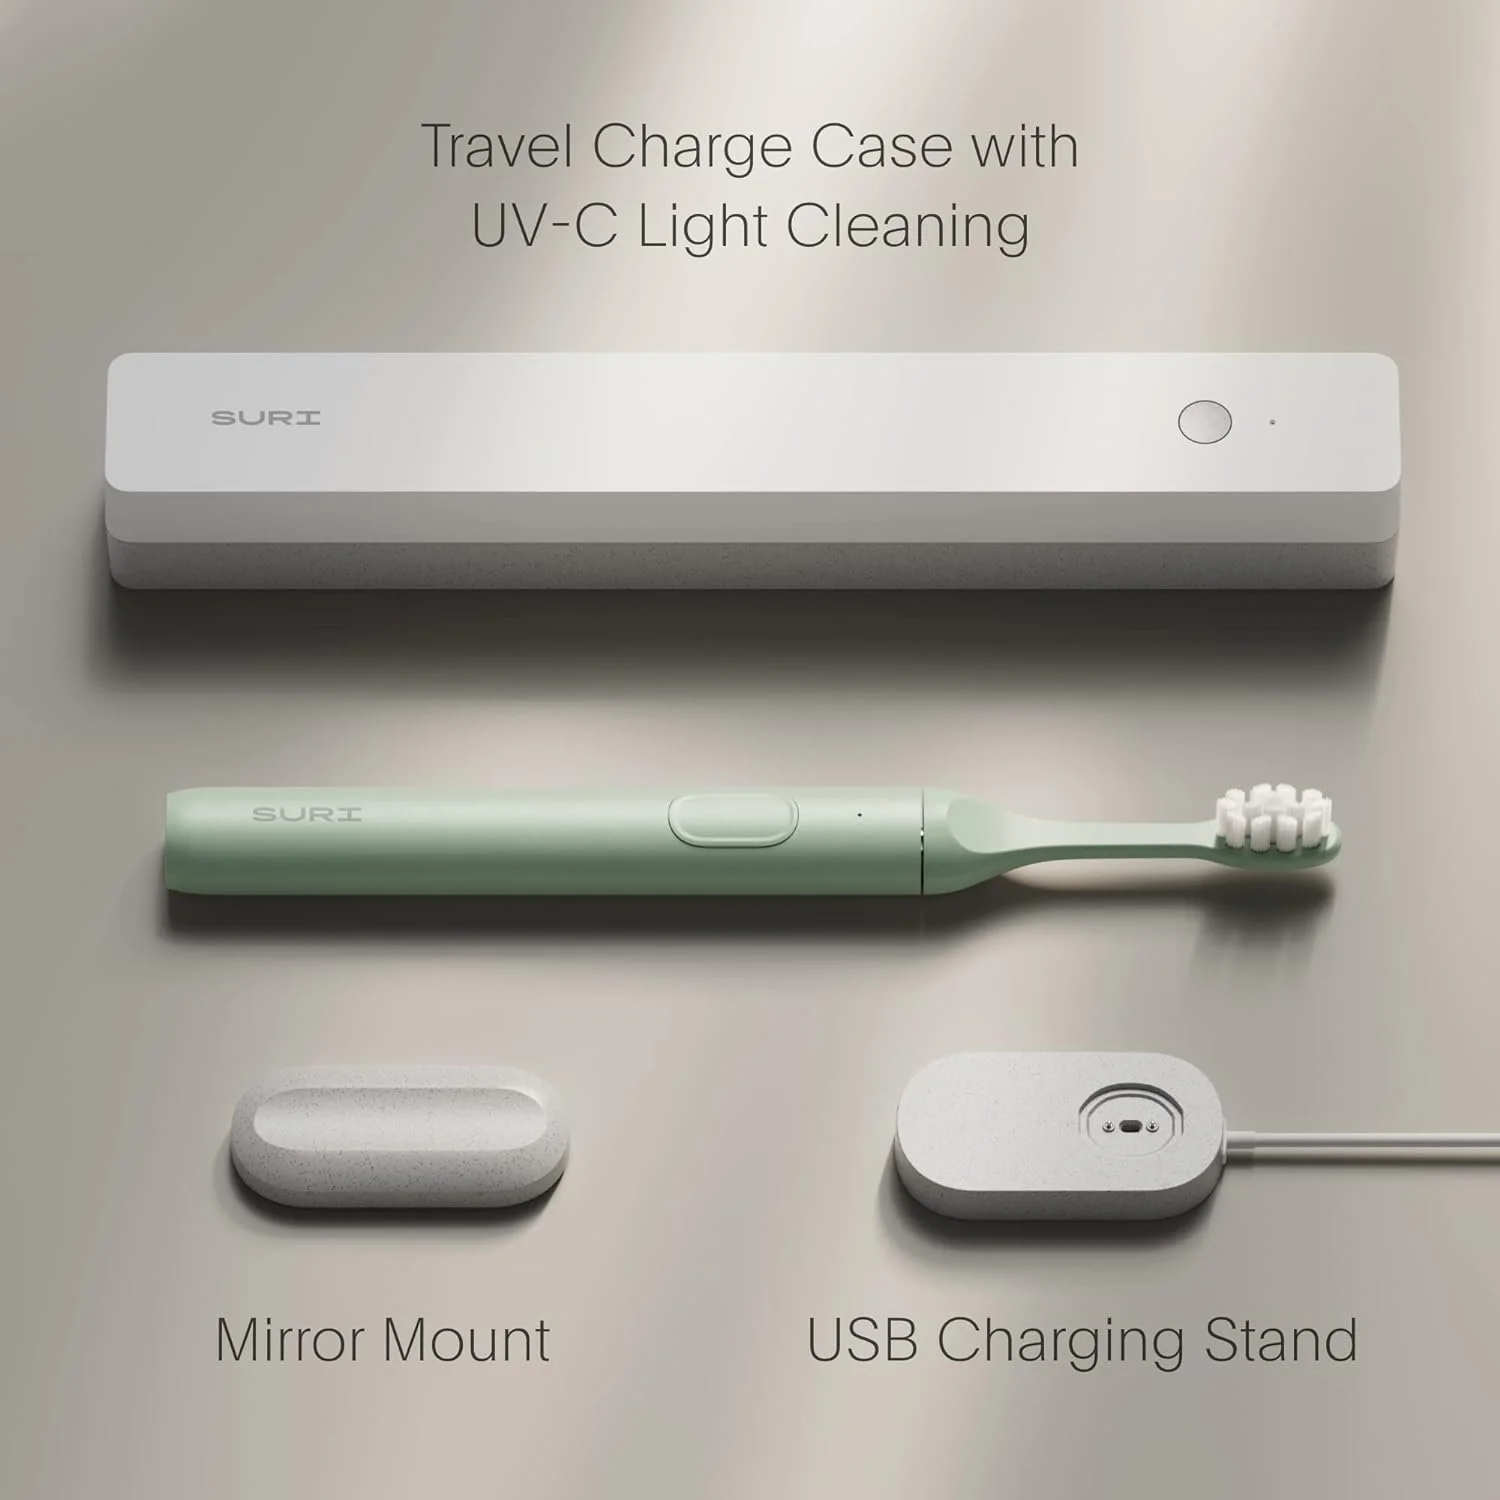
Essential overland kit? The Suri sustainable sonic toothbrush.
Okay, okay. I know oral hygiene is on the “lite” side of subjects for an overlanding column, but bear with me.
For years and years I resisted electric toothbrushes. My only experience with them was an early model that did nothing but wiggle back and forth, which I felt perfectly capable of doing on my own. But a few years back, a friend gave me a modern unit (he had got two on a deal), and I realized that the newer technology really did seem to clean better than a manual brush (several independent studies bear this out). I was more or less sold.
Why more or less? I still didn’t like all the extra plastic and electrics, and to my horror, when the battery died on that first one I discovered it wasn’t replaceable. A kit on Amazon promised a fix, but after disassembling the unit and trying some extremely precise de- and re-soldering, I gave up. The hygiene angle kept me a customer, but reluctantly.
The other issue involved taking the thing camping. The electric brush was bulky, and of course was yet another item that needed recharging off an inverter. And I was reluctant to use the thing when we were camped too near others, expecting snickering.
That’s changed with, of all things, a link on Instagram, a pitch for a “sustainable sonic toothbrush” called Suri. The website showed an extremely compact brush with an aluminum body, and, more importantly, a factory-replaceable battery. How about those disposable brush heads, of which, the company says, over four billion are discarded worldwide each year? The Suri’s plant-based plastic heads are not only recyclable, the company includes a postage-paid envelope to send them back (suggesting that you save up three or four at a time to save them shipping costs). Finally, the Suri’s recharger is tiny, and uses a USB connector, making recharging much, much easier on the road.
Done. Ordered.
I wondered if the Suri’s compact design would mean its smaller motor wouldn’t clean as well as our regular brush, but to my (our) surprise found it at least as good if not better. I’d originally thought it might be just a traveling brush (it claims a 40-day battery life; if it’s half that I’d still be impressed), but it’s taken over as our main unit. I’m planning to buy another for our place in Fairbanks. (The unit comes with a clever stick-on magnetic holder that adheres to the inside of your medicine cabinet.)
So there you have it: my slavish endorsement of . . . a toothbrush. I’m happy to support a company that seems genuinely to be trying to reduce its impact on the planet.
Suri is here.

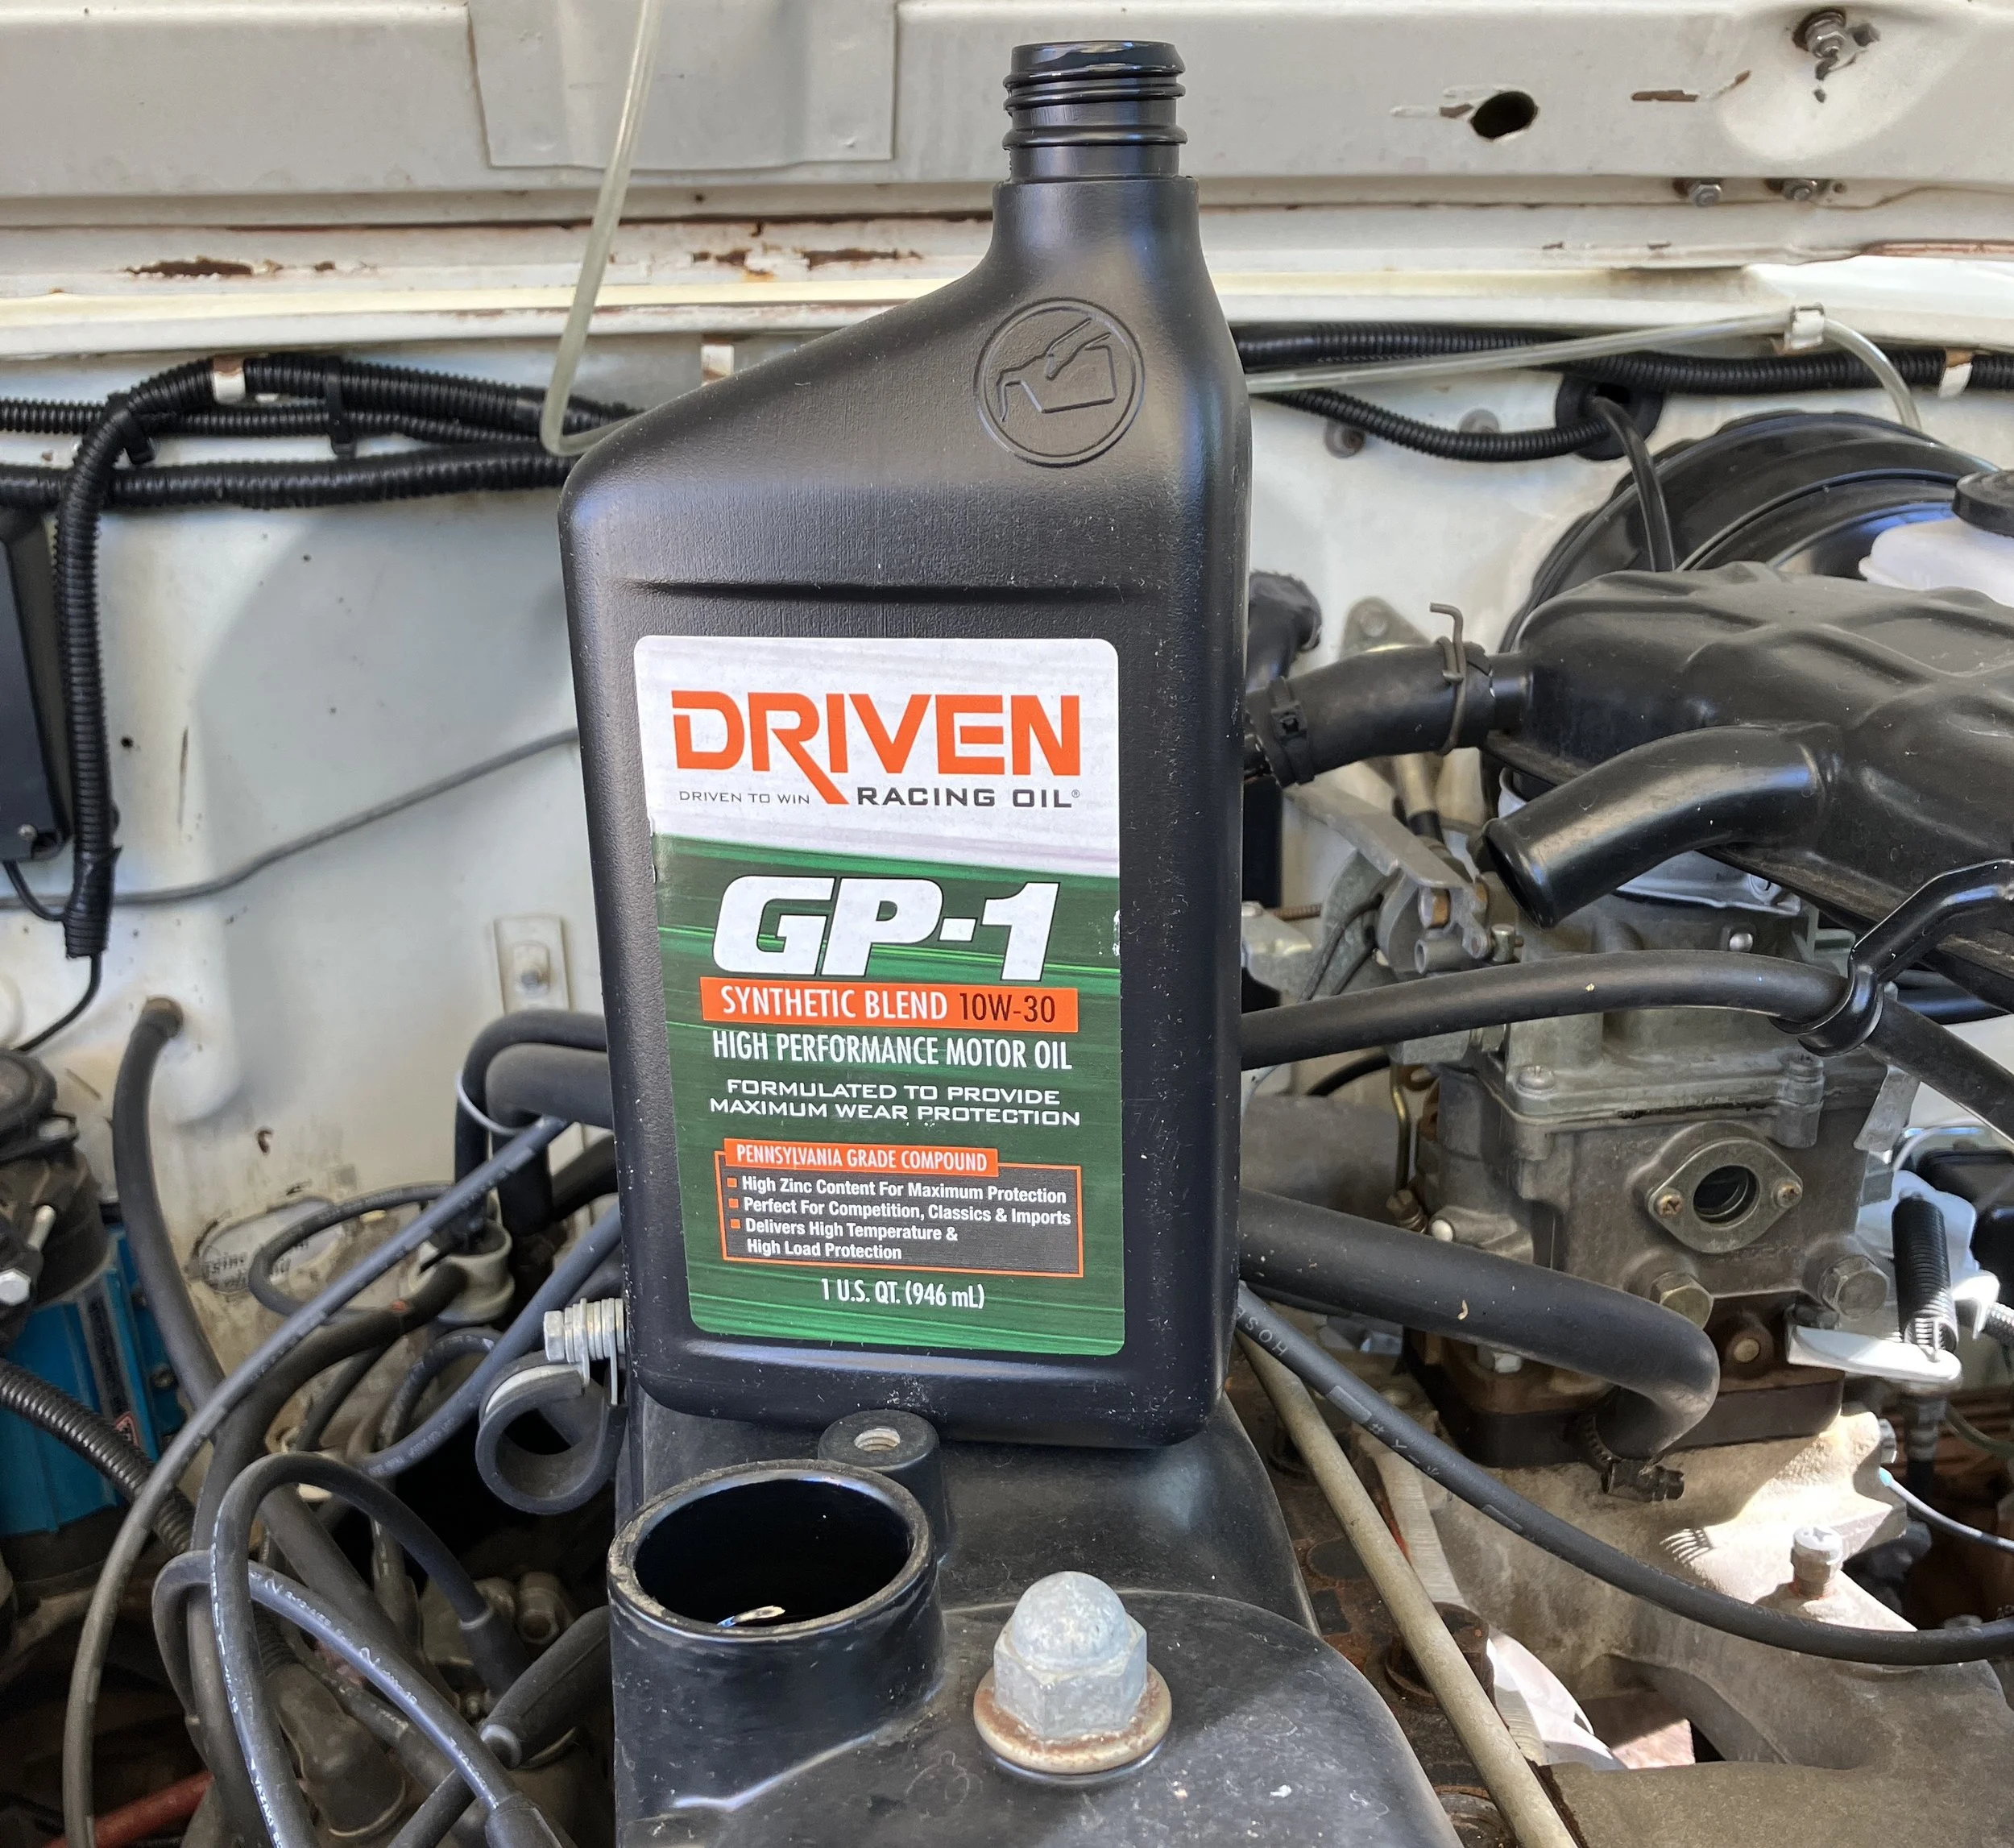
Pouring oil the correct way
Wait. Does anyone need instruction in how to pour oil into a crankcase?
Apparently I do, because it was only last year that I noticed a little icon near the top of a bottle of oil I was pouring into the Land Cruiser.
I had always poured it this way:

But the little icon told me to pour it this way:

And, well, to use the colloquialism . . . Duh. Poured this way the oil dispenses with zero gurgling, since air immediately enters the top of the bottle.
If I’m the only numpty on the planet, oh well. But if you read this and thought, “Ah ha!” Then you’re welcome.
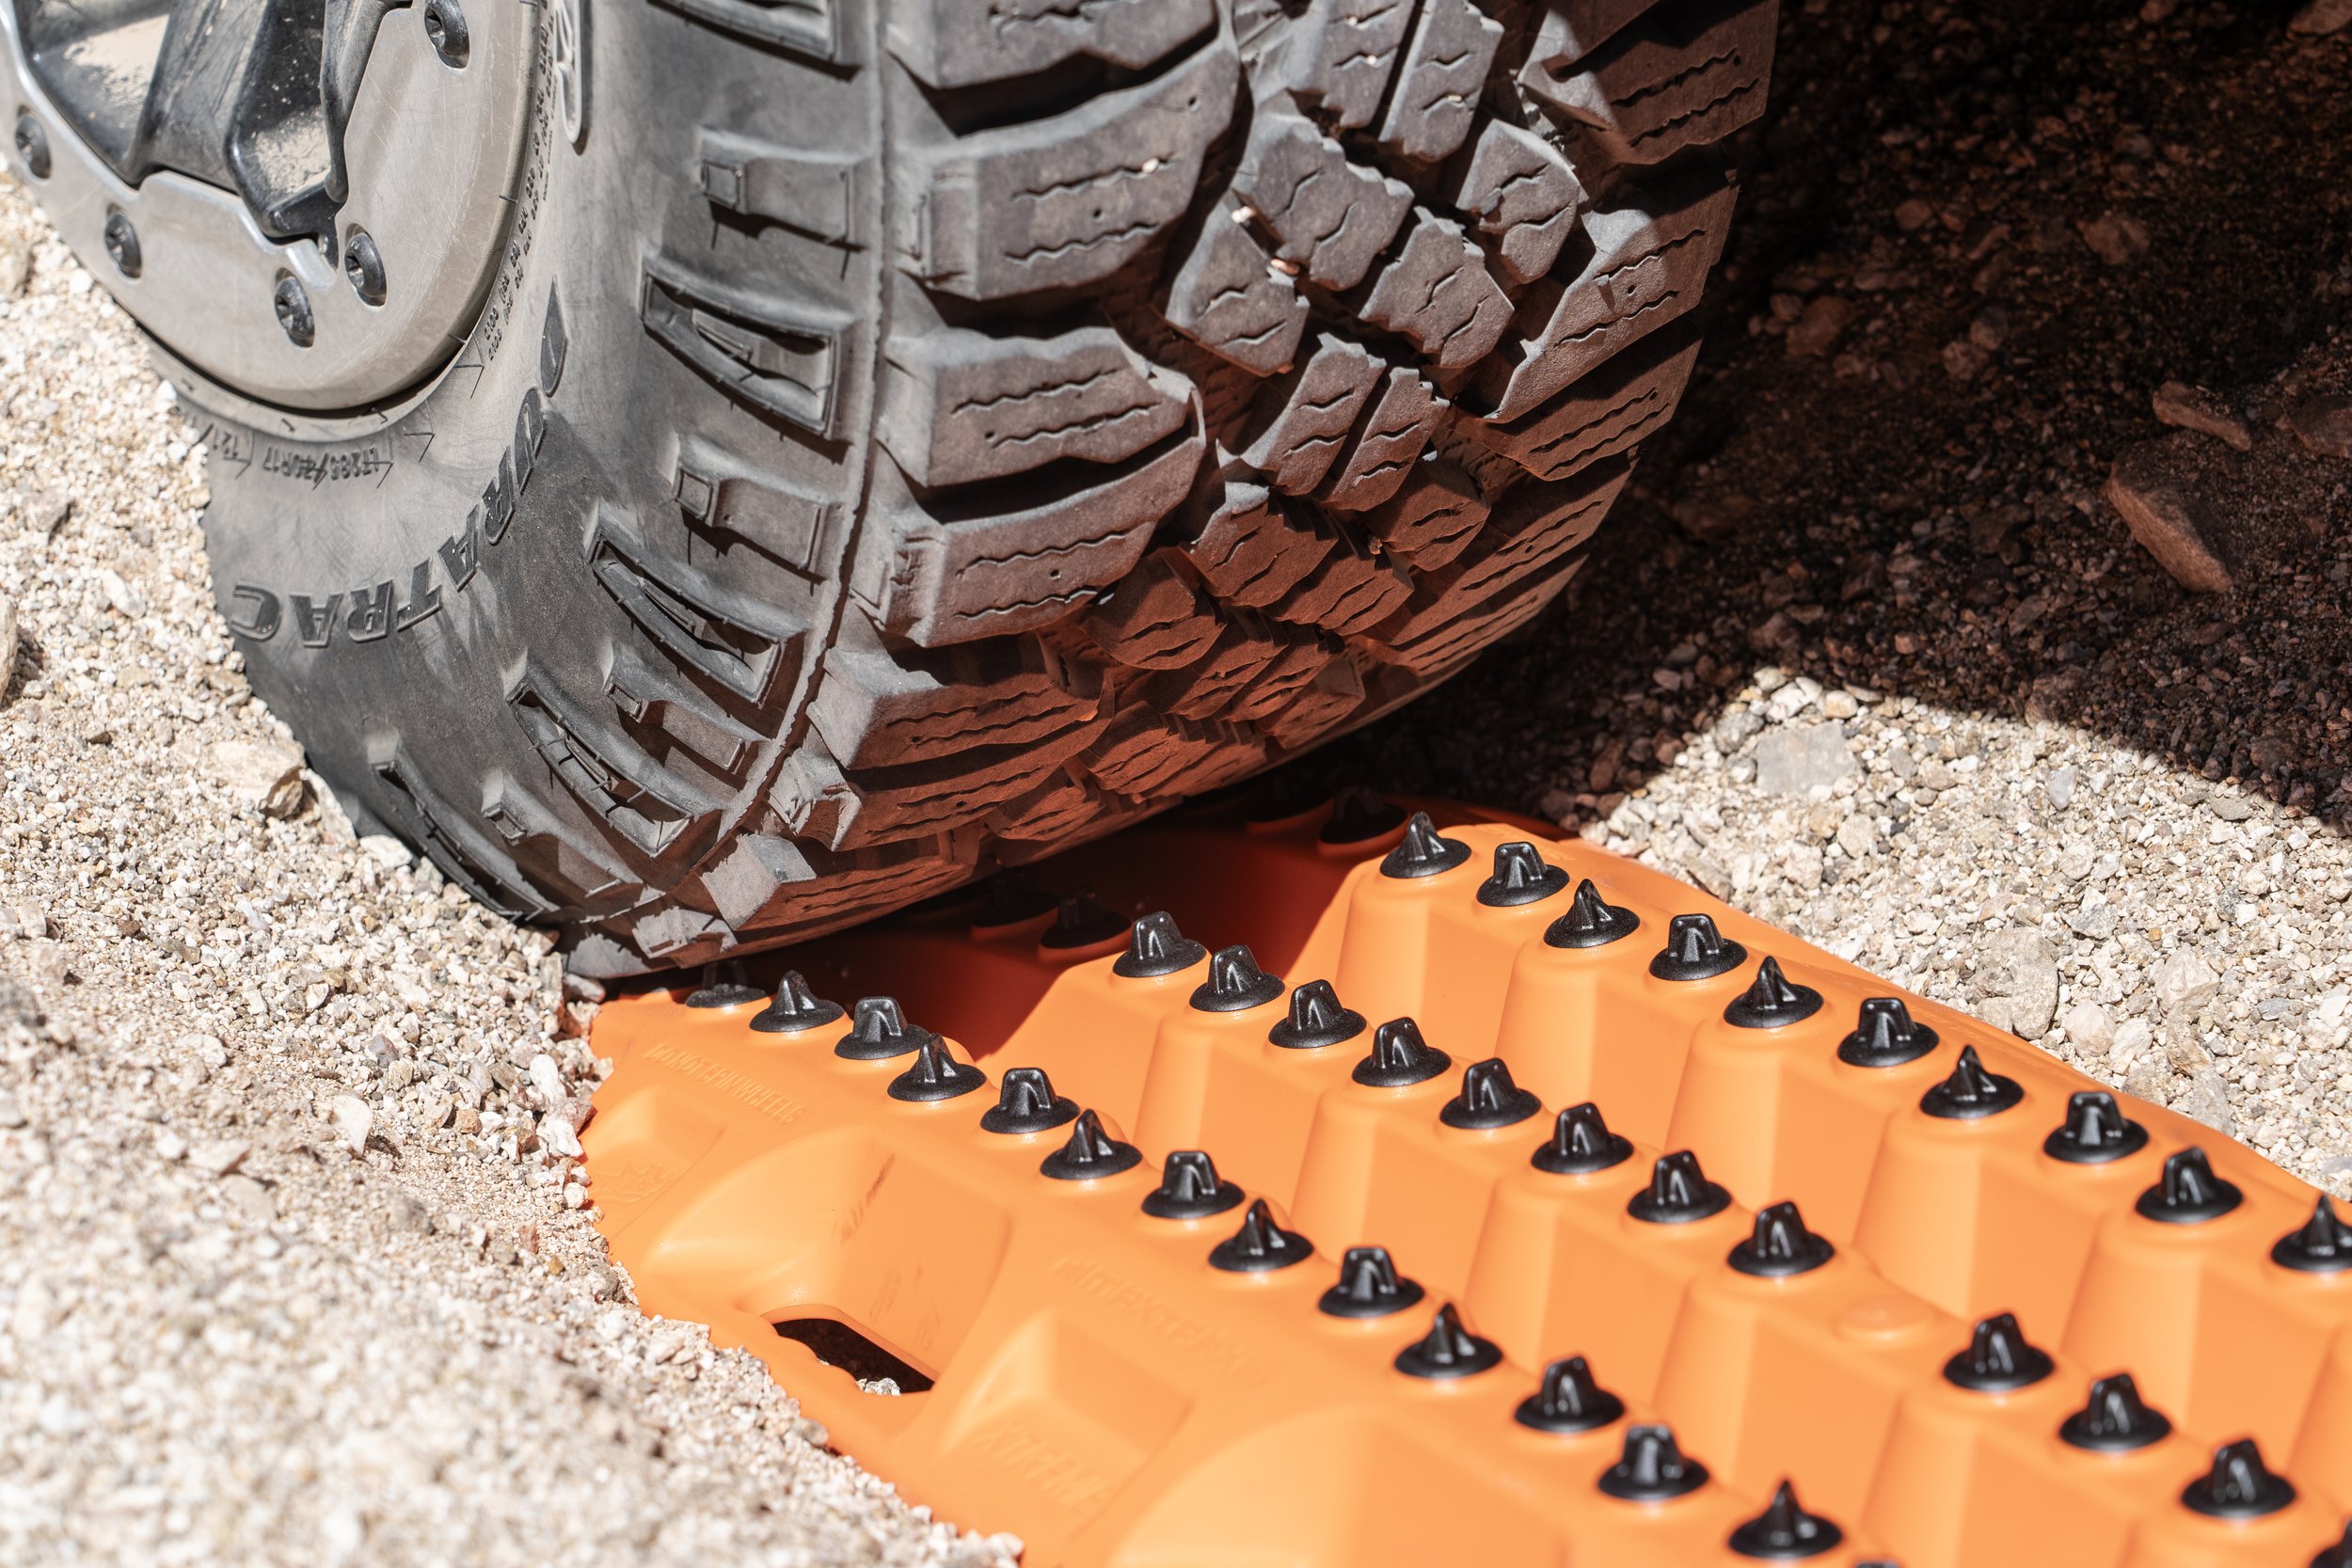
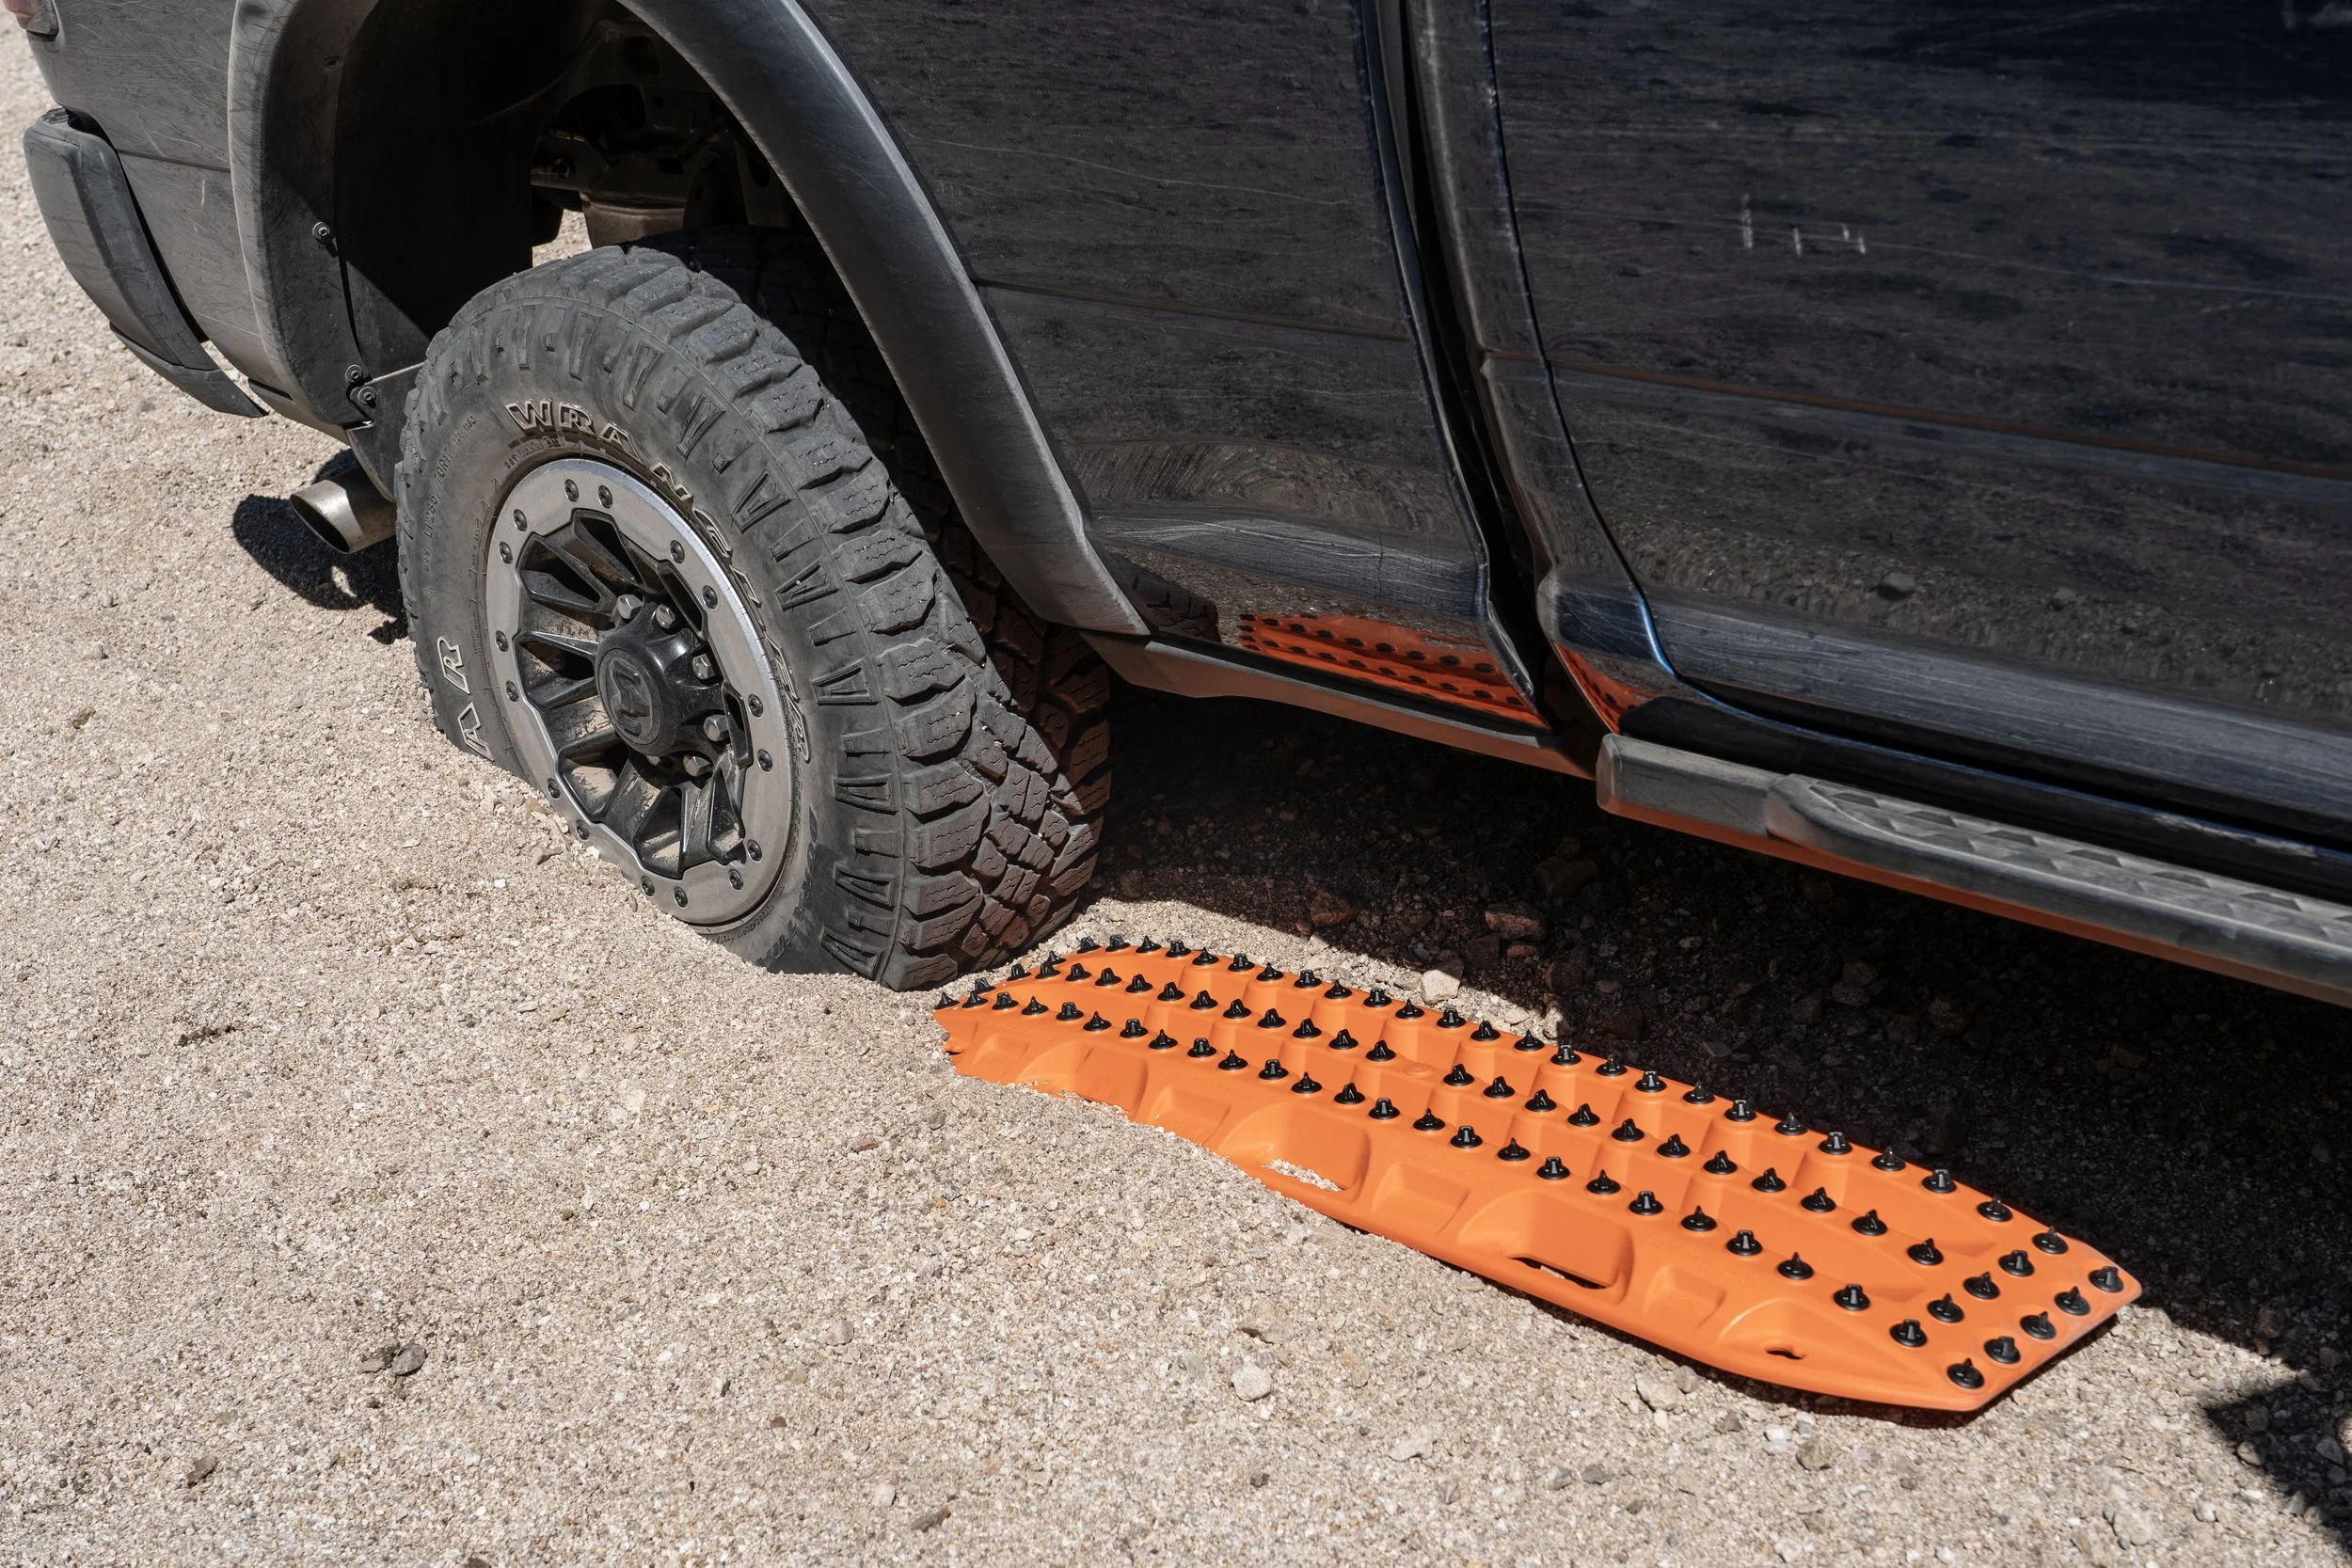
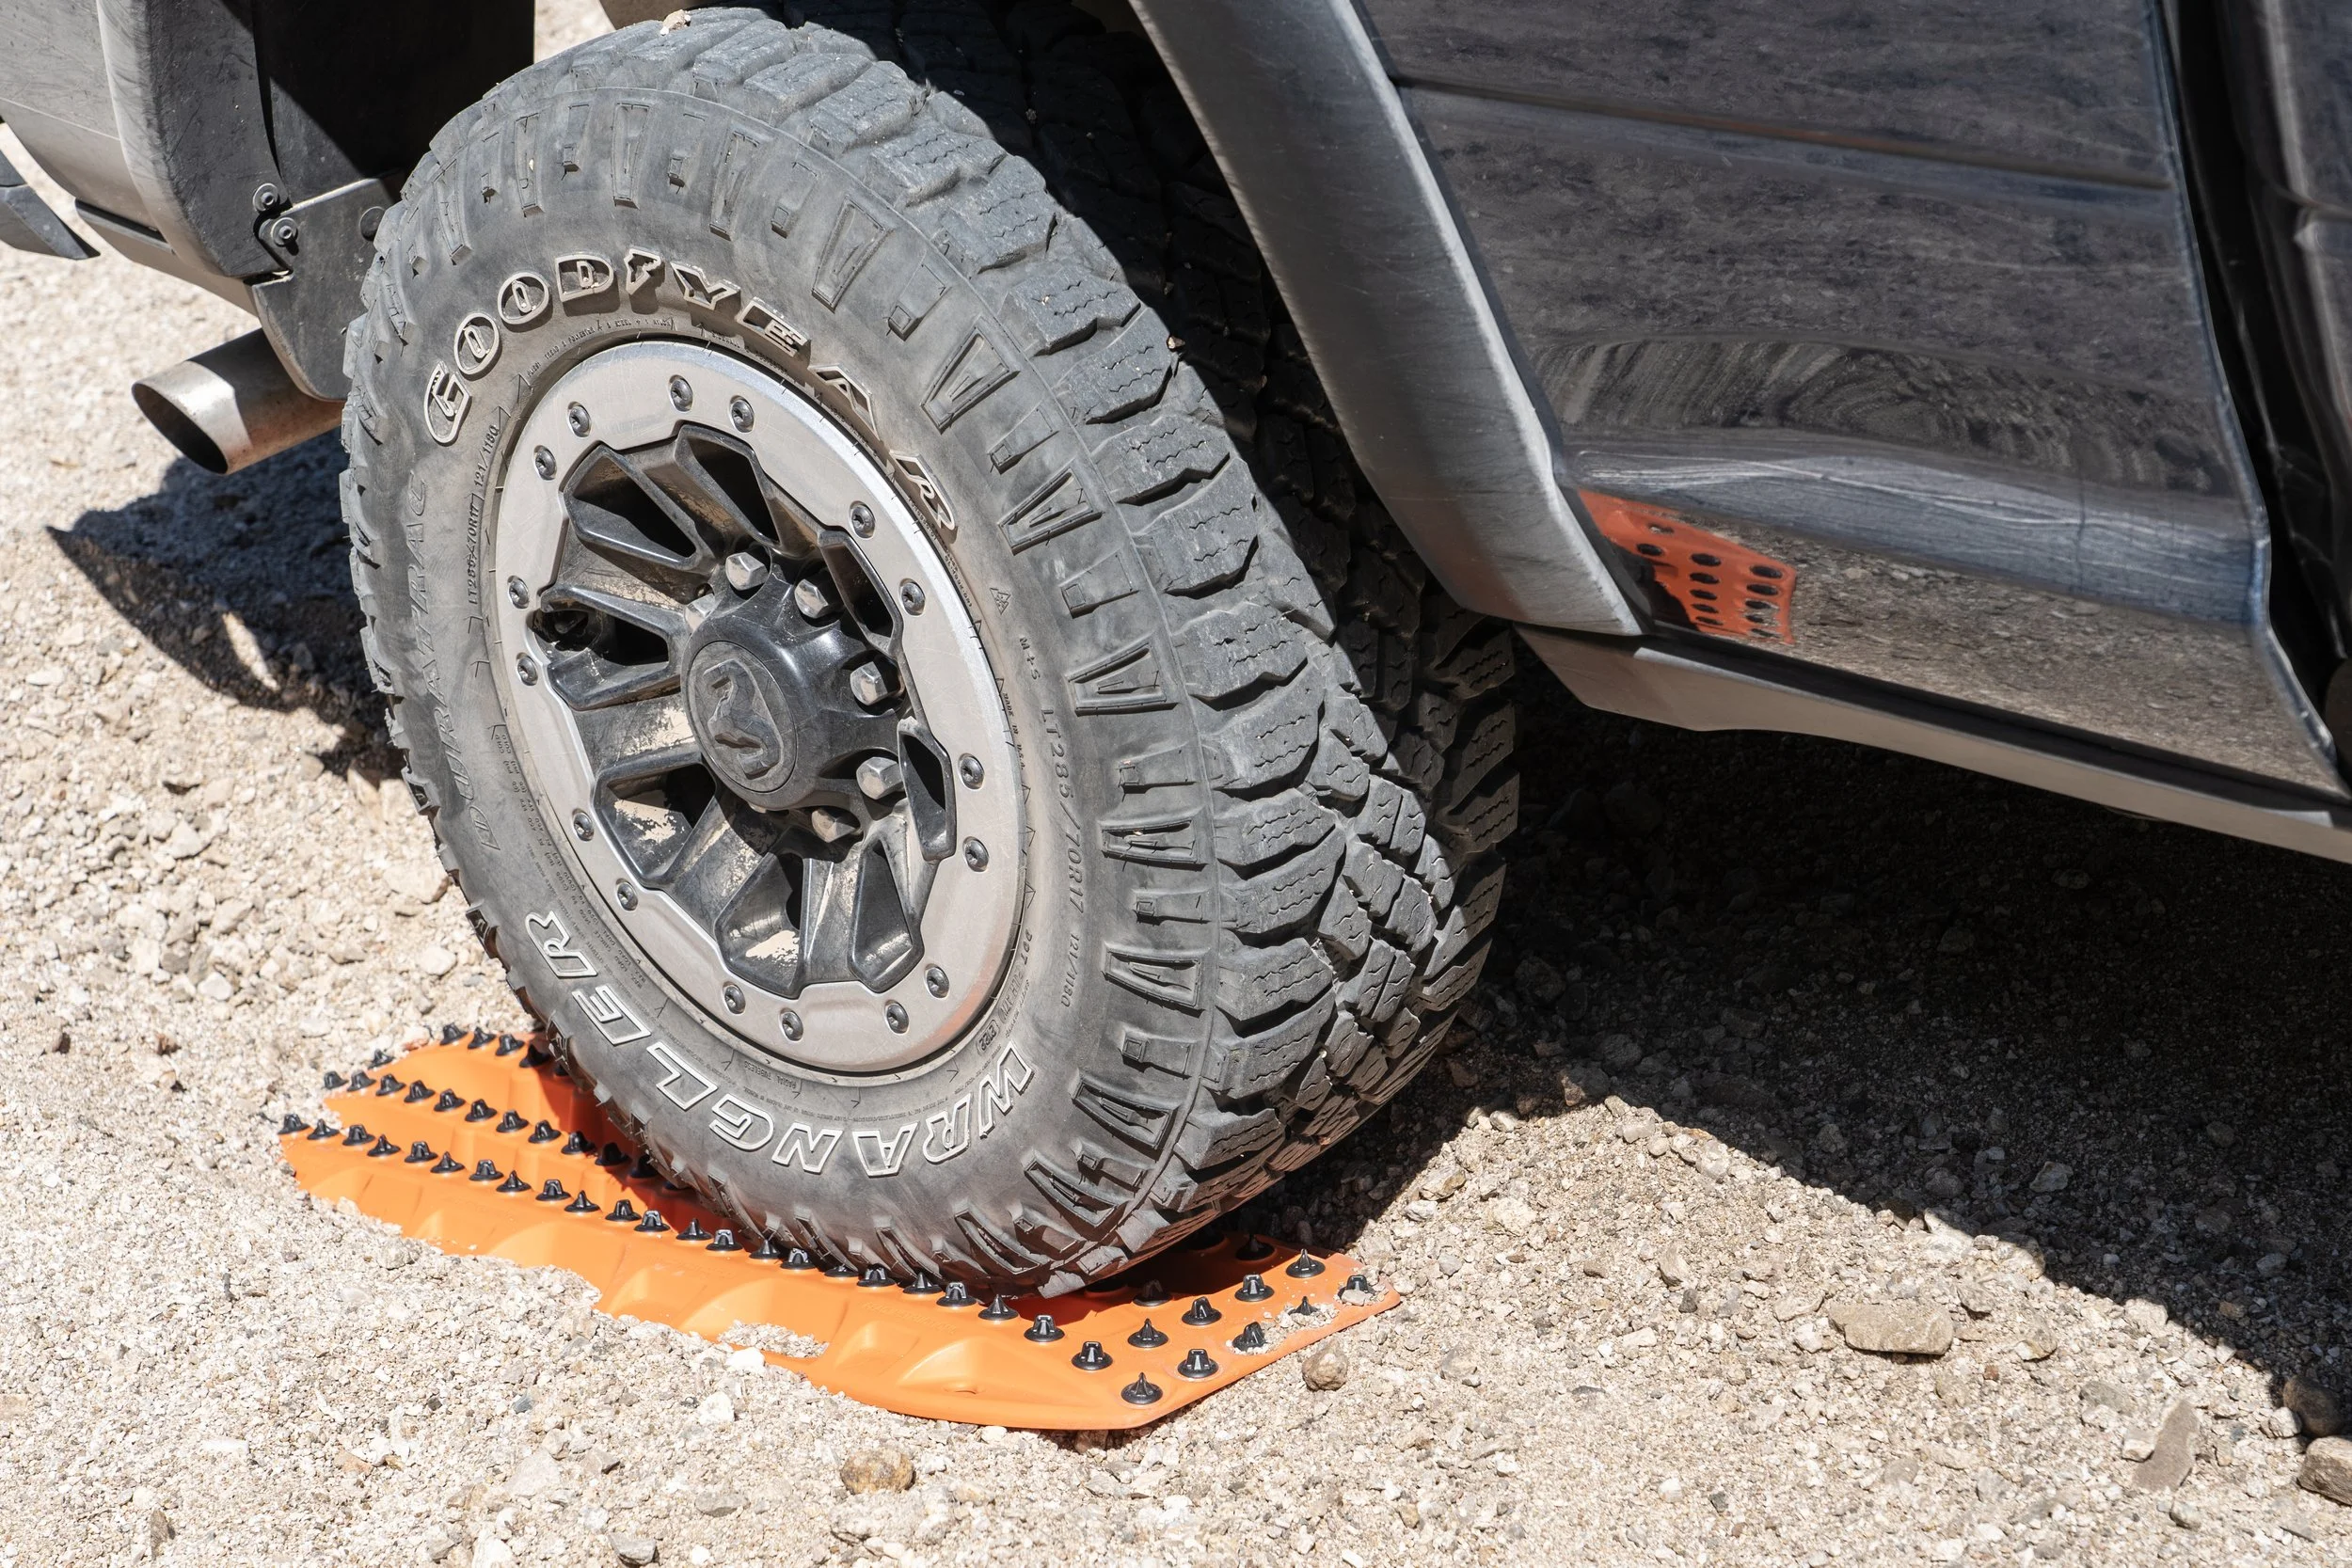
Traction board recovery: Go slow and get it right the first time
I teach a simple rule for retrieving a vehicle bogged in sand: The slowest recovery is usually the fastest, because it works right the first time.
Time after time I watch people mildly bogged in sand get out the MaxTrax (or whatever traction boards they have), dig a peremptory trench in front of the sunken tires, cram the board in, and give it the beans, which results in nothing but the tires digging in deeper because they aren’t actually in contact with the board. Or, worse, the tire will be barely on the edge, and the spinning tread will fail to catch but will melt off the first row of spikes on the board, even alloy versions. The vehicle is now stuck worse than before and the expensive traction boards are damaged.
This won’t work.

The tire is not in contact with the board. It will only sink farther.
Don’t do it that way. Take the time to fully dig out in front of the tire, enough so the traction board makes full contact. If possible you want the trench dug out so far that the tire wants to roll down onto the board. And make sure the trench has the gentlest possible slope. Don’t do what one poor fellow I watched did and scoop out all the sand into a nice little mound in front of the trench, right where the tire needed to go.

This will work. Board in firm contact with the tire, and a gentle ramp to climb.
If you’re solo and need to keep moving once you’re free, don’t forget to put the shovel back in the vehicle, and leash the traction boards to your rear bumper so they’ll follow you like obedient dogs until it’s safe to stop.
Americans always seem to be embarrassed by getting stuck, when in fact it’s a normal part of exploration. Adopt the attitude of my British friends, who use the mildest bogging as an excuse to take a break and brew some tea.
The most useful tool I've bought in a long time . . .

For decades I’ve used cheap plastic bolt checkers, with plain holes to confirm diameter and simple scales to measure thread pitch.
This is way, way better. It’s all-metal, and has actual bolt studs and threaded holes to instantly identify nearly any metric or SAE fastener. It took me seconds to identify a couple of weird bolt sizes (3/8 x 24, 1/4 x 28) on my 1976 Triumph TR6, which could theoretically have a mixture of SAE and metric fasteners.
It has holes at each corner, so if you wish you could mount it on the wall behind your workbench.
Made by Hillman. I found it at an Ace Hardware for $30, but you can probably get it or a similar model on Amazon. Highly recommended.

There are chocks . . . and chocks (I needed the latter)

Inadequate . . .
Now and then it’s good to be reminded of the laws of physics.
A few weeks back I conducted a training weekend for a lovely couple who had recently purchased a very well-optioned Sportsmobile. They wanted to become familiar with its capabilities (and theirs), to learn recovery techniques, and especially to learn the use of their winch, an accessory new to them both.
We spent the first day, Friday, driving and marshaling, and I think hugely improved the confidence of both of them, in addition to opening their eyes as to just how capable a Sportsmobile can be despite its size.

Saturday was winching day. I’d picked a dead-end bit of trail where we wouldn’t be in anyone’s way who happened to pass. It was a hill steep enough to actually work the winch, but not so steep as to be intimidating. The Sportsmobile was equipped with a Warn 12,000-pound winch and synthetic line. For an 11,000-pound vehicle that’s marginal if one applies the standard one and one-half times GVW formula for speccing a winch’s capacity, but we discussed ways to ameliorate this by running out more line and, especially, rigging a double-line pull whenever possible.
The only trees available were both marginal in size and behind a barbed-wire fence, so I set up my FJ40 as an anchor, facing down the hill at the top of the slope.
It was then I realized I’d forgotten my set of Safe Jack chocks, the substantial ones I normally use for winching. All I had with me were the smaller folding chocks I keep in the vehicle for tire-changing duty and the like. No problem, I figured—I set the folding chocks in front of the front tires of the Land Cruiser, and we lugged a couple substantial rocks to put in front of the rear tires. I was in low range, reverse selected, engine off and parking brake pulled out stoutly.
The first, single-line pull proceeded without drama. The winch did not seem to be working over hard (although I remarked that it was one of the loudest winches I’d ever heard). So we re-rigged for a double-line pull, running the Sportsmobile’s line through a 7P recovery ring linked to one of the 40’s front recovery hooks, and back to the Aluminess bumper of the van. I stood to one side and directed while Emmett sat in the Sportsmobile’s driver’s seat and operated the winch remote. He began to spool in and the van crept slowly up the hill.
For about five feet. Then a front tire happened to hit a bit of a rock ledge I’d failed to notice, perhaps eight inches high. The Sportsmobile came to a halt—but the winch, of course, didn’t.
Even as I was raising my fist to give the “stop!” signal, I turned to see my 40 pulled gently but inexorably over the folding chocks, which collapsed as if they’d been soda cans. Behind them the rocks in front of the rear tires had held, but were themselves being dragged with the vehicle.
The winch stopped, and I signalled Emmett to apply the brake and shift to park, then let out some slack in the winch line.
The Land Cruiser had only moved about eight inches. Had we for some reason continued to power the winch, it would simply have kept on being dragged slowly across the ground; there was no chance of it careening out of control. Nevertheless, it was a good lesson in the force an 11,000-pound vehicle and a roughly 24,000-pound-equivalent double-lined winch can put on a 4,000-pound vehicle, even on a moderate incline. The math is pretty simple.

These would have been better. From Safe Jack.
What could I have done differently? Having the larger and sturdier chocks would have made a difference, as might using big rocks instead of the little chocks. Even putting the rocks we used in front of the front tires, and the small chocks under the rear tires, might have made a difference, as the front of the Land Cruiser was being pulled slightly downward in addition to forward. However, a more secure option would have been to daisy-chain the 40 by its back bumper to the base of one of the trees on the other side of the fence with the endless sling I had on hand, then pull forward until the sling was tensioned, then chock.
A good lesson that there’s no such thing as “enough” experience, and there’s never a time to stop learning.
For much more on the forces involved in winching, please read this.
Safe Jack’s heavy-duty folding chocks are available here.
A cheap, bombproof lens-shipping case.

For the first 30 years of my career as a writer/photographer, all my camera gear went with me on airlines as carry-on luggage, packed securely in a Pelican case. For 30 years, there were no enforced weight limits for carry-on items, so no one ever noticed that the loaded case eventually weighed upwards of 33 pounds. That changed on one flight to Australia, when the check-in clerk asked to weigh it, and actually laughed out loud when she hefted it. Pointing to the sign I hadn’t noticed that said, MAXIMUM CARRY ON WEIGHT 7KG (15 pounds), she demanded I offload half its contents into our checked baggage. There followed five minutes of panic as we rolled a couple thousand dollars worth of DSLR equipment into our clothing, stuffed it into the middle of our checked duffels, and prayed for the best. (Walking past the business-class check-in we noticed that the limit there was 14kg or 30 pounds, sort of giving the lie to our clerk’s assurance that the limits were to “balance the load.)
We were lucky and everything made it to Sydney intact, but it was obvious a new approach was going to be necessary given increasingly widespread carry-on weight limits. Henceforth I carried a single camera body and a couple lenses on board, and packed the rest inside hard cases in our luggage, knowing it would inevitably be subjected to casual treatment by baggage handlers who, even if they were conscientious, were invariably pressed for time.
Early this year I picked up one of Sony’s brilliant 200-600mm zoom lenses for my Alpha 9 camera, and decided it needed extra protection—and thanks to my long-past life as a fixer-of-most-things, I knew how I wanted to go about it.

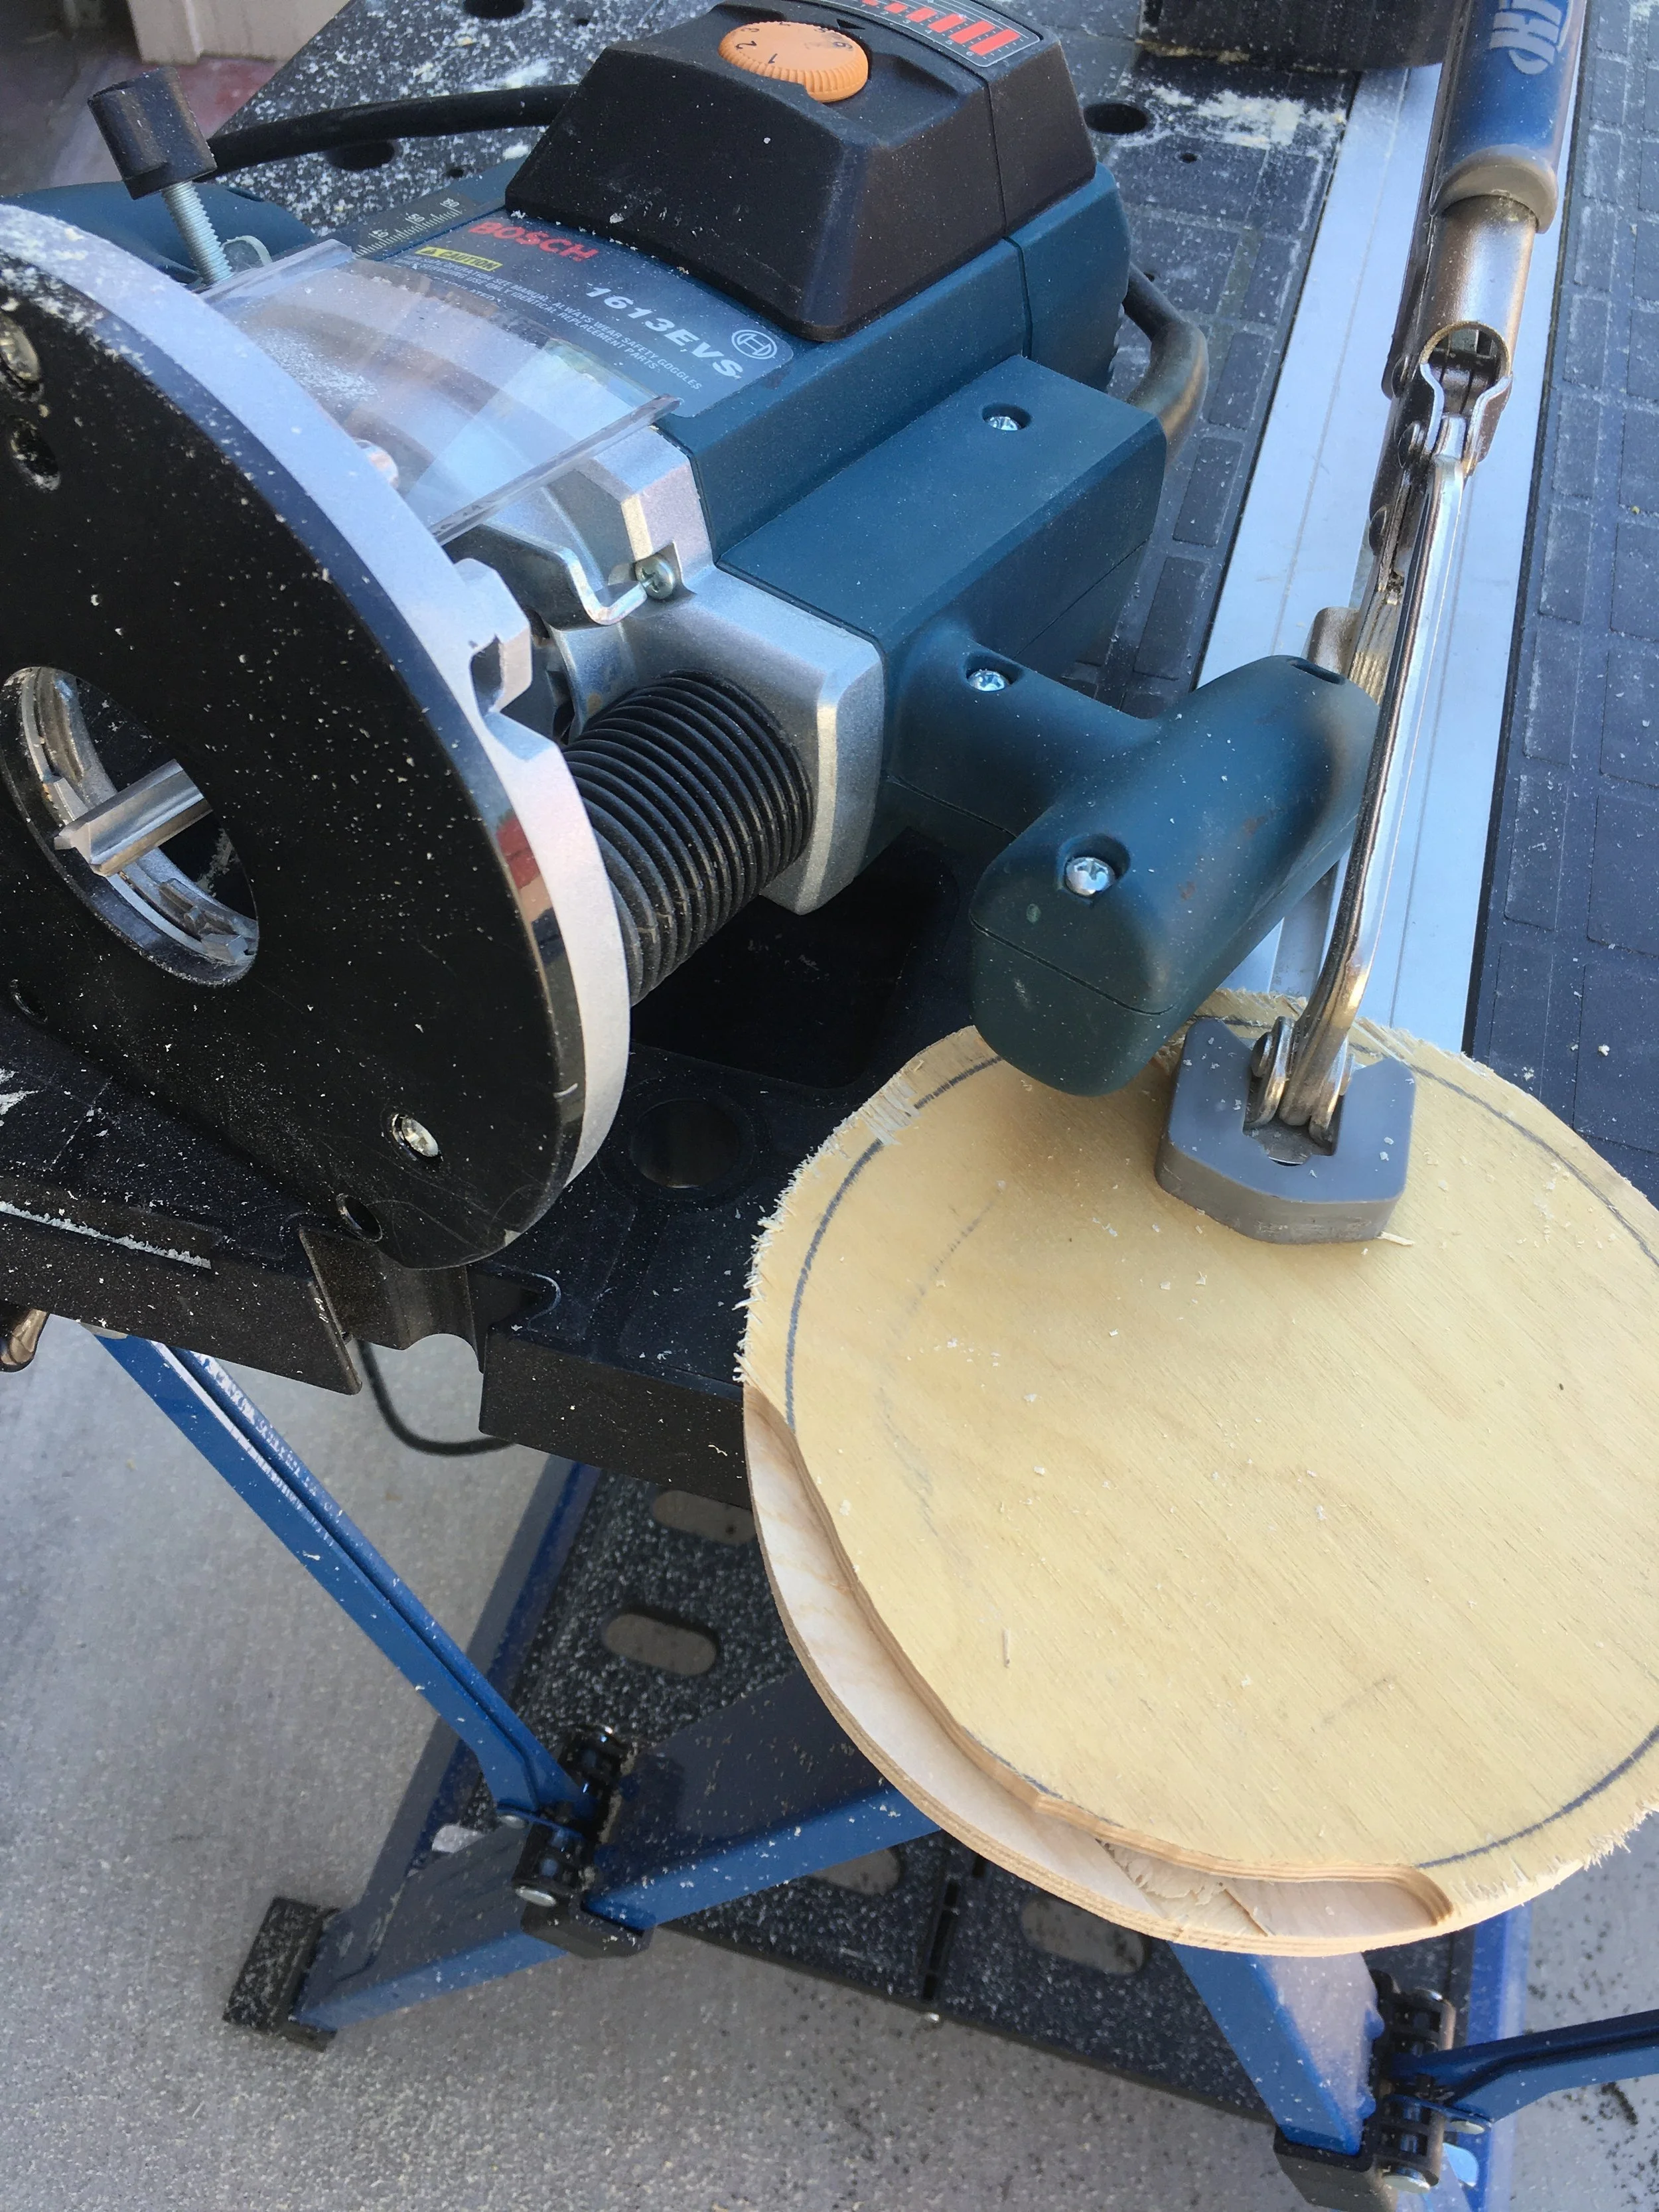
At Lowe’s Home Improvement I picked up an ABS stand pipe, six inches in diameter and 24 inches long, for the princely sum of $8.95 plus tax. Back home I picked out a scrap piece of 3/4-inch plywood (it happened to be Baltic birch but ordinary plywood would suffice). I traced the outer circumference of the pipe twice, then traced another circle inside each, a bit more than the thickness of the pipe wall. With a jigsaw I cut out each circle, then used a router to relieve the outer edge so each cap would fit securely into each end of the pipe.
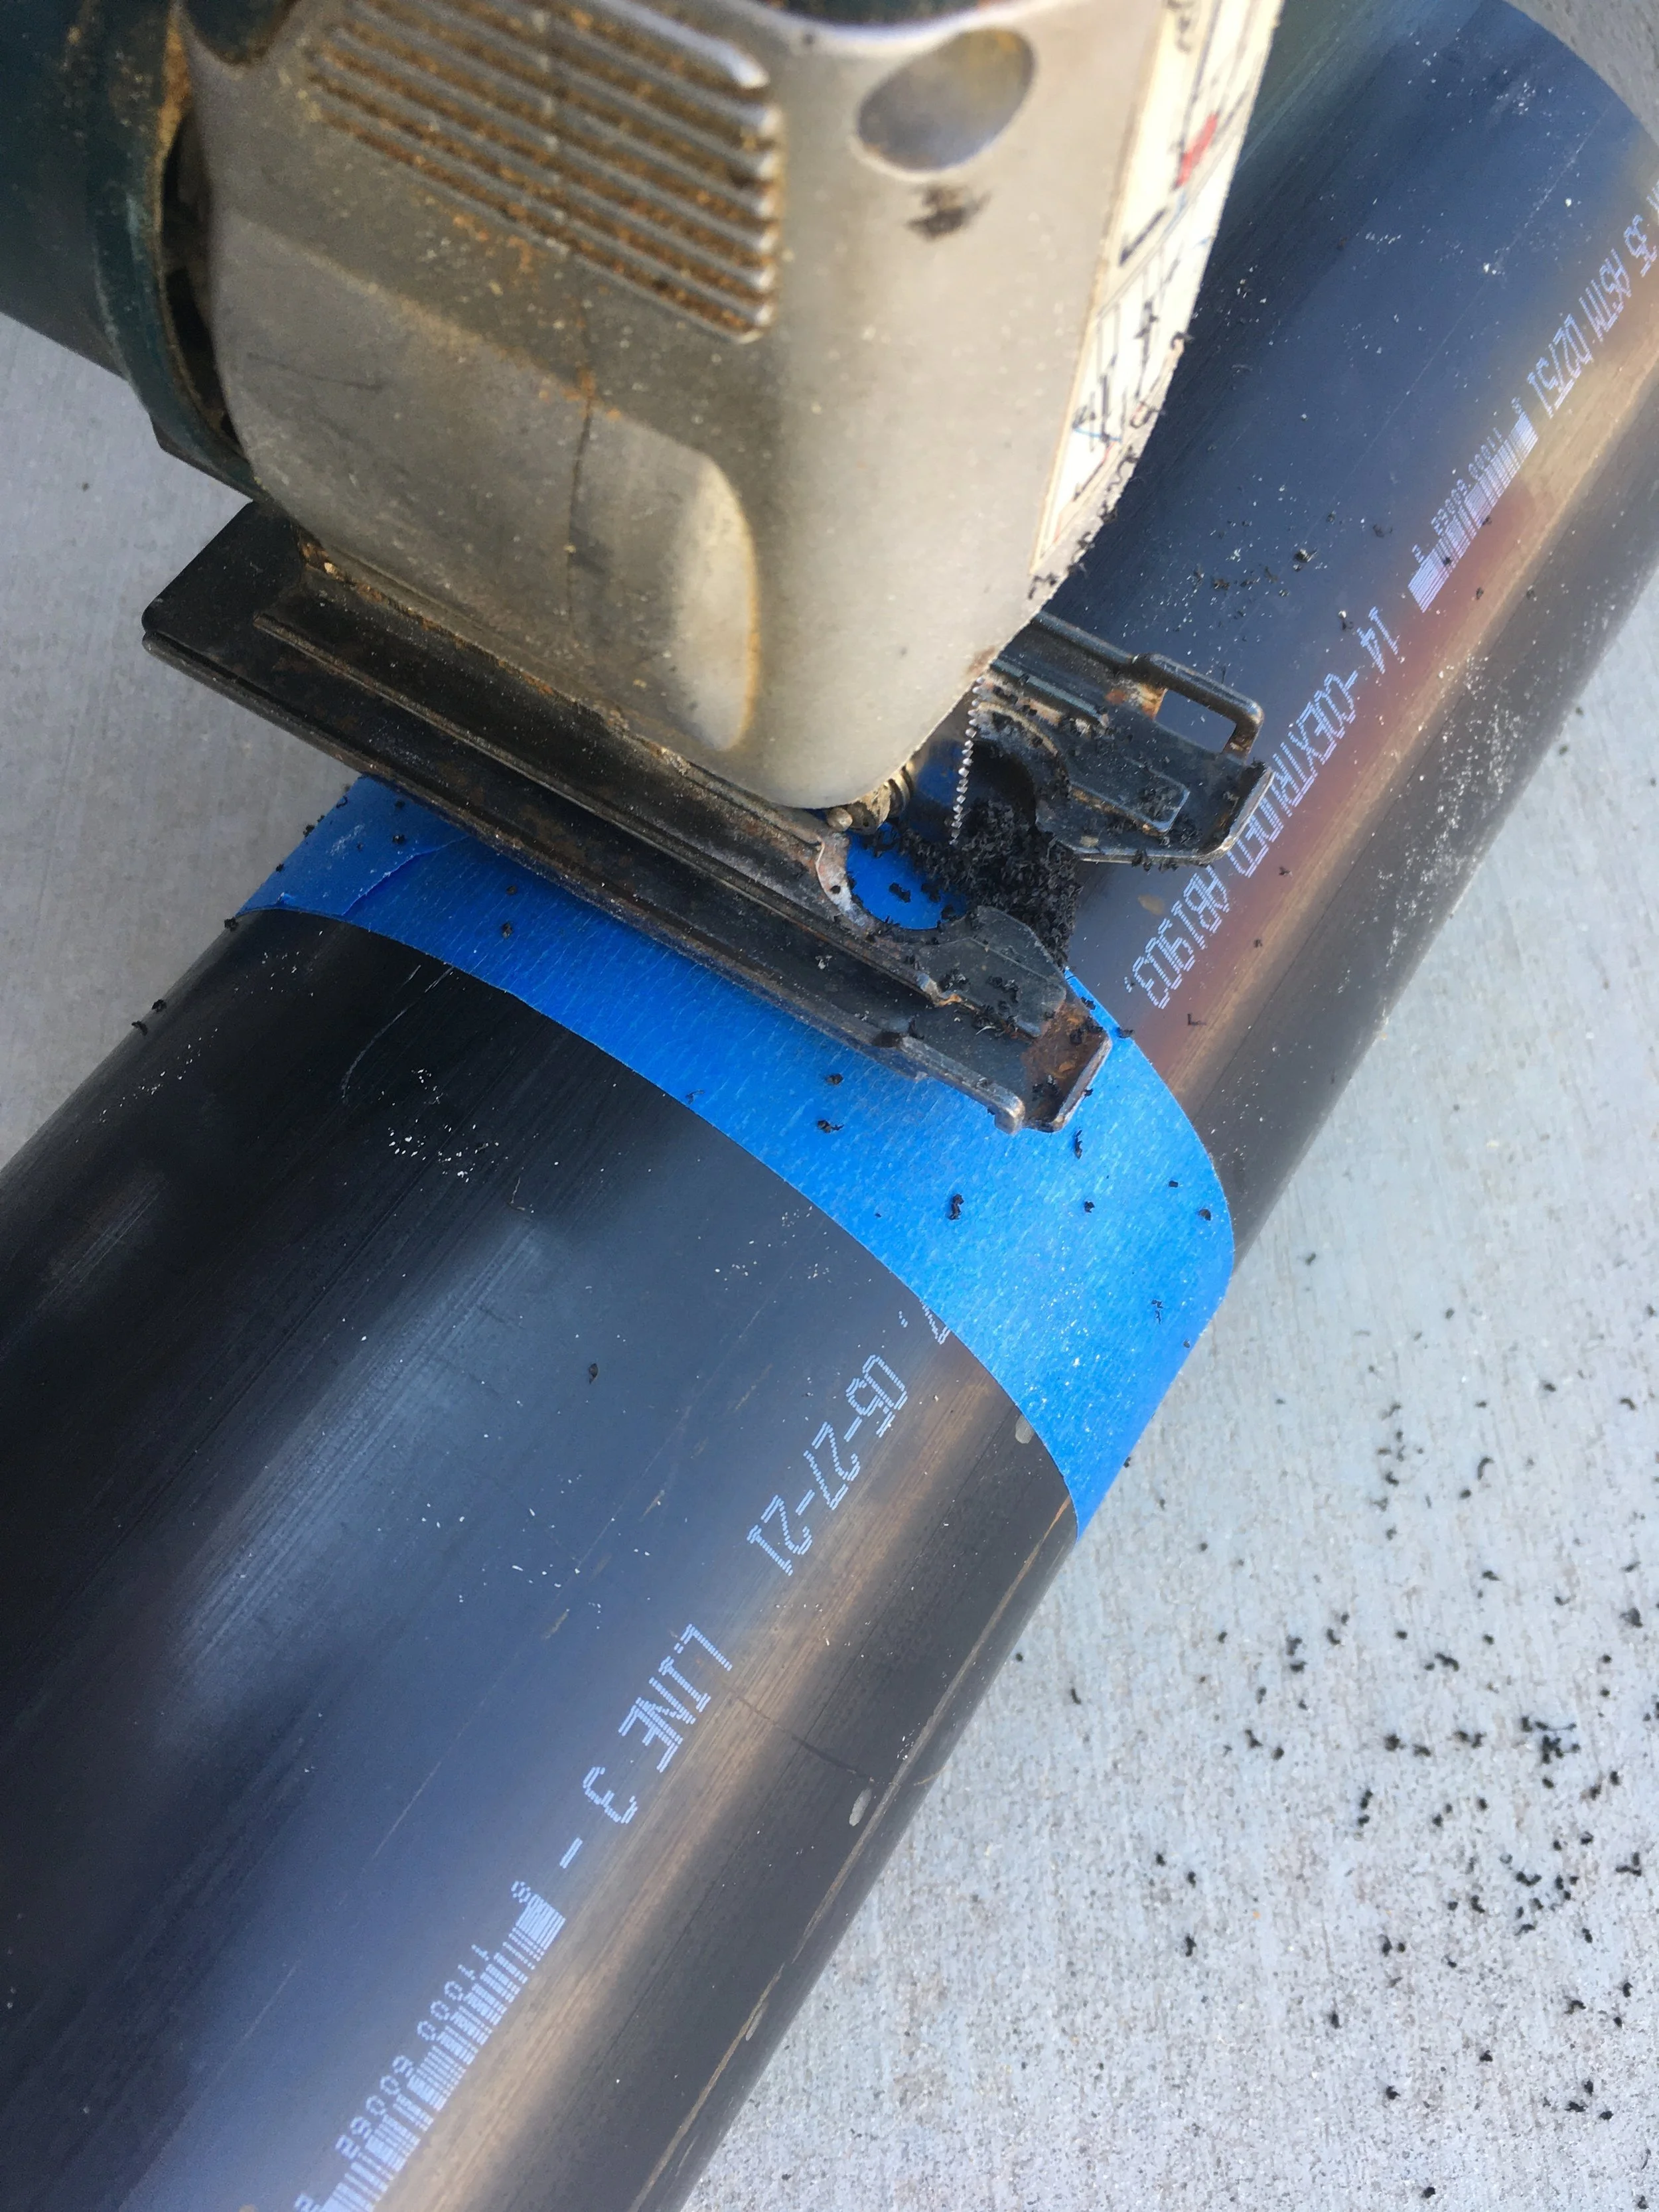
Next I set up the Sony lens next to the pipe, gauging its length with space left over for padding on each end. I marked the spot with a circumference of painter’s tape and trimmed the pipe with the jigsaw.
Nearly finished. I made sure the length was good, then used Gorilla tape to secure the “bottom” cap to the pipe, first with a piece around the edge, cut and overlapped thus:
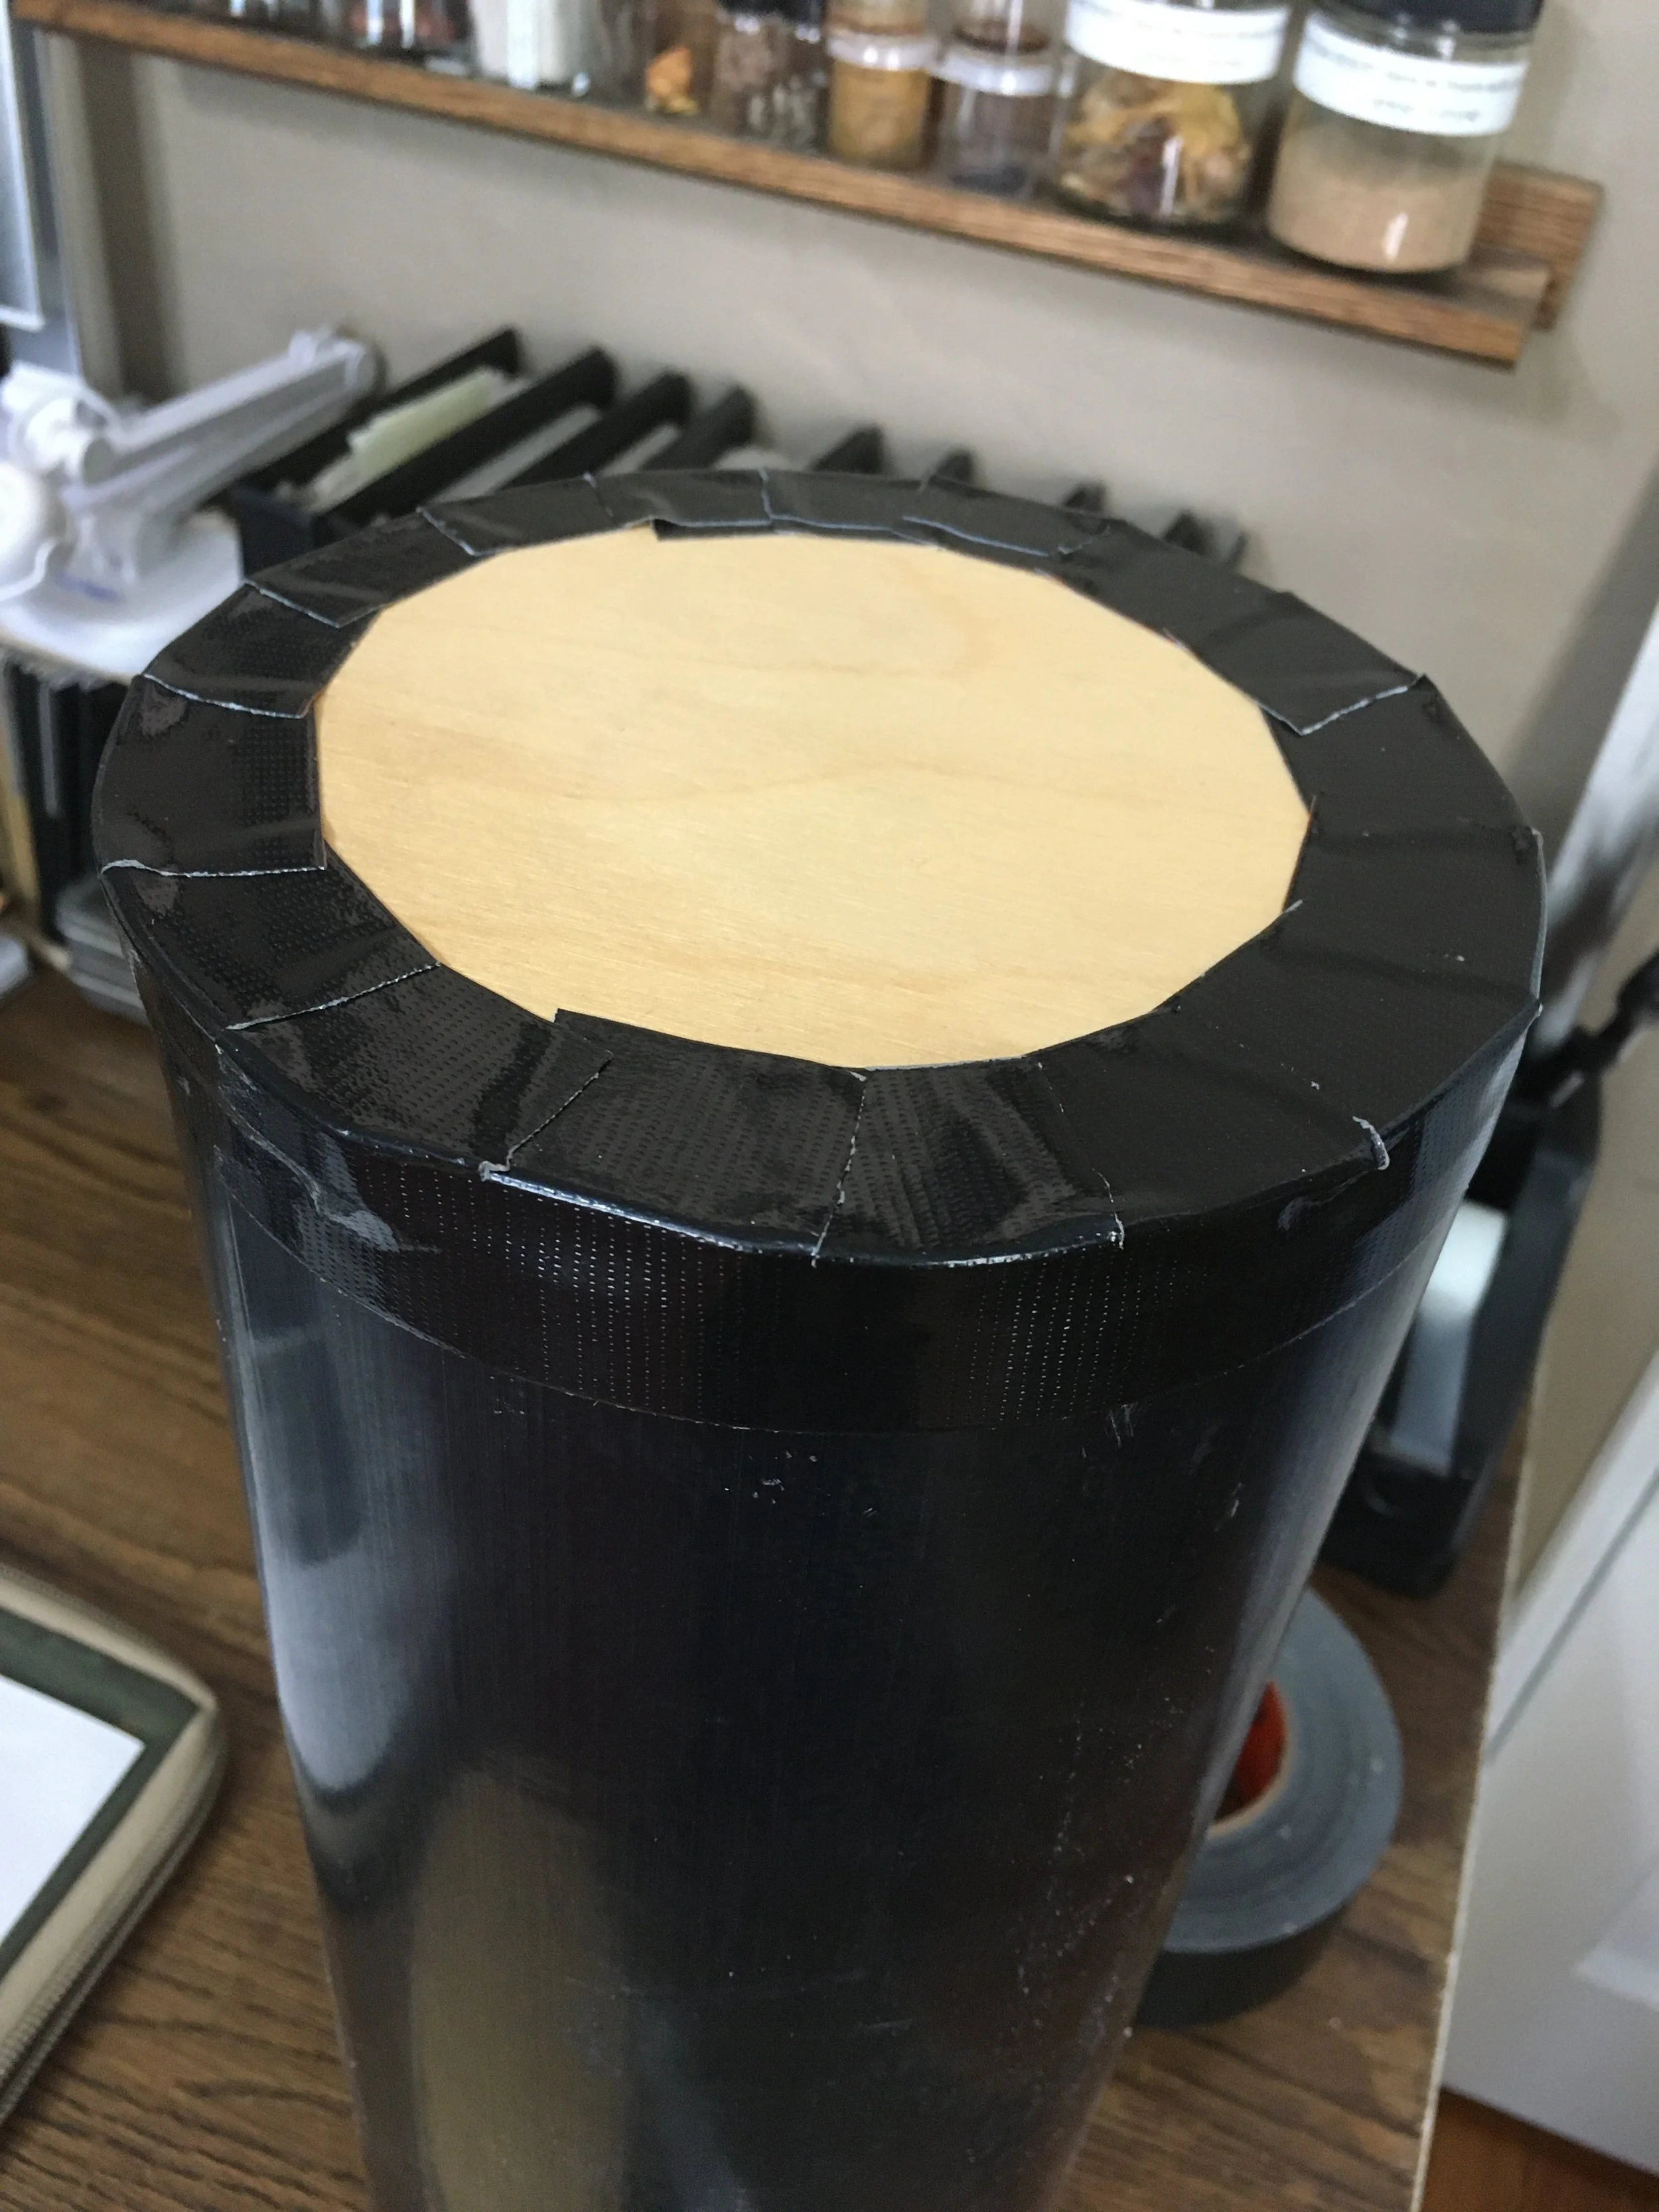
. . . then with strips all the way across.
All that remained was to load the lens—wrapped in a plastic bag to keep it dust-free—well-surrounded by packing peanuts. On top I inserted the remainder of the roll of tape to re-secure it on the way home—and also, I hoped, to allow anyone who might open it for inspection to re-secure it.
With the top taped shut, the case felt utterly bombproof. You’d have to run over the thing with a tractor to damage it (perhaps not beyond the realm of possibility at a couple airports I know, but . . .). I still marked the outside with warnings.
Of course the case survived multiple flights to, from, and within Alaska with zero issues, and for once we felt zero stress consigning such a piece of equipment to the vagaries of checked luggage.
Total out-of-pocket cost: $8.95. Plus tax.
Touching up 48-year-old paint

Most people find it hard to believe my 1973 FJ40 still wears most of its original paint (aside from the newer doors I installed and had matched, and a couple of repaired areas). Despite having sat uncovered in the Arizona sun for at least 26 years of its life, the paint still glows with a hand application of Classic Car Wax (until the brand disappeared) or Mother’s California Gold—no ceramic coatings, no polymers, just good old-fashioned “wax on; wax off” cleaner and carnauba. I’ve lost track of those who ask me where I had my Land Cruiser restored.
That is, until they walked around front.
Thanks to the thousands of miles of dirt roads the 40 has covered, it has over the decades collected what seems like thousands of tiny stone chips, which stand out like a bad case of acne once one gets closer than ten feet. I imagine as the paint has aged it has probably become more brittle and thus more prone to chipping, as well. When I had the new doors painted a few years ago I got an extra pint of the match and painstakingly dabbed dozens of chips on the edge of the hood, the front clip and fenders, and the windshield surround. In the intervening years, however, another couple hundred have appeared. The can of paint had long since petrified, so I went online to one of the paint companies specializing in touch-up matching, and looked up the chart for a 1973 Land Cruiser in white. The first company led me to a color coded 040, so I ordered a tiny $20 bottle of the stuff.
Not even close. It was way, way too white.
Back to the research. Several people online swore my color should be T12, Cygnus White, and linked me to a color chart of 40-series colors in the early 70s. And there it was, overlapping from 1970 to 1975. Perfect. Except . . . in looking for the paint I found this offering at Cruiser Corps:

Well, my fiberglass top is and always has been a distinctly whiter shade of white than the body, which is distinctly off-white. Still, several forum members swore Cygnus White was the body color on their early 70s FJs. So, I ordered another $20 mini bottle.
And it, too, was too white. Not, perhaps as too-white as the first one, but not a match. Now I was down 40 bucks with nothing to show for it. Back to the forums, and this time someone suggested Arctic White, 022, which on another chart was listed as a 1973 color for Toyotas—but not specifically Land Cruisers. Ugh. Do I risk another 20 bucks for a few CCs of maybe?

No. I decided on a different route. I pulled off the locking fuel filler lid and took it up to Finish Master, a professional auto paint supply store in Tucson. When I explained to the counter guy—whose name I should have recorded—he at first demurred. “We’re mostly a professional supply source; we don’t usually do small batches. And what we make is designed for spraying; it’s pretty thin. What kind of vehicle is it?”
When I said, “It’s a 48-year-old Land Cruiser,” he perked up. “Really?” He thought for a moment. “Well, look, I can match the paint with our camera, and you could just build up layers if it’s too thin. But the smallest amount I can sell you is a quart, and it will be $40.”
“Done,” I said. He thought for another moment, then said, “You know, since you don’t need that much for stone chips, I could take some of it out and make up two cans of aerosol. It would be an extra $24.”
“Seriously?” I said. “That would be great!”
He took the filler flap and scanned it. “When can I come back?” I asked.
“Do you have ten minutes? We’ll make it up right now.”
This just kept getting better. I waited; ten minutes later I had my paint, which proved to be an excellent match.

I used the can to dab chips on the edge of the hood and fenders. I tried to fill in each one to slightly above the level of the surrounding paint, and then sanded it all flush with 1500-grit sandpaper, brought back the finish with rubbing compound, and finally applied the Mother’s California Gold.

Looking at the front apron, which was particularly loaded with acne, I decided to try the aerosol. So I pulled off the apron, cleaned it and sanded it with 800-grit wet-and-dry paper, and started spraying on layers. The paint went on well but, as I’d been warned, in thin layers, and the stone chips still showed up behind it, so I bought some lightweight polyester filler and faired in most of the tiny nicks, then resanded and repainted. After three or four more coats I smoothed out the paint with rubbing compound, then went at it with the Mother’s California Gold.

And, well, it looked pretty darn good when I was finished—certainly not the mirror finish a professional painter would have achieved, but it shines well and looks ten thousand percent better than it did. Since it is such a discrete part of the front of the vehicle, any slight contrast with adjoining panels is difficult to see.
Overall the improvement is astonishing. From a couple of feet away you can see the repairs, but from ten the work is nearly invisible.

The five best modifications . . . to leave off your expedition vehicle

Expedition travel is a different universe than weekend four-wheeling. When you’re just out for a few days near home—camping, challenging a few trails—breaking down is no more than an inconvenience. But if you’ve embarked on a long journey far from familiar territory, perhaps in another country or on another continent, a breakdown can endanger the trip—or even your safety if you’re traveling solo and are tens or hundreds of miles from assistance. For journeys such as this, your priorities regarding vehicle modifications and accessories need to change, from an emphasis on maximum 4WD performance (and, let’s be honest, maximum looks) to reliability and durability. A lot of the products that enhance the former can seriously impact the latter. Here are a few of the most important.
Big tires. Everyone loves the look of big, aggressive tires on a 4x4, and in certain situations they have advantages in ground clearance, traction, and the ability to successfully climb ledges. But big, heavy tires extract a heavy price. They put massive additional stress on your suspension, steering components, and bearings. They hurt fuel economy and retard acceleration—and if you install higher-ratio differential gears in an attempt to compensate for these downsides, you’ll simply weaken the pinion gear, which has to be reduced in size to gain the higher ratio. Larger-diameter and heavier tires also increase braking distances. Remember that Land Rovers conquered Africa on skinny 7.50 x 16 tires, and Land Cruisers conquered Australia on the same size. Besides, if you destroy one of your 38s in Botswana I guarantee you won’t find a replacement in Maun. They know better there. For more details on the downsides of big tires, see here.

Installing higher ratio ring and pinion gears results in a smaller, weaker pinion gear.
Big suspension lift. As with tires, there are some advantages to a raised suspension for rock crawling or mud bogging. Not on an expedition. You want to keep your center of gravity as low as possible to ensure maximum fuel economy and safe handling while carrying the equipment and rations needed for a long journey. Big suspension lifts increase angles on rod ends and driveshaft joints, leading to premature wear. You’ve probably seen photos of the Camel Trophy Land Rovers that challenged some of the toughest terrain on the planet—they all rode on stock-height suspension. If you really think you need some lift, keep it to a couple of inches. The expedition experts at ARB know this—their Old Man Emu suspension kits are all in the two-inch range.

Race shocks. Along with a suspension lift, many owners install long-travel shocks modeled after racing versions, with all-metal heim-joint ends, external-bypass tubes, and remote reservoirs. Shocks like this are designed to deal with the kind of high-speed, high-amplitude movement common in off-road races—exactly what you’re not going to be doing on a long journey in a loaded vehicle. You’re better off using a simple shock with enough oil capacity to stay cool after a full day of driving over washboard or rutted roads and trails. Standard rubber bushings last longer and are far easier to replace than heim joints, and help dampen road vibrations. Exposed chrome shafts quickly become sandblasted in the bush; they should be shielded or completely covered with a sheath or bellows.
The best expedition shock I’ve ever used is the Koni Heavy Track Raid, an utterly boring-looking thing next to the racer models, but with a huge oil capacity capable of soaking up mile after mile of abuse under a fully loaded Land Rover 110. ARB’s (Old Man Emu) BP51 is another excellent shock, employing internal bypass valves that allow adjustment of both compression and rebound without the exposed bits of external pypass tubes. Some BP51 models, it appears, come with heim joints; I’d avoid those. Sadly neither of these shocks is available for my FJ40 or I’d have them on it (although the standard OME Nitrocharger has performed well for me for decades).

The Koni Heavy Track Raid relies on robust twin-tube design and massive oil volume to handle torturous conditions.
Wheel spacers. A wheel spacer is a disk—usually aluminum—that fits between the hub and the wheel to increase track width and reduce lateral load transfer, which can fractionally help handling and stability. They give your truck a more aggressive look, too. Unfortunately, they also put significant extra stress on wheel bearings, since as you move the wheel farther away from the bearing you’re essentially lengthening a very strong lever. You’re also increasing the scrub radius, which is the distance between where the pivot point of the kingpin intersects the ground and the center of the tread, as well as increasing the kingpin offset. All of this affects the steering and suspension negatively, and will wear components you do not want to have to replace in a spot where “Amazon” only refers to a large river.

Every time I criticize wheel spacers I get emails from guys (you know who you are) who’ve had them on for X-hundred thousand miles and never had a problem. I don’t doubt this. But physics is physics, and putting extra leverage on your wheel bearings and steering components does them no good, period. (I know a guy who smoked two packs of cigarettes a day and lived to 80, too. Doesn’t prove it’s a good idea.)
“High-performance” air intakes. Intake systems that replace the stock air filter with one designed—or at least hyped—to produce more horsepower are frequently much worse at actually filtering air, and are often more vulnerable to water intrusion during a crossing. Those advertised horsepower gains are measured on a dyno—about as far from expedition reality as possible. The truth is, most factory intake systems are carefully routed to ingest cold outside air while minimizing the danger of water ingress. You can, if you choose, install a snorkel, which contrary to belief does not automatically turn your vehicle into a submarine, but does help get the intake above some ground-level dust.

Roof rack. Okay, I said five, but here’s a bonus. Do without a roof rack if you can. Ah, but what about the Camel Trophy Land Rovers I just mentioned? They looked awesome under those racks piled high with jerry cans and PelicanPelican cases, right? True, but, first, the CT vehicles usually had two team members plus two journalists inside; they were operating in extremely remote terrain, and and simply had to carry extra gear on the roof. More important, those vehicles all too frequently ended up on their sides during demanding special tasks. You don’t want to do that, because you won’t have 15 other Camel Trophy vehicles to help you get back on all four wheels.

Excess roof loads negatively affect handling and fuel economy, and everything strapped up there is vulnerable to casual theft. It’s even bad for braking: Weight up high tends to pitch the vehicle forward under braking, unloading the rear tires. If you absolutely need a roof rack, keep the load as light as possible—the weight of the rack itself plus, say, a tent is about maximum for safety’s sake. Some of the current minimalist aluminum racks from Front Runner and ARB don’t add much mass or bulk themselves, as long as they’re not loaded up with 300 pounds worth of jerry cans and Hi-Lifts and solar hot shower systems.
Remember, on a long, remote journey, reliability should be your number one through five priority. Add on all the accessories you like that won’t affect that, but the best approach to most critical driveline components is to stay as close to stock as possible.

Proof in the pudding: We successfully negotiated the Abu Moharek sand sea in three Land cruisers with 1) near-stock-size tires, 2) stock suspension, 3) factory (raised) air intakes, 4) no wheel spacers, and 5) lightly loaded roof racks.
(A version of this article first appeared in Tread magazine.)
Hint: When using “Search,” if nothing comes up, reload the page, this usually works. Also, our “Comment” button is on strike thanks to Squarespace, which is proving to be difficult to use! Please email me with comments!
Overland Tech & Travel brings you in-depth overland equipment tests, reviews, news, travel tips, & stories from the best overlanding experts on the planet. Follow or subscribe (below) to keep up to date.
Have a question for Jonathan? Send him an email [click here].
SUBSCRIBE
CLICK HERE to subscribe to Jonathan’s email list; we send once or twice a month, usually Sunday morning for your weekend reading pleasure.


Overland Tech and Travel is curated by Jonathan Hanson, co-founder and former co-owner of the Overland Expo. Jonathan segued from a misspent youth almost directly into a misspent adulthood, cleverly sidestepping any chance of a normal career track or a secure retirement by becoming a freelance writer, working for Outside, National Geographic Adventure, and nearly two dozen other publications. He co-founded Overland Journal in 2007 and was its executive editor until 2011, when he left and sold his shares in the company. His travels encompass explorations on land and sea on six continents, by foot, bicycle, sea kayak, motorcycle, and four-wheel-drive vehicle. He has published a dozen books, several with his wife, Roseann Hanson, gaining several obscure non-cash awards along the way, and is the co-author of the fourth edition of Tom Sheppard's overlanding bible, the Vehicle-dependent Expedition Guide.