Tips

Hella horns

IMG_6735.JPG

The only car I’ve ever owned that had decent factory horns was a Porsche 911SC, which was equipped with proper Autobahn blasters to move inattentive slower cars into the right lane right now. All others—and especially all the Japanese makes—needed serious upgrades to perform at a level I consider acceptable. I don’t use my horn very often, but when I do I want it to capture its target’s undivided attention. This has become significantly more important in the age of texting—which studies have show to be more dangerous than drunk driving. Why? Drunk drivers, at least, are generally paying attention because they know they’re drunk and they don’t want to alert the police. Texting by definition requires one to remove all one’s attention from the road.

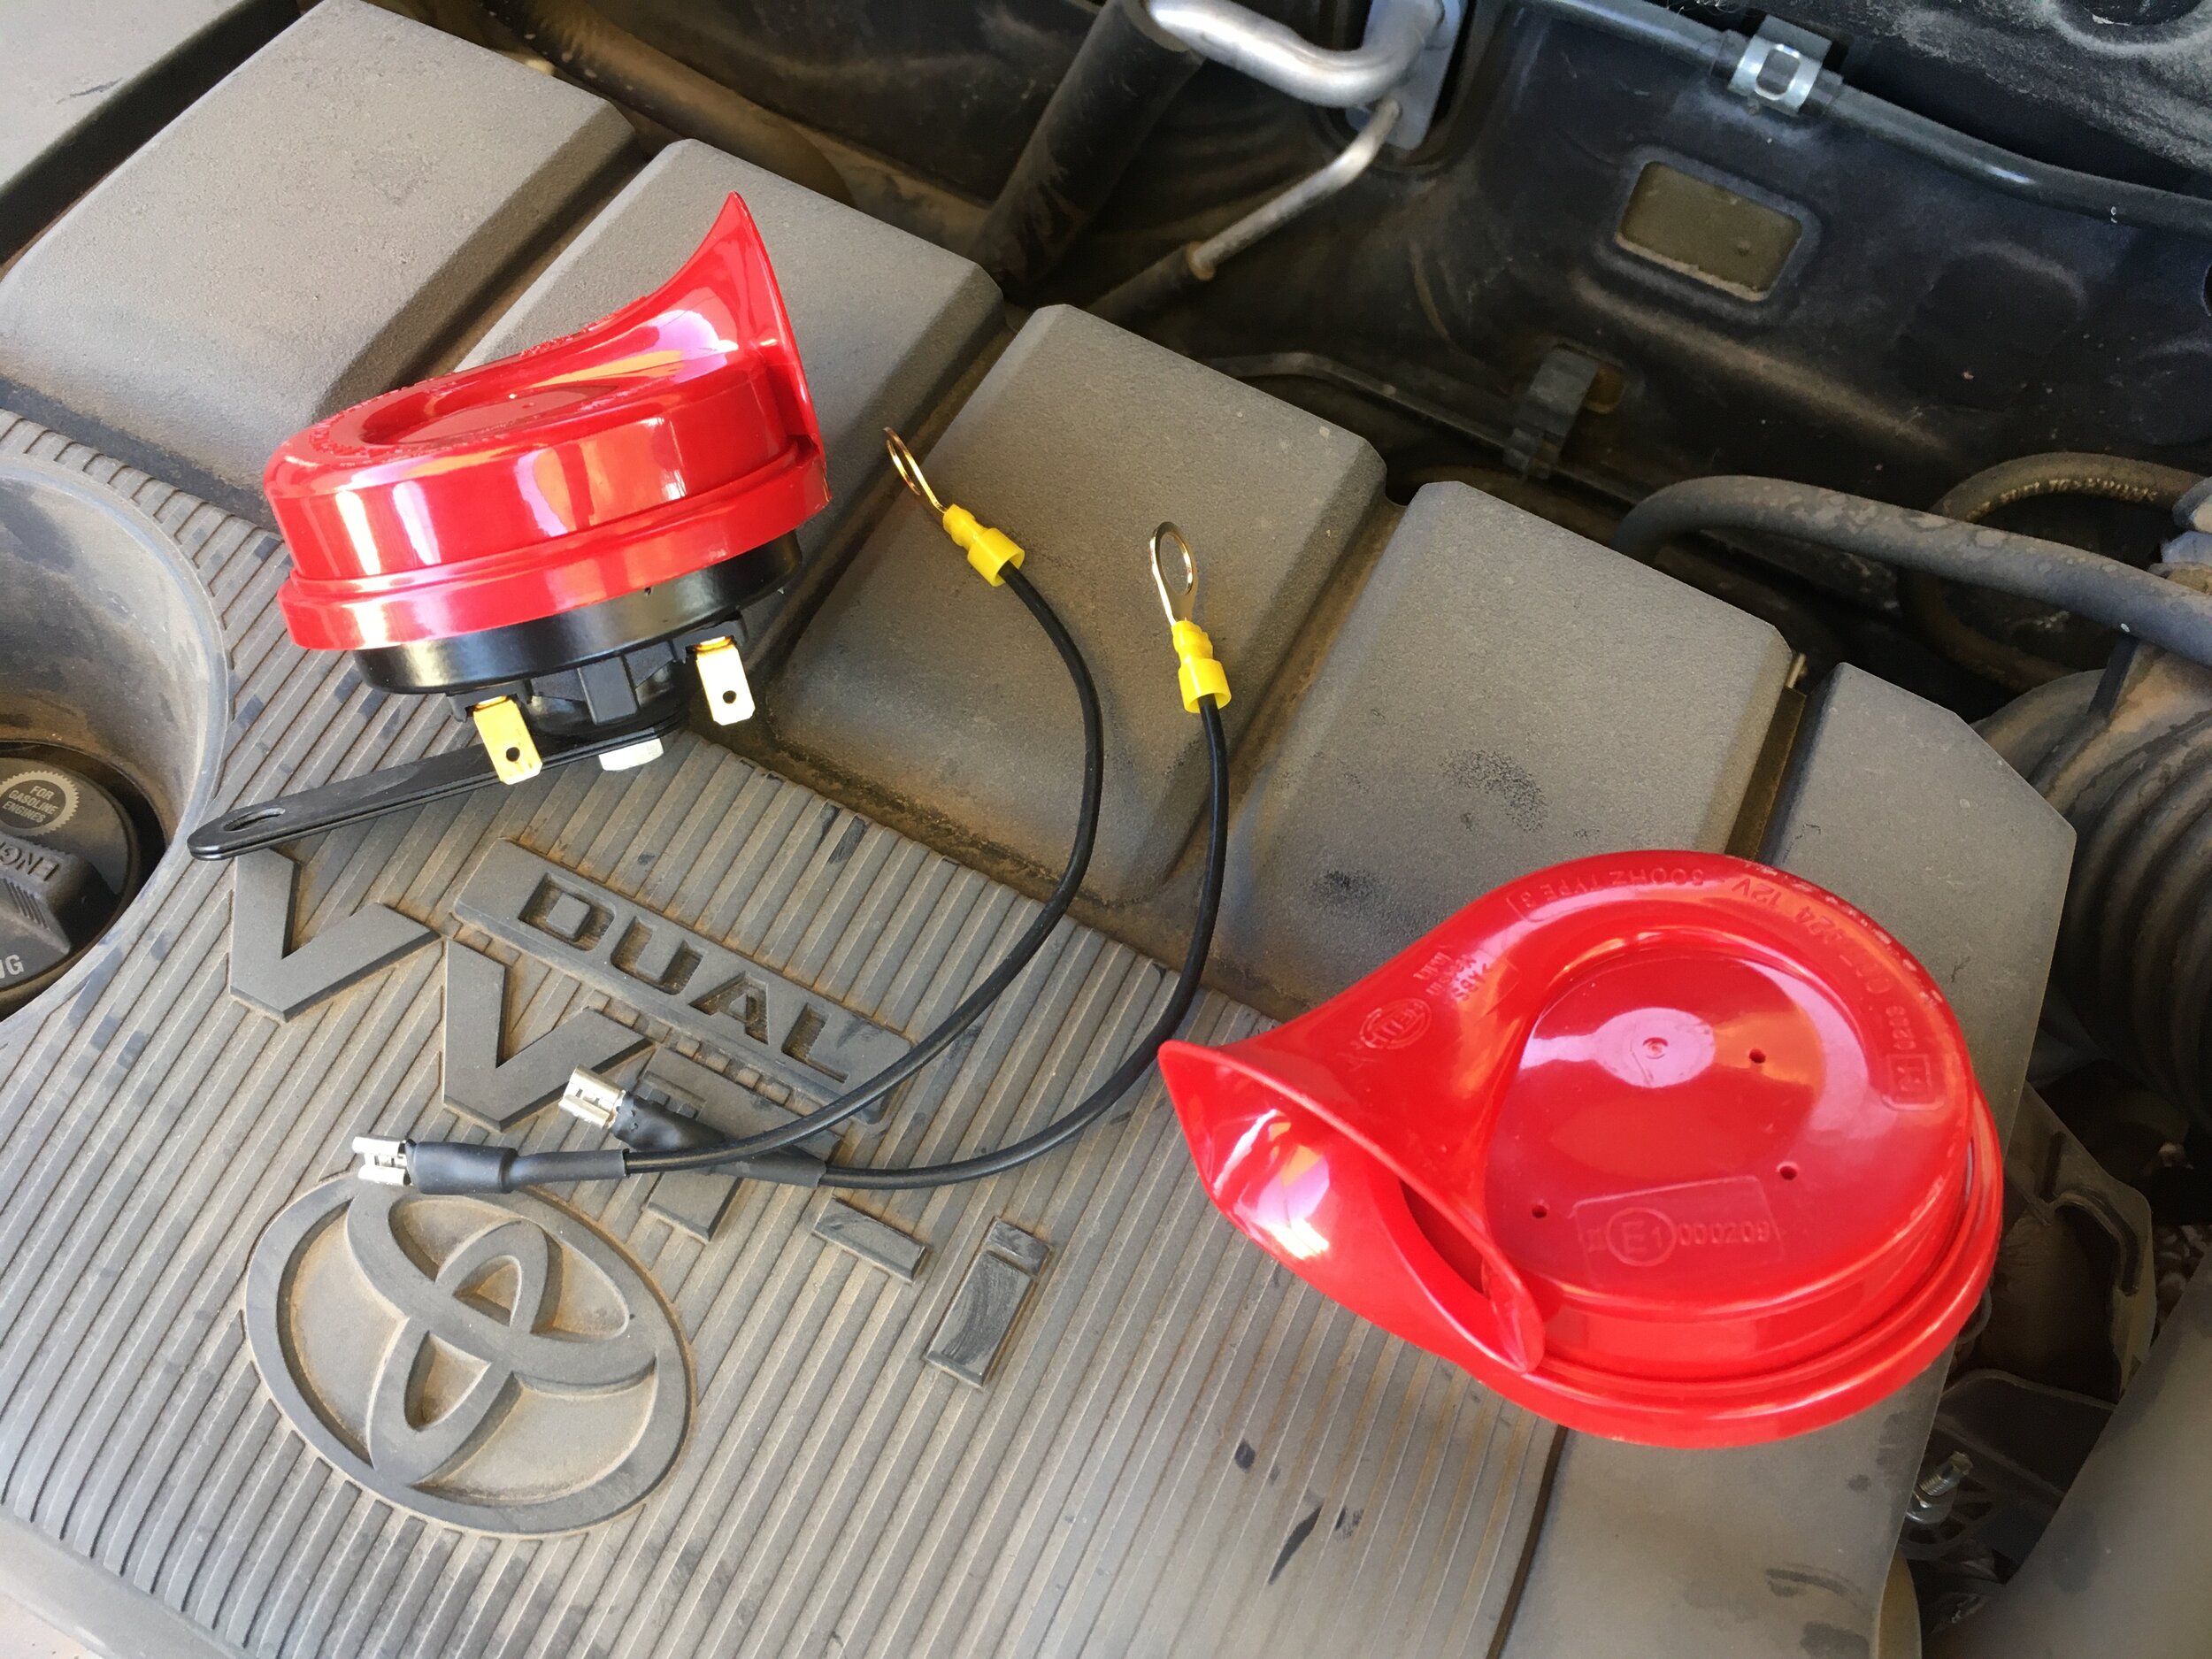
Thus all of our vehicles carry Hella horns of one model or another. They’re affordable, starting around $20 or so, and all have an authoritarian tone. My favorites are the twin or triple-trumpet air-powered models, which have a lovely teeth-on-edge screech, but the lesser models such as the ones here are still excellent.

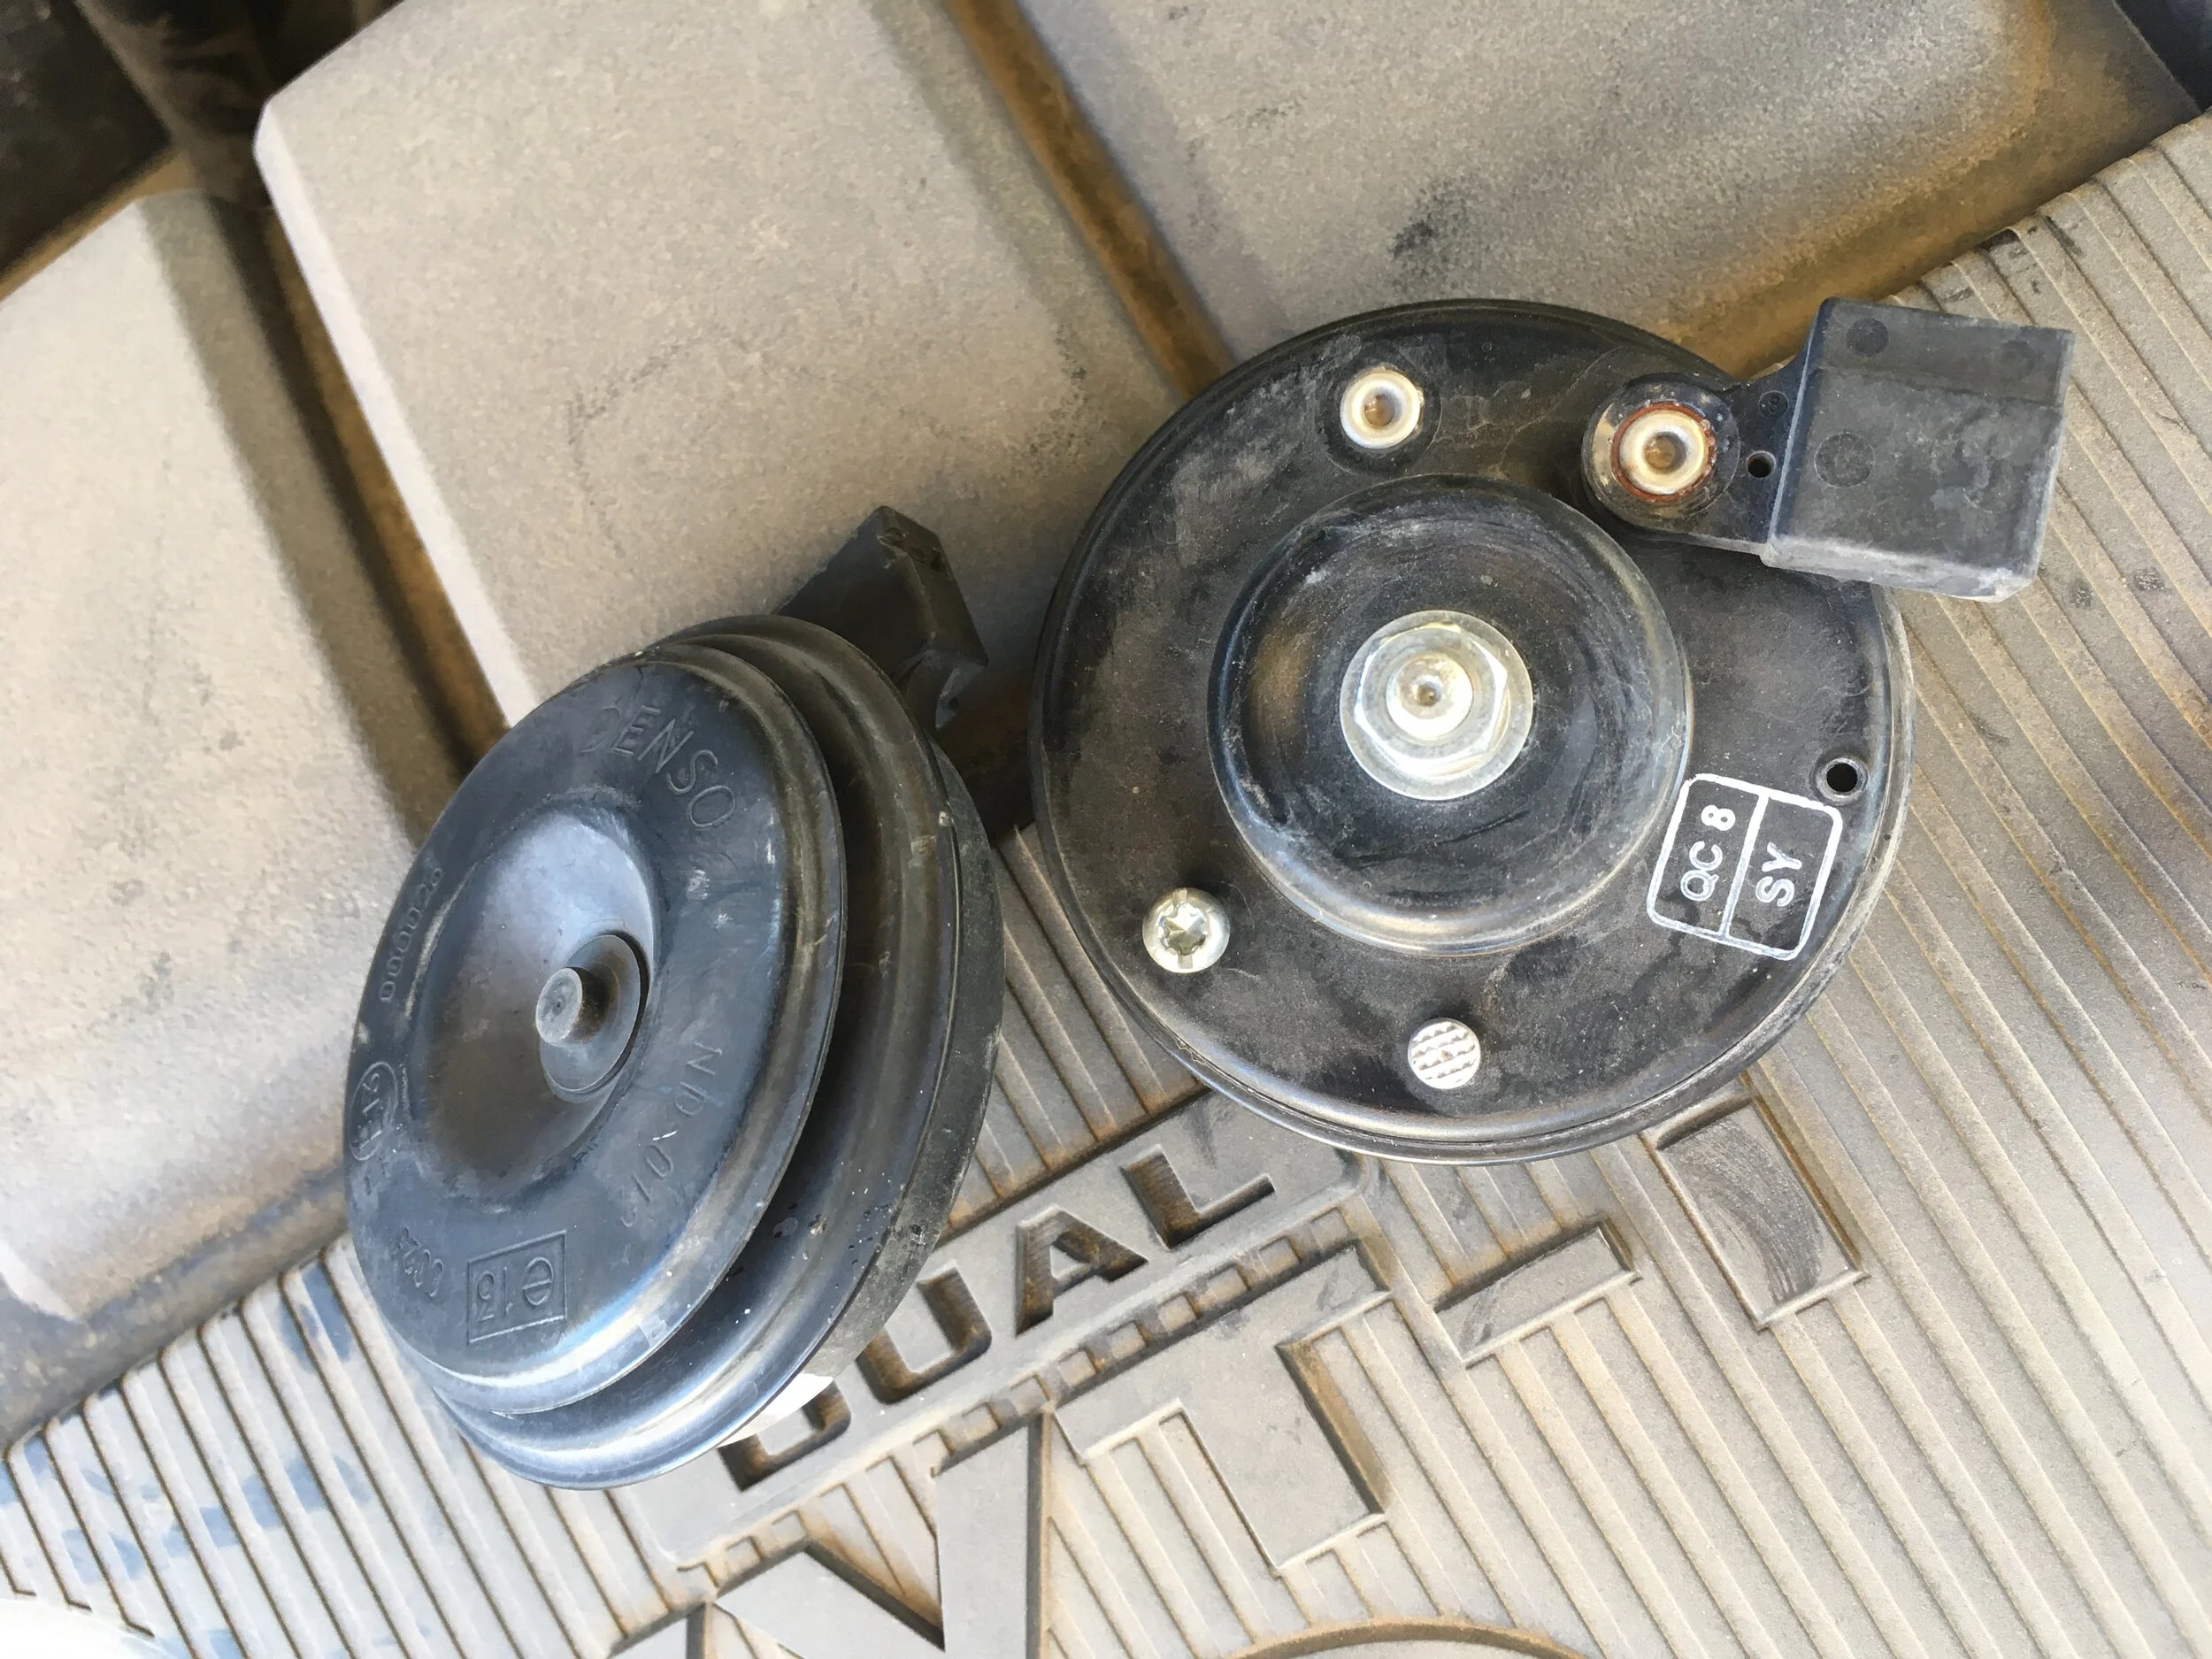
These went on Roseann’s mother’s RAV4, which we have taken over since she gave up driving at 90 and is now allowing us to chauffeur her around town. The stock horn on this vehicle was even worse than most Japanese horns, which tend to sound like sheep bleating. This one sounded like an asthmatic sheep bleating.

IMG_6736.JPG

Of course, being a modern vehicle, removing the “grille” on the RAV to access the horns actually involved peeling off the entire plastic front end of the thing . . .

IMG_6737.JPG

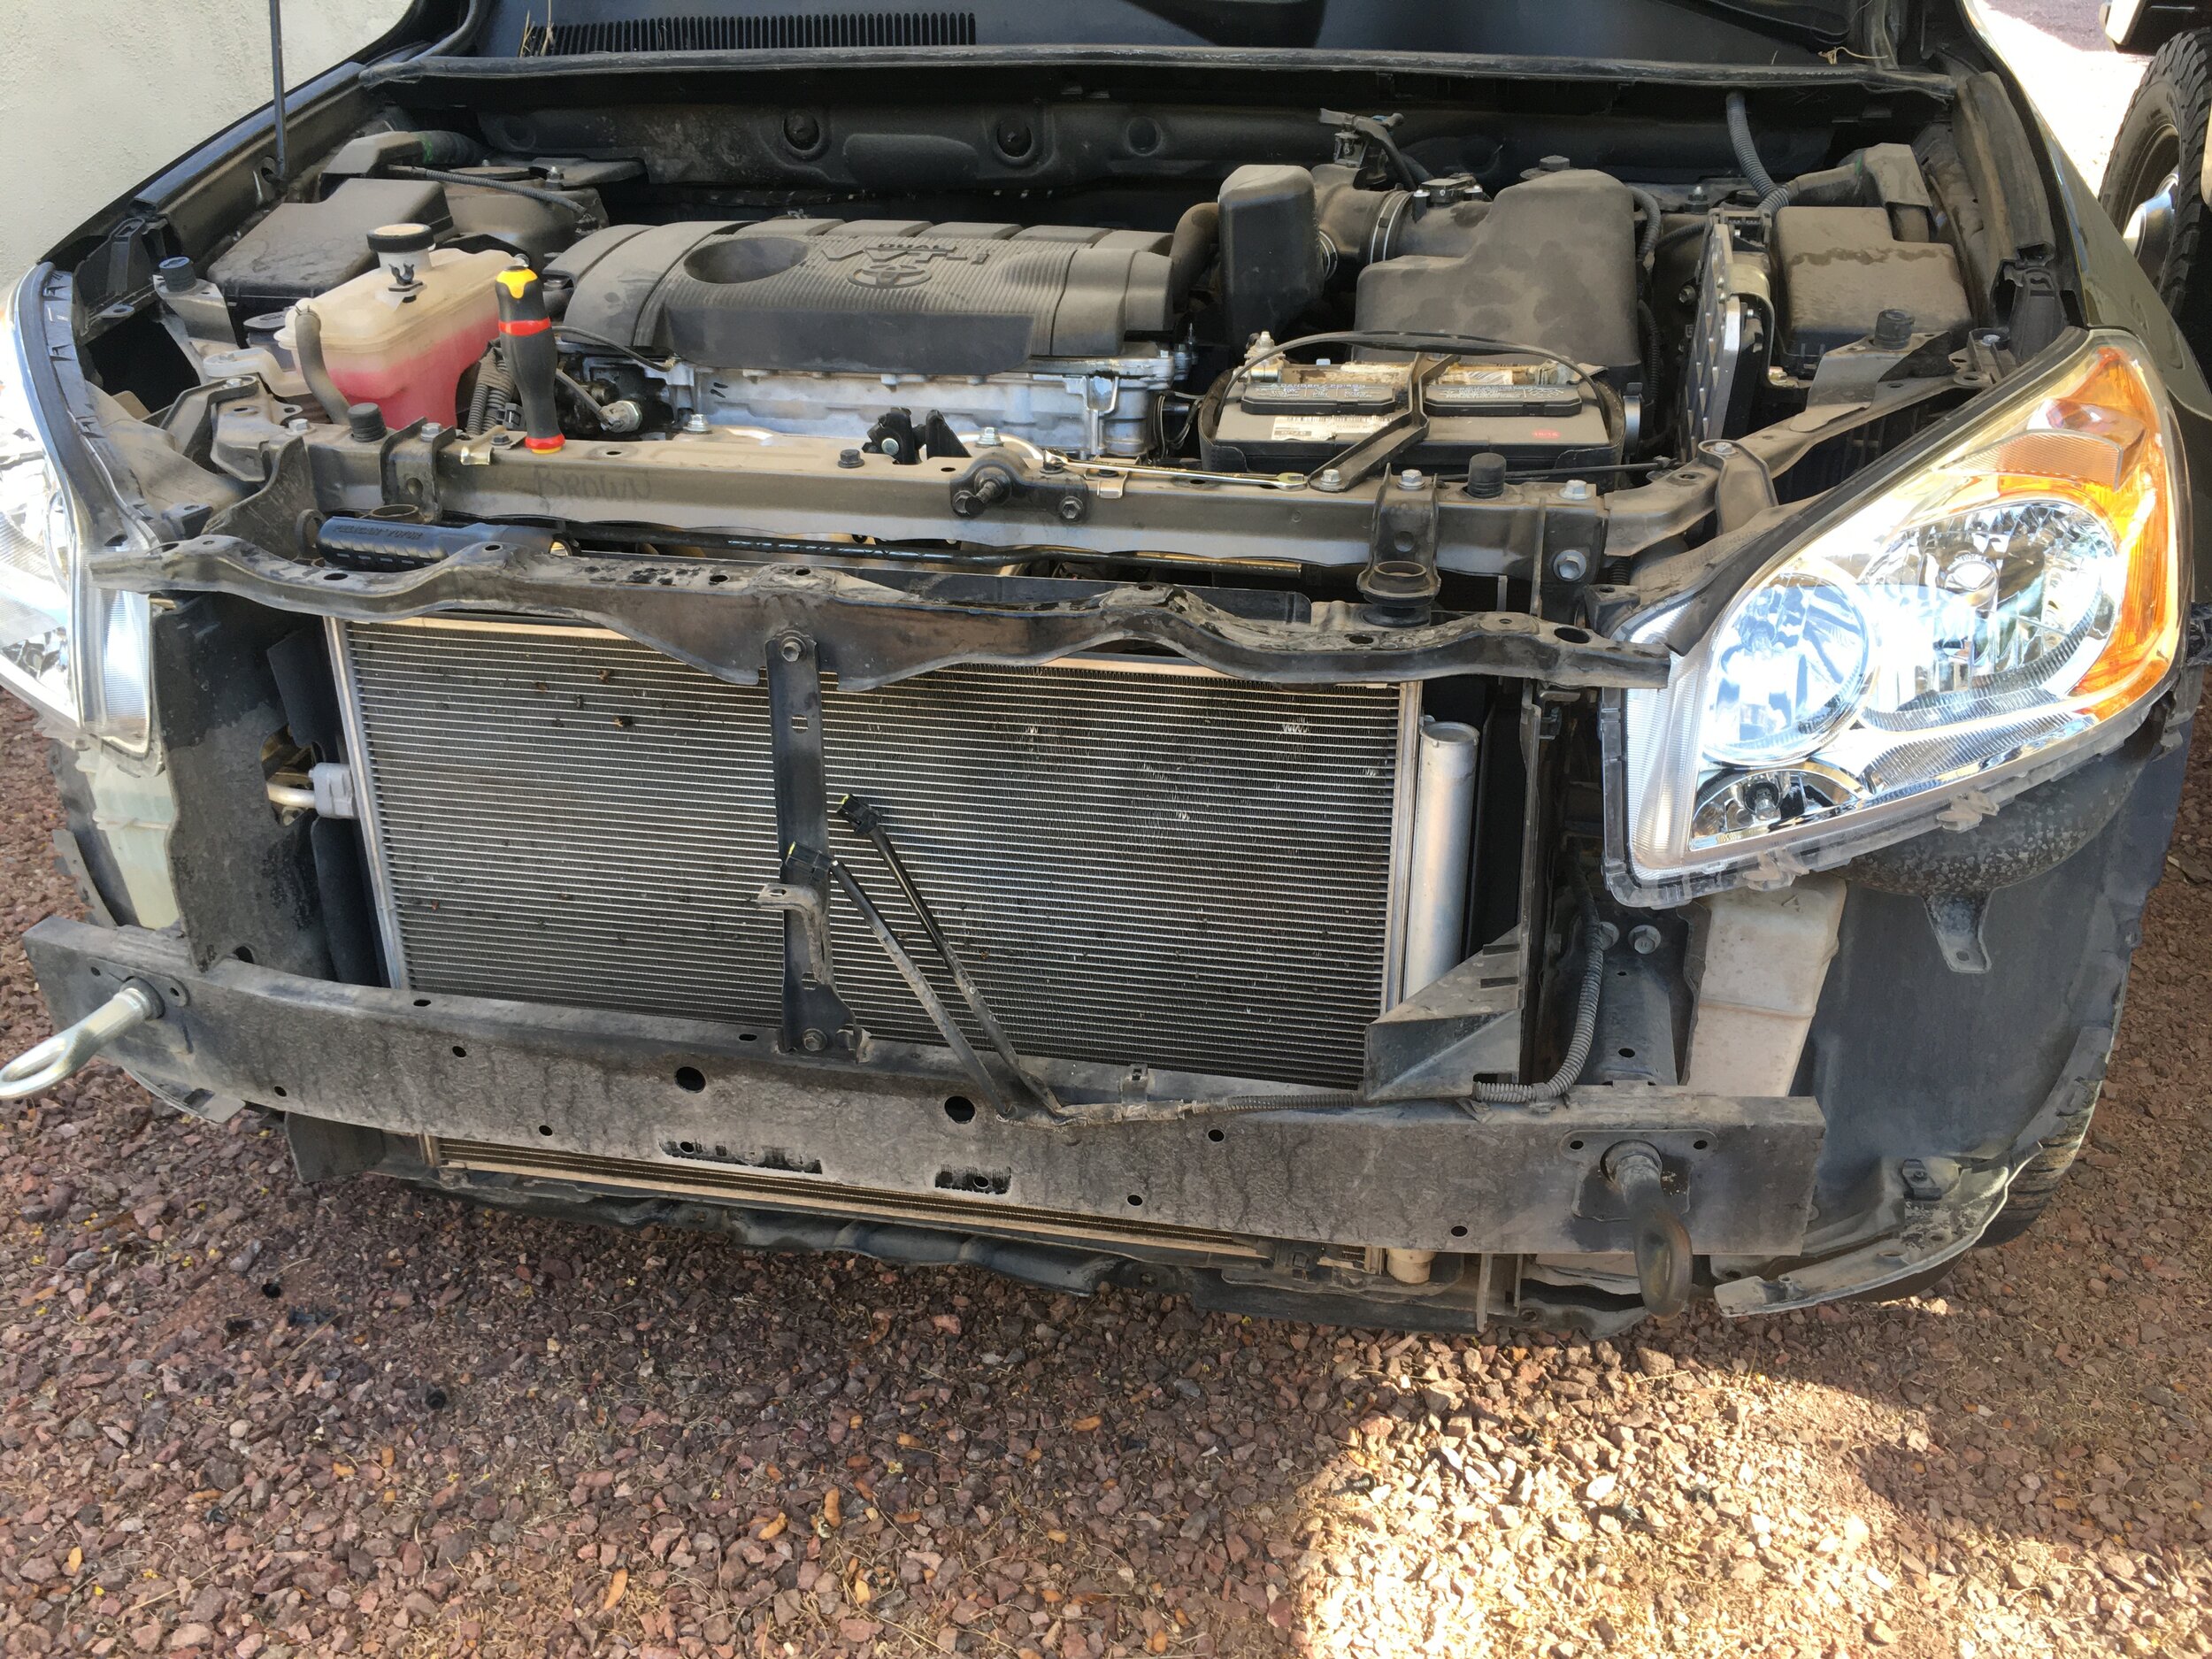
. . . which, thanks to a helpful YouTube video describing the location of the hidden fasteners, only took about ten minutes.

After that it was easy. The Hellas require a separate ground wire, which I simply connected to each horn’s mounting bolt. The result is a huge improvement. I’m going to go hunt for texters.

IMG_6738.JPG

Hacking the Front Runner drop-down table

Screen Shot 2020-09-10 at 12.55.21 PM.png

One of the most useful accessories we added to our Troop Carrier was a Front Runner drop-down tailgate table. It’s perfect for making trailside lunches, as a work place for repairs on small parts, or just a spot to hold small items while loading or unloading. It’s quite strong, and with the plywood extension pulled out there’s a surprising amount of surface area.

However, it has one annoying flaw (at least ours, on our vehicle, does): The table is held closed by two curved extensions of the top frame that snap over the edge of the work surface when you raise it. And when the tension of the clips is adjusted so the table is relatively easy to open, it falls open by itself on bumpy roads or when slamming the door. If ours falls open on the road it rides against the side of the National Luna fridge, and if we don’t notice it has fallen, when we open the door the table rides down the side of the fridge, a corner scoring a nice arc in the cabinet.

IMG_5947.JPG

I found the solution at a hardware store: a simple sliding-glass-door security pin. I fabricated a mounting plate from a piece of aluminum, drilled and secured it to the edge of the frame, then drilled for the pin, and voilá—an easy-to-deploy table that won’t rattle open on its own.

IMG_5946.JPG

Front Runner is here.

IMG_5945.JPG

Knipex: The right tool for the job

Knipex retaining ring tool.JPG

If you’ve ever needed to disassemble a Land Cruiser hub (or quite a few others), you’ve run into the retaining ring that secures the end of the stub axle. It’s not a circlip with holes that accept a standard snap-ring plier; the free ends come to bevelled points that are expletive-inducing to remove with any makeshift tool. Graham Jackson and I got them off our Troopy in the middle of the Australian bush by filing flat shoulders in the tips of a pair of his needle-nosed pliers. But it was still a dicey job to avoid having the things sproing off 20 feet into the dirt.

Rather unbelievably, I’d been through this same procedure at least a dozen times on our other Land Cruisers, from my 40 to our FJ55 to our FJ60. Every expletive-filled time I thought, I need a proper tool for this (expletive) job!

Finally I got one, and oh brother what a difference. It’s from the German tool maker Knipex, and it turns the task of removing and replacing this ring into an effortless and expletive-less five-second procedure.

IMG_5816.JPG

If you drive a Land Cruiser and carry a tool kit for field repairs, get one, part # 4510170.

You’ll thank me some day.

IMG_5817.JPG

A better Hi-Lift handle keeper?

IMG_5604.JPG

If you own a Hi-Lift jack, you’ve probably dealt or struggled with the issue of how to lock the handle firmly in place during transport.

The spring clip that comes on the jack is worthless (and not designed) for that purpose. The polyurethane collars that slip over the handle and shaft are okay, but in my experience they stick when new, and eventually wear and slip down on the jack if it’s stored upright, or vibrate right off the end if it’s stored horizontally. For a time I just used a piece of One-wrap (hook-and-loop tape), but I’m not a big Velcro fan, and it quickly clogs with dirt when used in such an application.

A few years ago I set out to make something better. With an old sheet of half-inch-thick HDPE plastic—I don’t even remember what from, perhaps a cutting board?—I started playing around with ideas, and eventually came up with what you see here.

IMG_5605.JPG

It slips easily over the shaft and handle of a Hi-Lift, and you can lock it anywhere you like with the two through-pieces and then the spring clip. It can’t slip. The only disadvantages I’ve found are that it won’t slide over the removable clamping foot if you keep one attached (although you could modify the opening so it could), and it has multiple pieces that might be prone to loss. However, I think it would be easy to modify it with a safety wire that would keep all three plastic bits together. 

Always remember to store your Hi-Lift with the operating lever in the “lift” position. 

P.S. If you don’t want to make your own, Step22 Gear has a promising alternative, here. I just got one and will be reviewing it soon.

Part Souq, an international resource for parts

Old floor mat.JPG

Whenever possible I try to buy parts for our vehicles locally. For the newer ones this is generally no problem, but automobile dealers seem to be increasingly reluctant to stock parts for any model more than a few years old. And when you begin your conversation with the counter person with, “I have a 1973 . . .” he looks at you like you just stepped out of a time machine. (It would be fun to run with this some time, and as he’s looking futilely at his screen for spark plugs to fit a 46-year-old FJ40, say something like, “So, do you think Nixon will resign?”)

If parts for the 40 flummox the dealer, imagine the situation with a 1993 HZJ75 Troopy that was never even officially imported into the U.S. I don’t even try.

Fortunately there are several specialty Land Cruiser shops around the country that carry at least the commonly needed items for 70-Series Land Cruisers, and a few have surprisingly extensive inventories. In part this is due to the happy fact of a model that has changed very little over its 35-year history. Cruiser Outfitters and cruiserparts.net are good sources.

However, even these enthusiast outlets can’t carry everything. And supposing you’re looking for something really arcane—like say, a Toyota factory floor mat in “sable,” the brown that is our interior color?

Some time ago I was introduced to an online parts source called PartSouq.com—“souq” being the Arab term for a market. (Amazon, I understand, recently bought the English/Arabic-language E-commerce site souq.com; I have no idea if the two are related.) I called up the site, clicked on the Toyota section (the site lists 20 brands and claims 17 million parts in its database). A prompt asked me for the VIN of the Troopy, so I retrieved that, typed it in, hit enter—and was rewarded with a complete catalog of parts for a 1993 Toyota Land Cruiser HZJ75. Engine, transmission, chassis, electrical, body—it was all there, with diagrams. I went to the interior section, hovered over the floor mat part number, 58510B (when you do this, the list on the side scrolls automatically to the correct placement), and clicked on that. It showed four factory floor mats available, three in gray, one in sable. The sable mat was located in  . . . Oman? Yep. “Ships in one day,” it said.

Factory floor mat.jpg

Needless to say, clicking “Buy now” on a $310 item located halfway around the world took a leap of faith. Only the rave reviews I’d read of the site gave me the courage to do so. Shipping was nearly a hundred dollars—hardly unexpected.

What was unexpected was finding the large box containing our new Toyota factory HZJ75 floor mat, in sable, at our commercial mail service four days later. The mat was perfect, and a welcome replacement for the sadly (and hazardously) chewed-up original. 

So if you can buy your parts locally, please do so to support your nearby economy. But if you can’t find it close, and the factory made it, there’s a really good chance it will show up on a PartSouq.com search.

New floor mat.jpg

Curiously useful: the offset box wrench

L1000557.JPG

I never owned a set of offset box wrenches until last year. The configuration always seemed like something that could be duplicated by other tools—a standard combination wrench, even a ratchet and socket. It seemed like a solution to a problem that didn’t exist—even though I had noticed them in the tool chests of several professional mechanic friends.

But then I chanced across a beautiful German-made set from Stahlwille (say “stallvilla”) on sale online—and few things can make me reconsider the need for a tool faster than a discount price on German-made version of that tool. Since I had some birthday funds available from my wife, I ordered the set, which comprised eight tools that covered the broad and useful span of 7 to 22 mm. They were as beautiful in person as in the photos. I set them up on a wrench rack in my rolling chest and more or less forgot about them.

L1000555.JPG

But over the past few months, a funny thing has happened. I’ve found more and more situations for which an offset box wrench was the perfect tool, indeed just a bit more convenient or secure than whatever I would have used before. Sometimes it was just nice to have the extra knuckle clearance provided by the offset design.

And twice already I’ve used one in circumstances where no other tool I owned would fit. The latest involved snugging the nylock nuts on the rear engine mounts on the FJ40, which had loosened a bit as the new motor mounts installed when the engine was rebuilt have compressed a tiny bit. The driver’s side bolt head is easily accessed on top of the mount, but the bottom 19mm nut is inside the boxed chassis rail, accessible only through an opening about three inches in diameter. That by itself might not have been a problem, but I have a header on my engine, and the exhaust runs very close to that hole.

I tried a socket and ratchet. No go. Short extension on it? Nope. Just a breaker bar on the socket? Close, but not quite. Standard combination wrench? Uh uh. 

Hmm . . .  I grabbed the 17/19mm offset box wrench, angled it into the hole above the exhaust, and bink. It snapped right on. 

Motor mount nut 2.jpg
Motor mount nut.jpg

So my who-needs-them? offset box wrenches have become some of my favorite tools. Of course you really don’t need the über German versions—unless you’ve got some birthday cash on hand.

L1000556.JPG

Just in case, Stahlwille is available here.

It's 10:00 AM, and I could use a drink

IMG_5301 copy.jpg

I’m a big proponent of effective mirrors, and of developing the ability—and trust—to use them. I learned this decades ago while delivering furniture and major appliances for J.C. Penney, driving a 24-foot box truck and, occasionally, a 40-foot semi. You either learned to use and trust your mirrors on those trucks or you wouldn’t make it far without damaging either the truck or something the truck impacted. But I learned that mirrors don’t lie. If a mirror tells you the back bumper of the truck is two inches away from a wall on the passenger side, you can be absolutely sure it’s two inches away. This made maneuvering and backing much easier than it seemed at times to onlookers such as homeowners, whom I could (also) see in my mirrors gesticulating wildly or actually screaming as I backed up near their houses. But I never so much as scratched one (house or owner).

Needless to say, learning to use mirrors effectively is just as useful when piloting a four-wheel-drive vehicle in difficult terrain. If your mirror tells you you’re still two inches away from that tree trunk you need to back around, you can be absolutely sure you’re still two inches away.

However, effective use of mirrors depends on having effective mirrors.

The stock mirrors on my FJ40 were high-quality steel-framed units, but the round configuration was just too small. I dealt with them for years before deciding to try a different approach. My first trial was a set designed to bolt to the windshield hinges—no drilling required. They were very nice mirrors with decent area, but as it turned out the vertical tube of my front roll cage badly obscured the passenger-side mirror. Attempts to swing the arm backward just ran it into the windshield frame. Fail.

The next experiment was a set designed to bolt to the door hinge—again, no drilling required. That solved the roll-cage issue; however, I found the rectangular shape of the new mirror to be barely better than the original round mirror. They were tall enough but not wide enough. Another fail.

Tall enough but not wide enough

Tall enough but not wide enough

The solution had been there all along, and I knew it, but I’d been hoping to avoid that route. Later FJ40s came with generously sized square mirrors, but they employed a different mounting system that involved three holes drilled in the door just behind the top hinge.

Finally I ordered a set of the newer mirrors, along with a retrofit kit, from Cool Cruisers in Texas (noting on my order that no thanks, I did not want a free poster of a scantily-clad chick holding an AK47 posed in front of a Land Cruiser). The kit sat in my garage for a month while I procrastinated and found other tasks to do, like emptying out the junk in the center console, and, oh, wow, the windows really need a good cleaning.

Finally I gritted my teeth and deployed the 7/16ths drill bit called for. I was leery of the plastic compression inserts designed to hold the bolts for the new-style mirrors, but actually they snugged up reassuringly.

IMG_5302.jpg

The new mirrors are a huge improvement, and worth the angst of applying a drill to my beautiful doors.

IMG_5303.jpg

My only remaining regret is the slightly—no, decidedly—cheesy appearance of the plastic backing on each mirror. I know exactly how to fix that: All I need are the custom mirrors offered by the FJ Company; the models they install on their $200,000 restorations. They’ll let plebes like me order just the mirrors—for $1,200 per pair.

Screen Shot 2020-02-09 at 2.42.02 PM.png

Driving with elephants: Botswana, anyone?

L1050766.JPG

Last year we spent three weeks+ in Southern Africa and fell in love—Botswana in particular is now our hands-down favorite place on the continent to explore (and we’ve spent considerable time in Tanzania and Kenya). Easy to get to via Durban (direct flights now from many cities) or Johannesburg, it’s accessible, friendly, laid-back, and blessed with abundant wildlife.

And now is the time to go—as we said in this fall 2019 article in the Overland Sourcebook. If you just don’t have the time to plan your own trip (which can take considerable effort, especially if you haven’t ventured into Africa yet), we can highly recommend a September 2020 Botswana safari with Graham Jackson (Overland Expo training team director) and 7P Overland.

L1050822.jpeg
Up close and personal at Elephant Sands Camp, northern Botswana

Up close and personal at Elephant Sands Camp, northern Botswana

Beginning August 31 at Santa Safari Camp near Victoria Falls, the trip will wend its way through the famous Makgadikgadi Pan, through the Central Kalahari Game Reserve, resupply at Maun (like Moab only with elephants), then explore Moremi Game Reserve and the legendary Okavango Delta. It just doesn’t get any better—especially with a small group (no more than 9)—for 16 days of classic Africa. ($14,500 all-inclusive once you arrive to Botswana; a bargain, in our opinion.)

More information at 7p.io/destinations/botswana/